Mixed Media with Melize van der Walt
You will need:
- 1 +- 30cm Zip tie
- 1 black ball point pen
- 1 sheet decorative / scrap book paper of your choice
- Scissors
- 1 small artist brush
- 1 larger artist brush
- 1 till slip paper roll
- Fast drying glue (super / bostik clear/)
- Paint – red, light blue and grey
- Modge podge
- 1 Stencil of your choice
- Black stamp ink
- Word stamp of your choice
- Pattern sponge roller
- Kitchen sponge
- Piece of sand paper or nail file
- 1 x Laser cut MDF 3mm tag 300 x 200mm
- 1 x Laser cut MDF 3mm heart 45mm
- 3 x Laser cut MDF 3mm heart 10mm
- 1 x Laser cut MDF 3mm strip 100 x 15mm
- 2 x Laser cut MDF 6mm circles 10mm
Lets do this
- Paint the tag grey until covered (two coats should do) set aside until dry.
- Paint the 3 small hearts red until covered (two coats should do) set aside until dry.
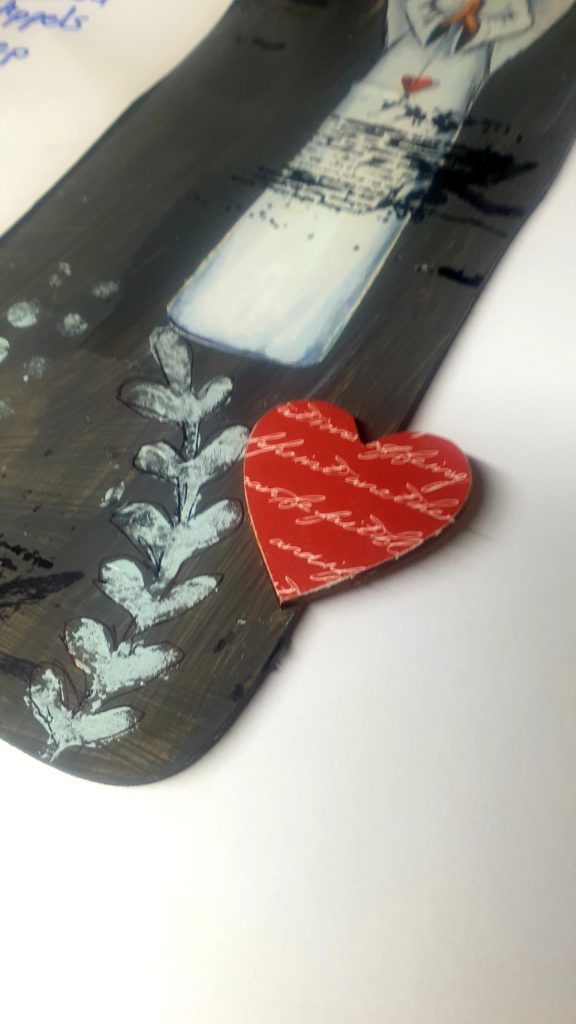
- Apply modge podge to one side of the big heart. Press to a piece of scrapbook paper and cut off the excess paper. Apply another coat of modge podge over the scrapbook paper. Set aside until dry.
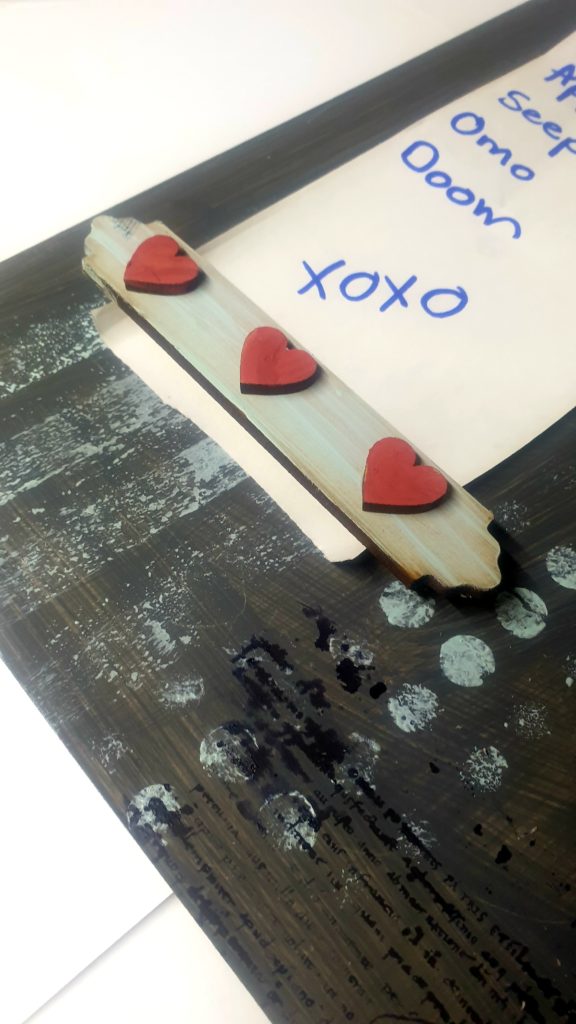
- Paint the strip light blue (two coats should do) set aside until dry.
- Use sandpaper or nail file to remove excess paper from big heart, sand until smooth.
- Glue the 3 small painted hearts on the painted side of the strip, let dry.
- On the other side (not paint) glue the 2 circles to the ends of the strip, let dry.
- Mix a bit of the light blue and grey paint to create a lighter blue/grey colour.
- Using the decorative roller and lighter/blue grey paint and make a pattern on the left-hand side of your tag, allow to dry.
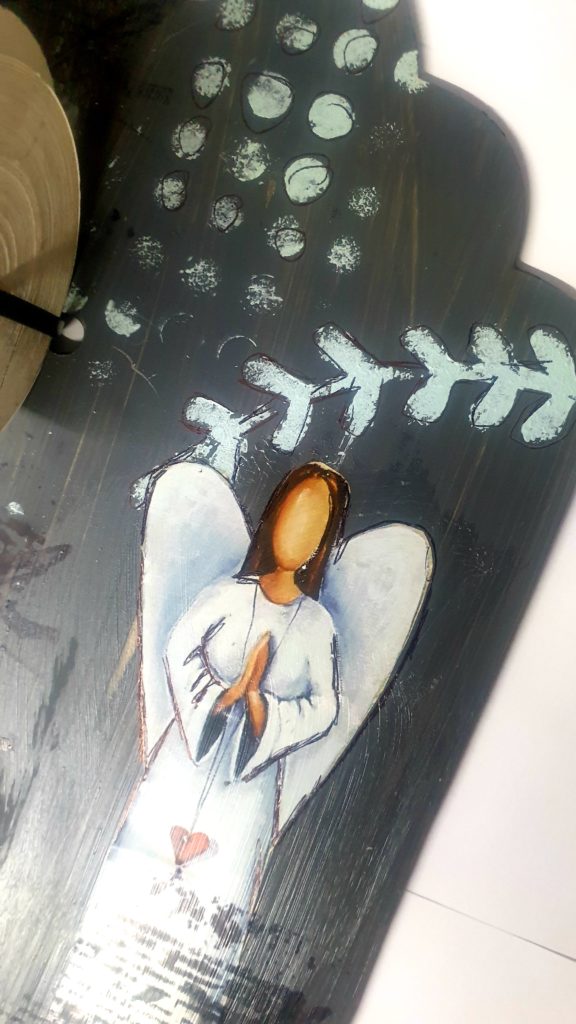
- Using your stencil, light blue paint and kitchen sponge, stencil a pattern on the right-hand side of the tag and allow it to dry.
- Cut an image from your decorative / scrapbook paper. Apply modge podge to the right-hand side of the tag where the image should go. Apply another coat of modge podge over the image and allow it to dry.
- Glue the strip (circle side) to the bottom left-hand side (approximately 5 cm from the bottom) of the tag.
- Glue the large heart on the right-hand side (half on half off) on the tag.
- Ink your stamp. Stamp your tag randomly. Set aside to dry.
- Using the ballpoint pen, trace the outline of the image and stencil images.
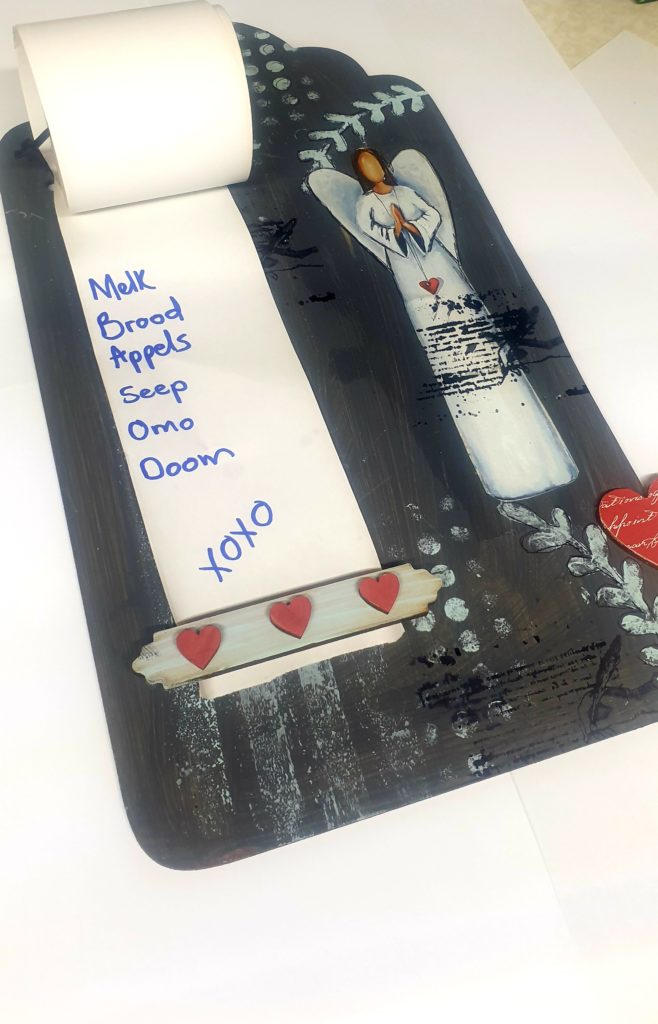
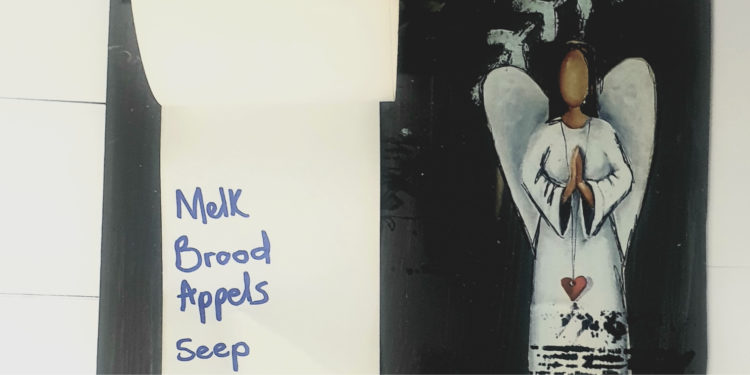
- Using the zip tie, fasten the till slip roll to the top left-hand side of the tag and feed paper through the strip.
- Enjoy your shopping list.