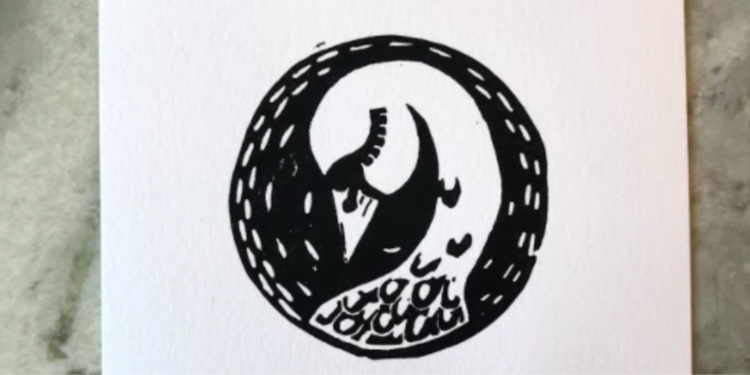
Swan Lino Cut with Nina Steyn
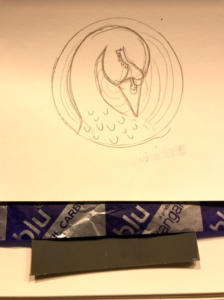
- Cut your linoleum sheet to the desired size. I always use a smaller size than my paper size. E.g., here I am using an A5 size linoleum sheet and will be printing on A4 sized paper.
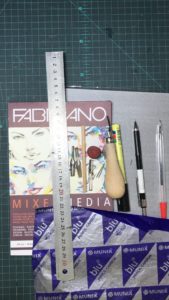
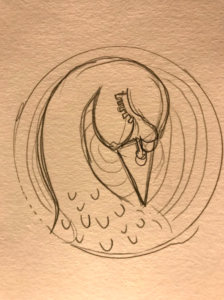
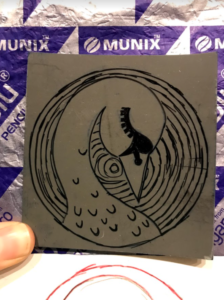
- Do your drawing or design that you want to carve. Start by making sure the size of the lino corresponds to the size of your paper. (Try to work from real objects, your own photographs or sketches) – to keep it as original as possible.

- Transfer your design by using carbon paper in between your illustration and the linoleum sheet.
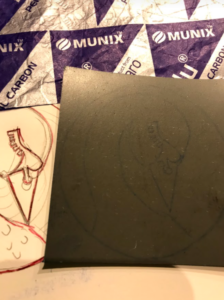
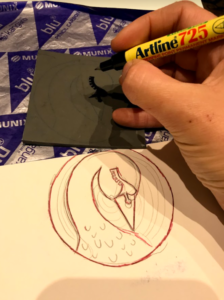
- Enhance the faintly visible carbon paper lines on the linoleum sheet with a permanent marker. Here you can also use the black markings to mark the areas you want to keep black (these will be the areas that you will leave and not carve away).
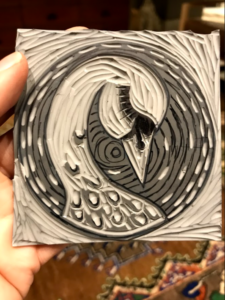
- It takes some mind-boggling, but you will be carving away what you don’t want to print (so that which is left behind is what will create the image).
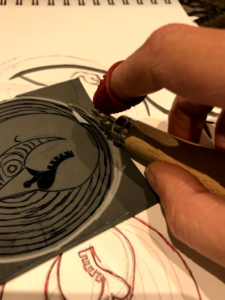
Carve carve carve (I have learned to use a rubber finger hat). Play with different size carving tips.
- Use a smooth finish surface (I used the back of a piece of a mirror). Squirt some paint and roll it out, you have to roll it quite a bit in all directions until it becomes “sticky” and makes a “sticky” noise.
- Roll your ink onto the carved linoleum sheet – roll it in all directions to ensure an even layer throughout.

There are two types of printing by hand – wet and dry/submersed printing. I use the dry technique. When using a more standard paper (that comes in a paper pad), this is the preferred method. I love using a very smooth paper finish, but some enjoy a textured paper more – it all comes down to personal preference.
With wetting the paper, you have to use a specific paper with a high cotton content. There are two ways of printing: The one is top-down (so you turn your inked lino sheet around and place it ink downward on the paper) – I used the top-down for most smaller dry printing. The other technique is the lino sheet at the bottom and paper at the top (this technique works well if you place another hard cardboard before you roll it, also preferred in the wet technique or large pieces).
- Roll with either a roller or any smooth bottomed object over your entire paper and print, ensuring to cover all the areas in multiple directions.
- First peal: unveiling your artwork!
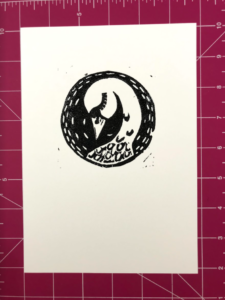
- Let it dry thoroughly. Sign and date! (If printing more than one – this is where you mark your edition – so if you are printing 5, then you mark it 1/5; 2/5 etc., and then there’s no printing that carving again! Except if you are using your carving as a stamp and not signing it as an edition…
Now you can get started on so many more exciting things. There are colours that you can incorporate reduction prints to be done, mixed media. The joys are endless.
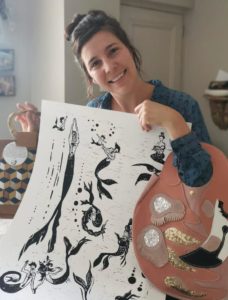
My name is Nina Steyn (@ninaskep), and I am a lover of creating new things and acquiring new skills. Linocutting as an art form is one of the most wonderful mediums I have come across, particularly because of the play with form, stripes and dots. And the reveal with that first peal – so rewarding! I love the black and white colour palette that suits almost any home and style. I also love the fact that it is a “giving” artform. Now you can print a few, and many can share in the joy of the creation.
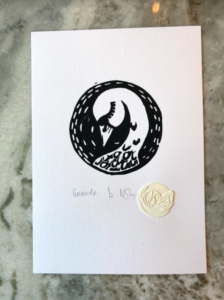
The swan illustration I have done in this carving is very close to my heart. It was inspired by my range of functional leather artworks – the swan bag.