Suzanne Blignaut: Handmade Polymer Clay Earrings
I’m sure you have seen polymer clay earrings pop up all over your Pinterest and Instagram feed lately, and luckily, these statement earrings are surprisingly easy to make! Whether you want to start a small business and looking for something to sell, or just looking to make earrings to wear yourself, polymer clay is an amazing medium and has endless possibilities.
One of the best ways to make polymer clay earrings is to use a flat slab of clay as your canvas and adding small pieces of colourful clay to form a beautiful design. You can create flowers, fruit or simply abstract patterns. You will be surprised how easy it is and how many pairs of earrings you can create from a single slab.
Below is an easy step-by-step guide to creating your very own polymer clay earrings!
Workspace:
Select a proper workspace that is well-lit, and free from dust, hair or lint. Ideally, you want to work on a smooth surface like a tile, glass or a Perspex sheet. Polymer clay acts as a magnet for any dirt particles, so make sure your hands are clean.
Supplies & Equipment:
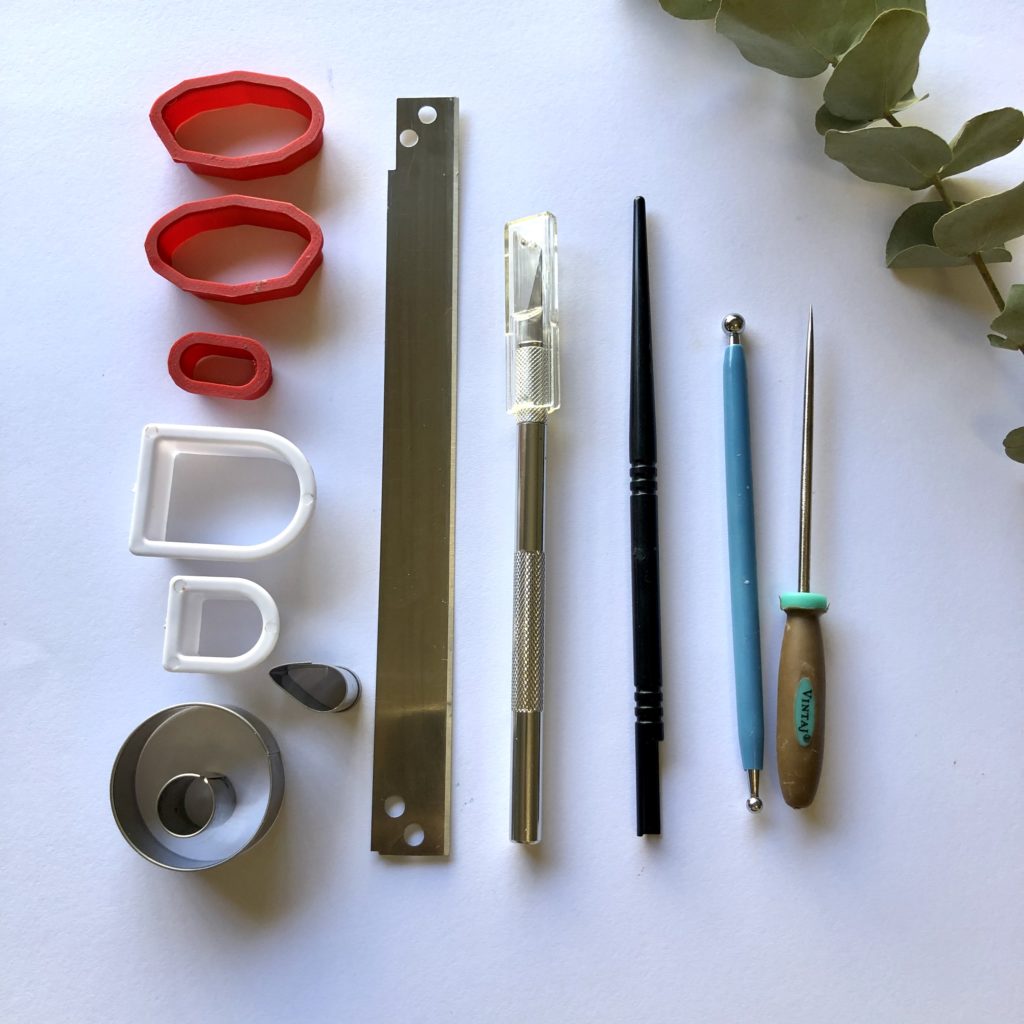
You will be surprised to find a lot of the materials you need already in your toolbox, kitchen cupboard or stationery drawer and best of all, polymer clay bakes in a regular oven.
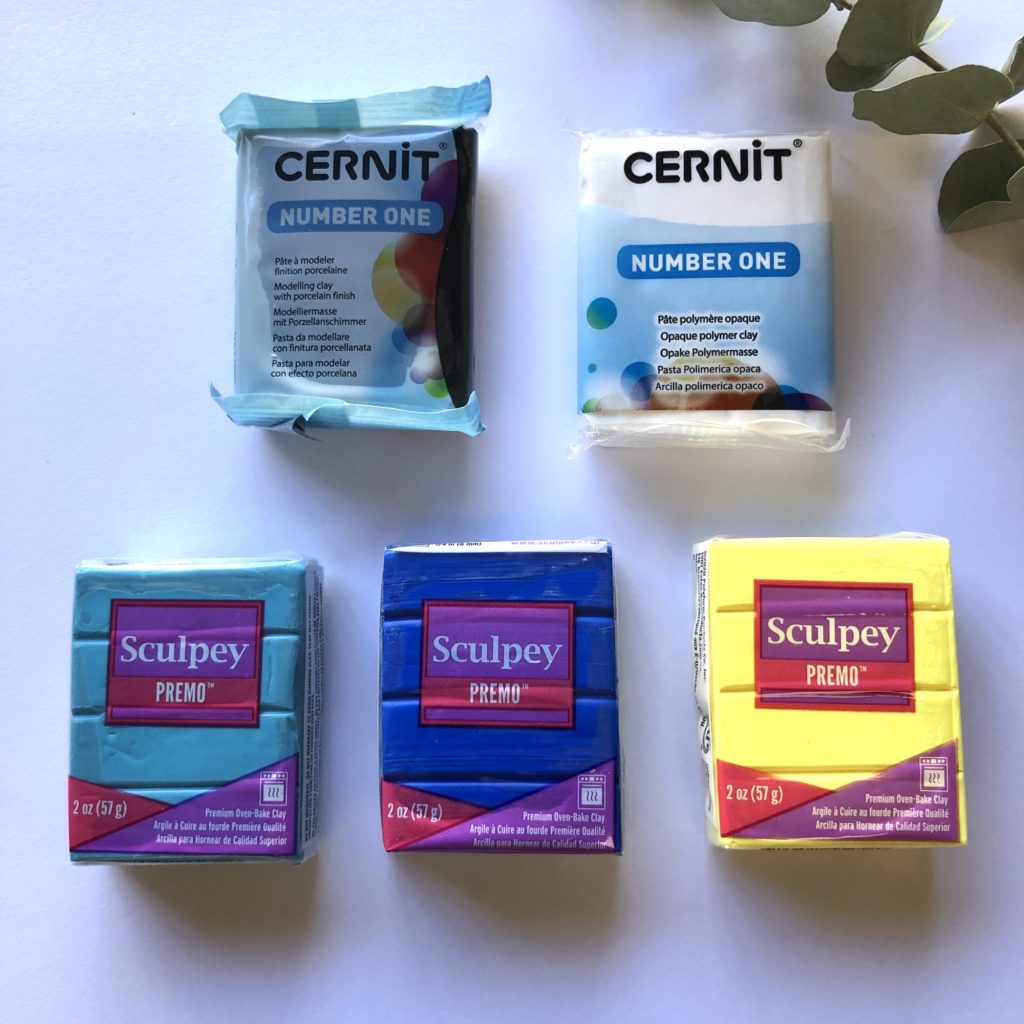
- Polymer clay (there are variously available, but I prefer Premo by Sculpey, Cernit or Montmartre)
- Rolling pin
- Wooden depth sticks/ ice cream sticks
- Shape cutters
- Craft knife/ blade
- Texturing tools (you can use toothpicks, an old toothbrush or the back of a pin)
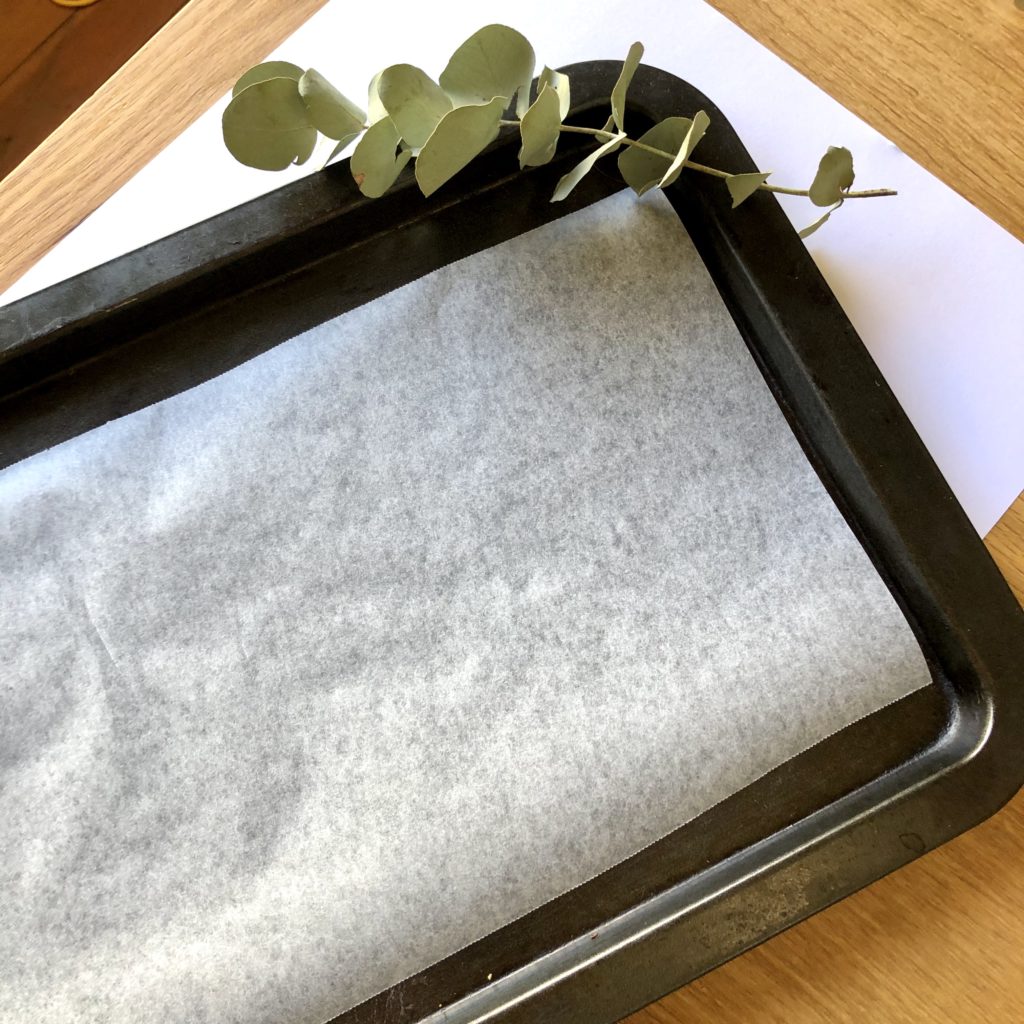
- Oven tray and baking paper
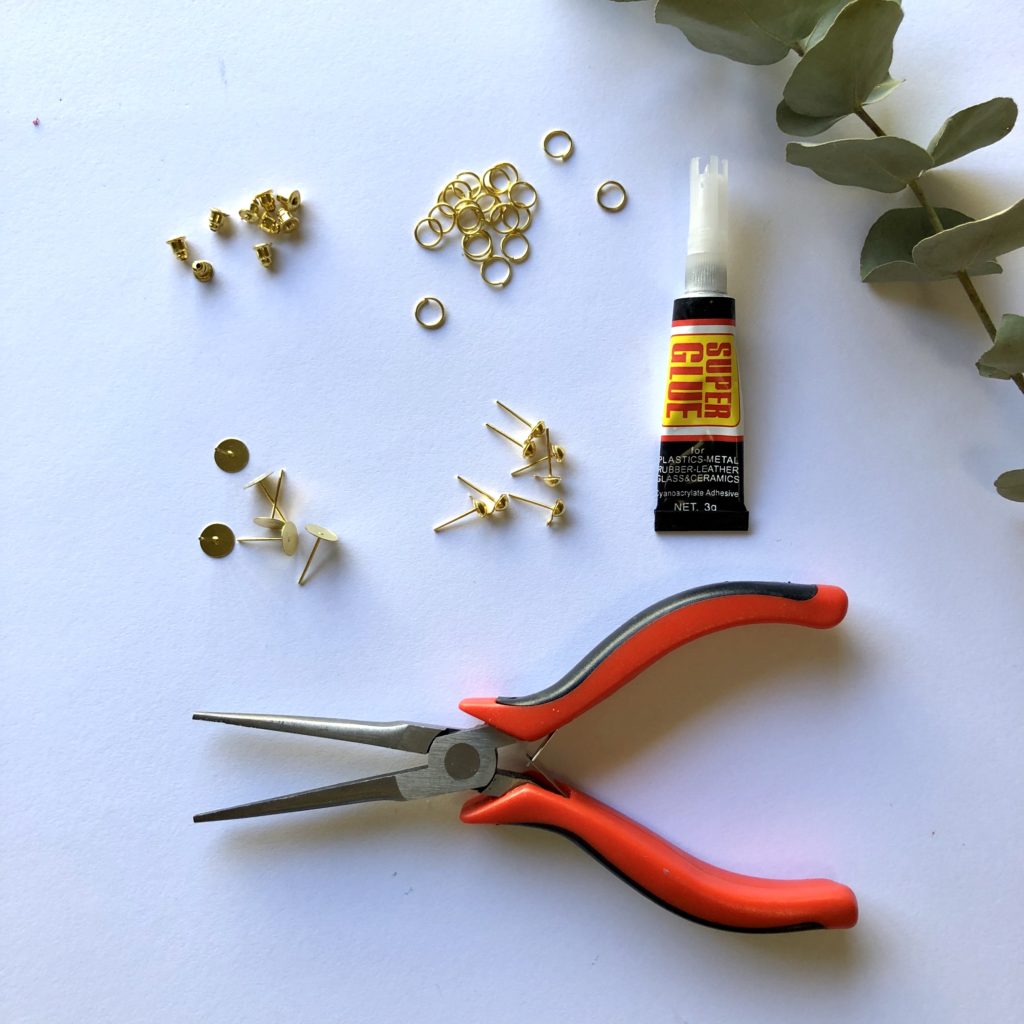
- Earring findings (jump rings, earring backs and butterflies)
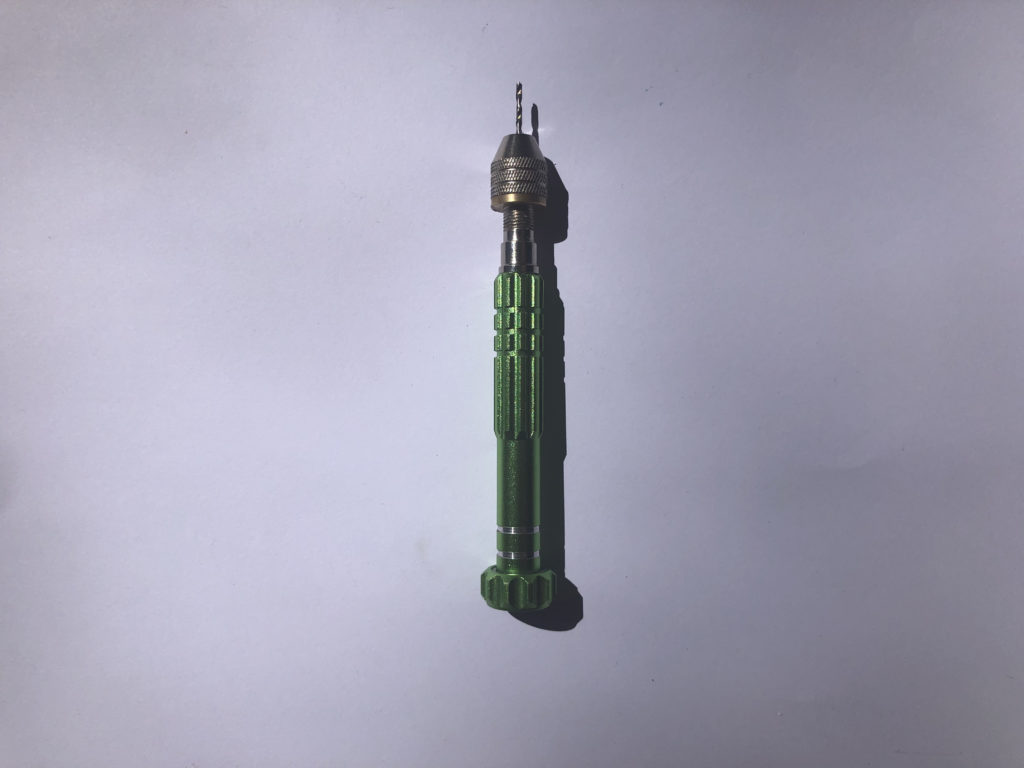
- Hand or electric drill with a 0.5mm drill bit
- Superglue
- Pliers

Step 1: Preparing the base of the slab
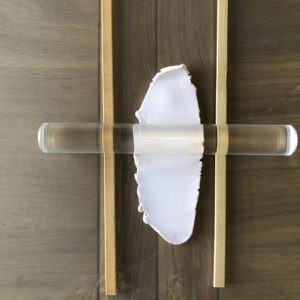
Select the colour for the base of your polymer slab (I chose white) and start to condition the clay by working it between your fingers to soften the clay. Polymer clay can be quite hard, especially in colder weather, so this can take a while. Once softened, roll out the clay with your rolling pin using the wooden sticks as depth guides, this will ensure that the thickness of the clay is uniform. Ideally, you want the clay around 2 to 3mm thick. After every roll, move your slab to make sure it does not stick to your work surface.
Step 2: Decorate the slab
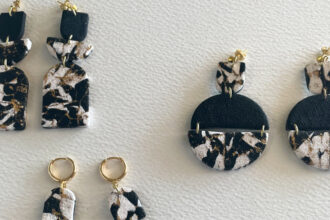
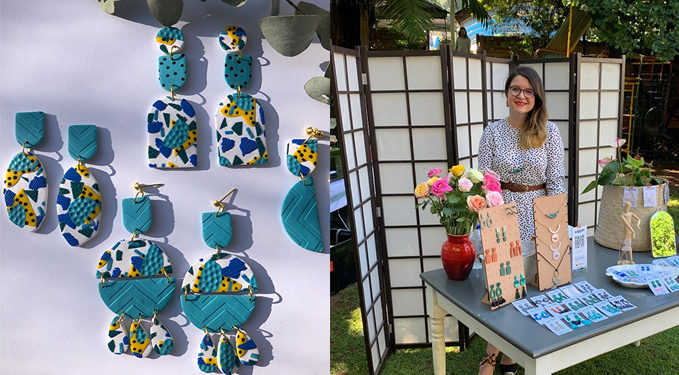
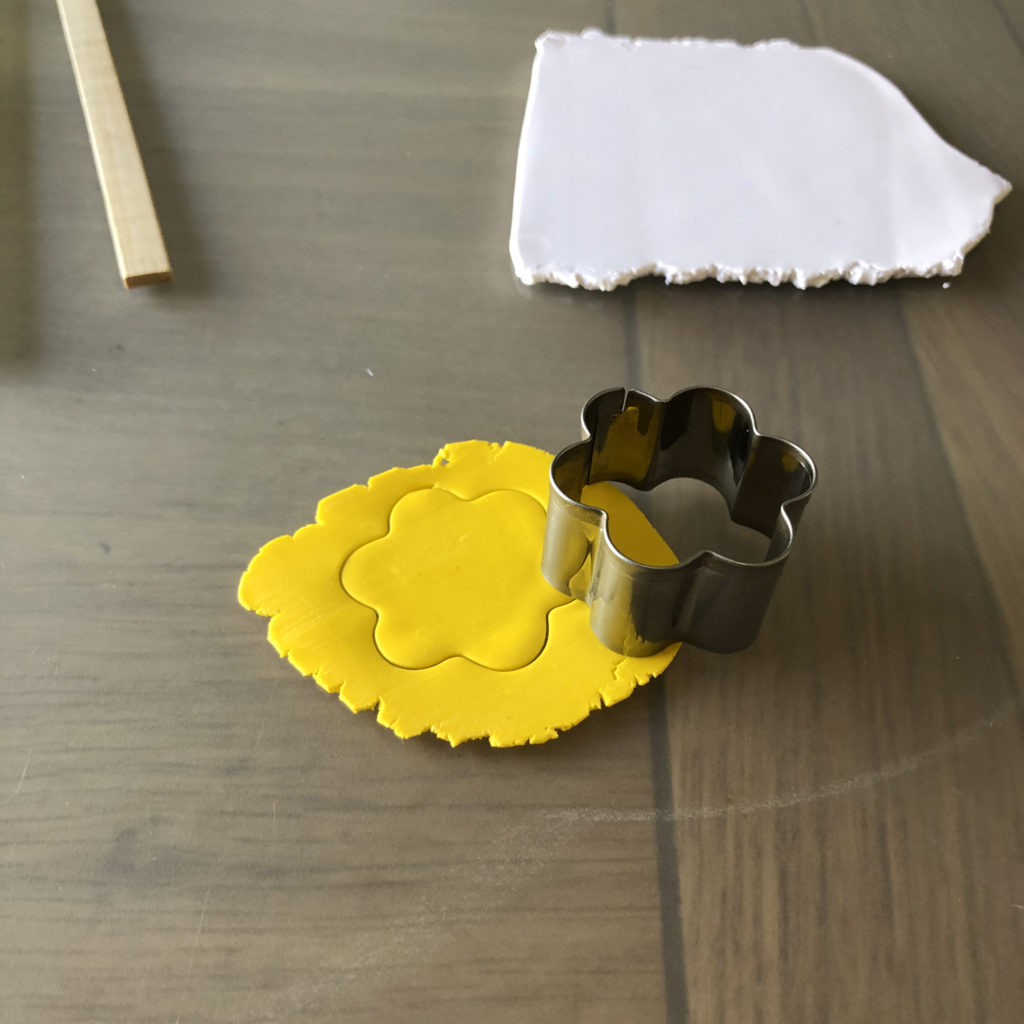
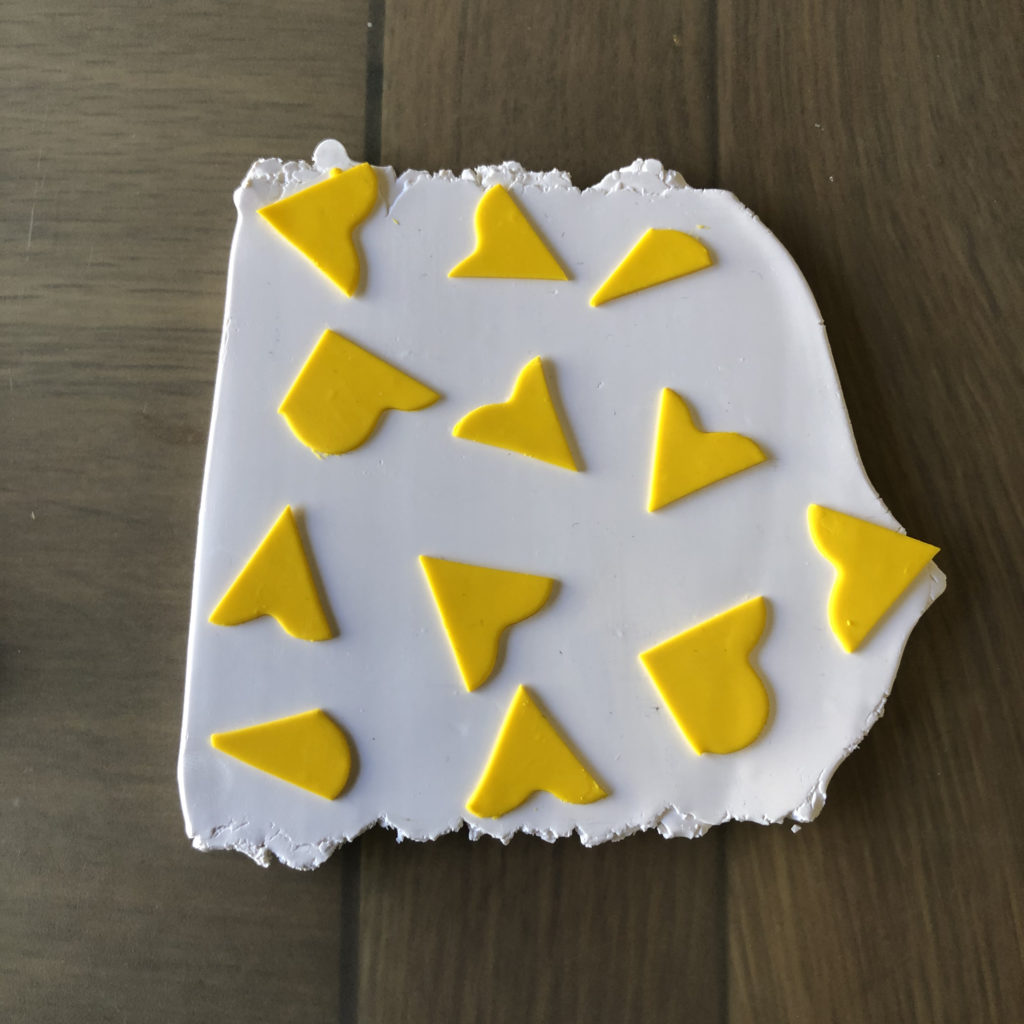
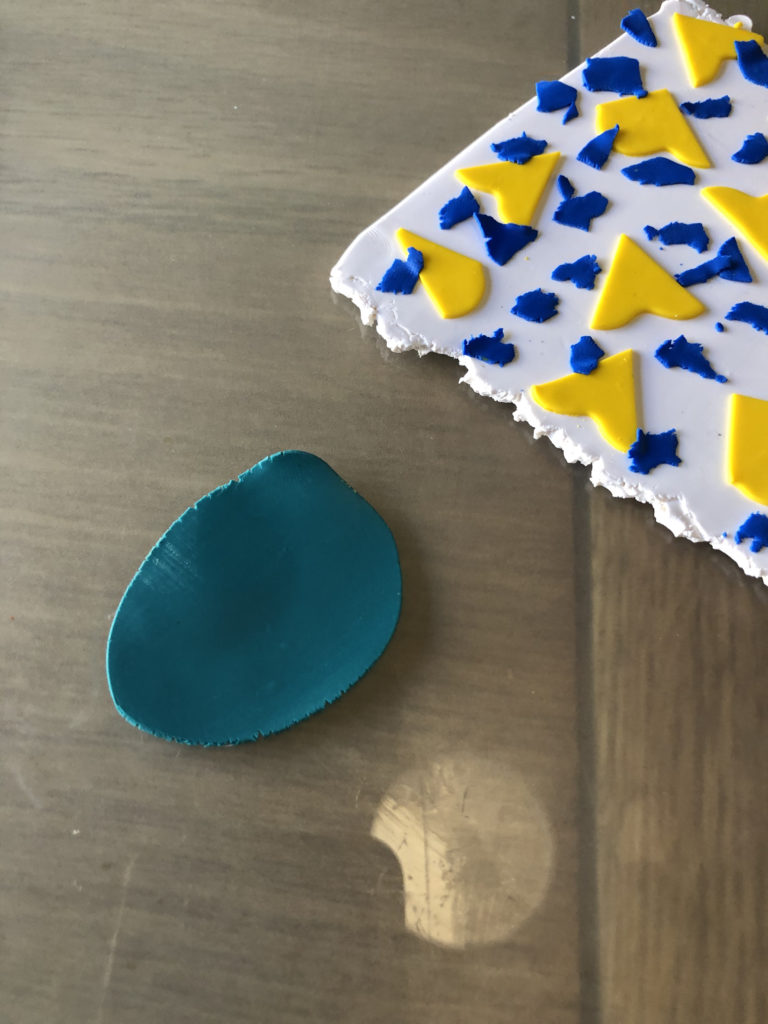
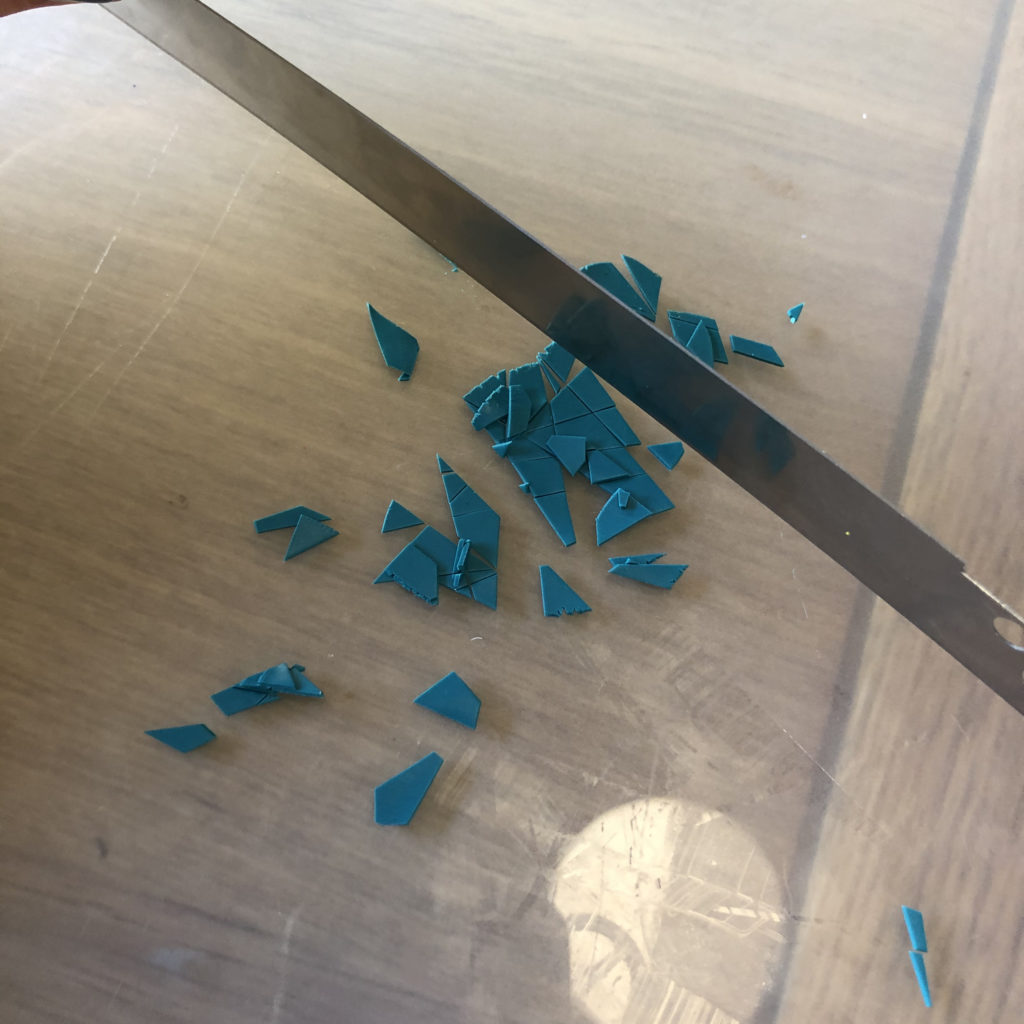
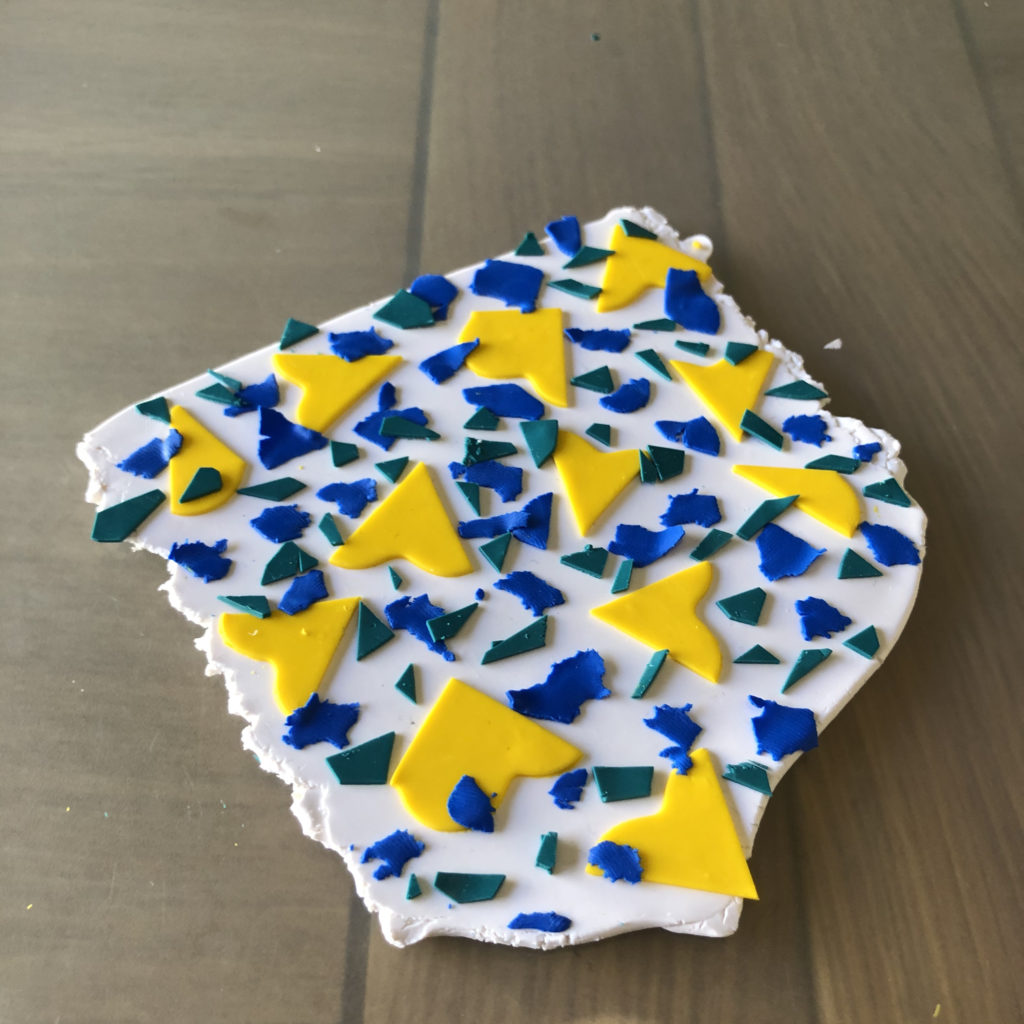
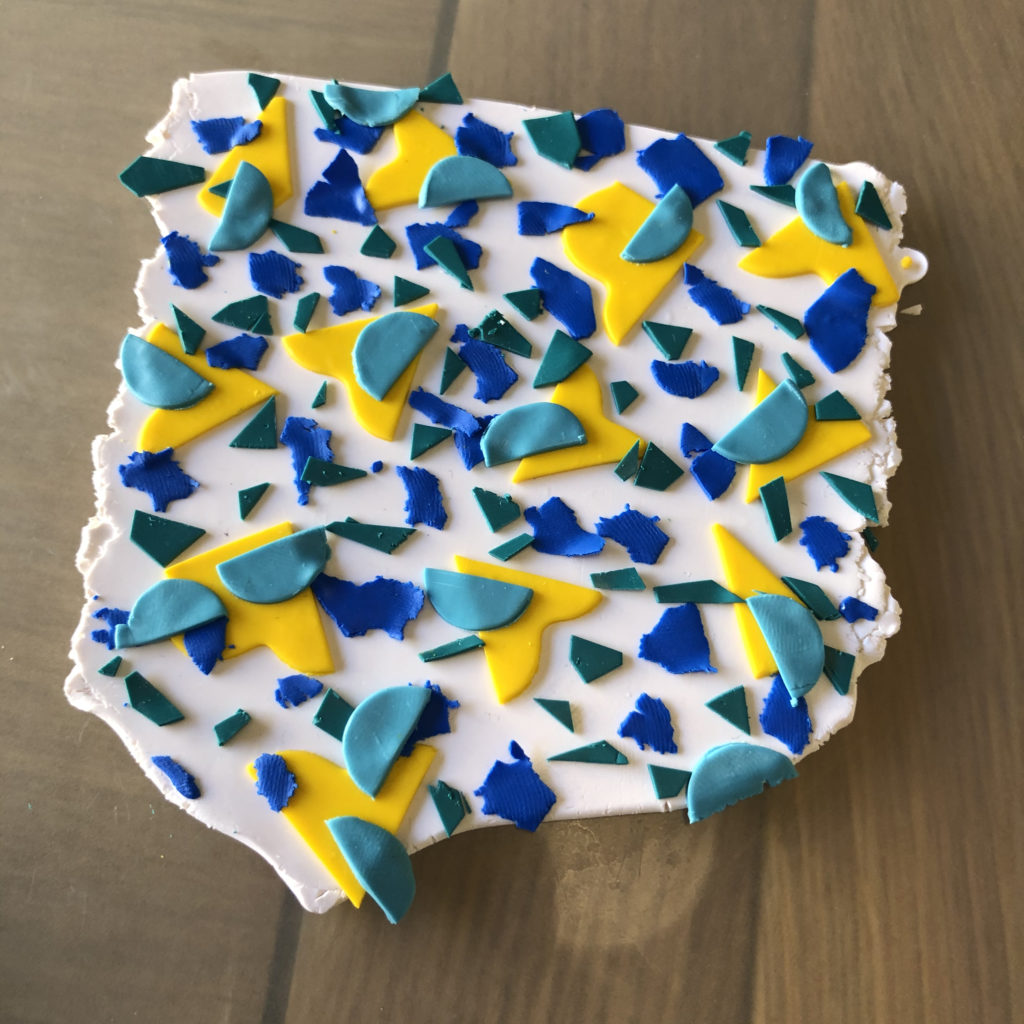
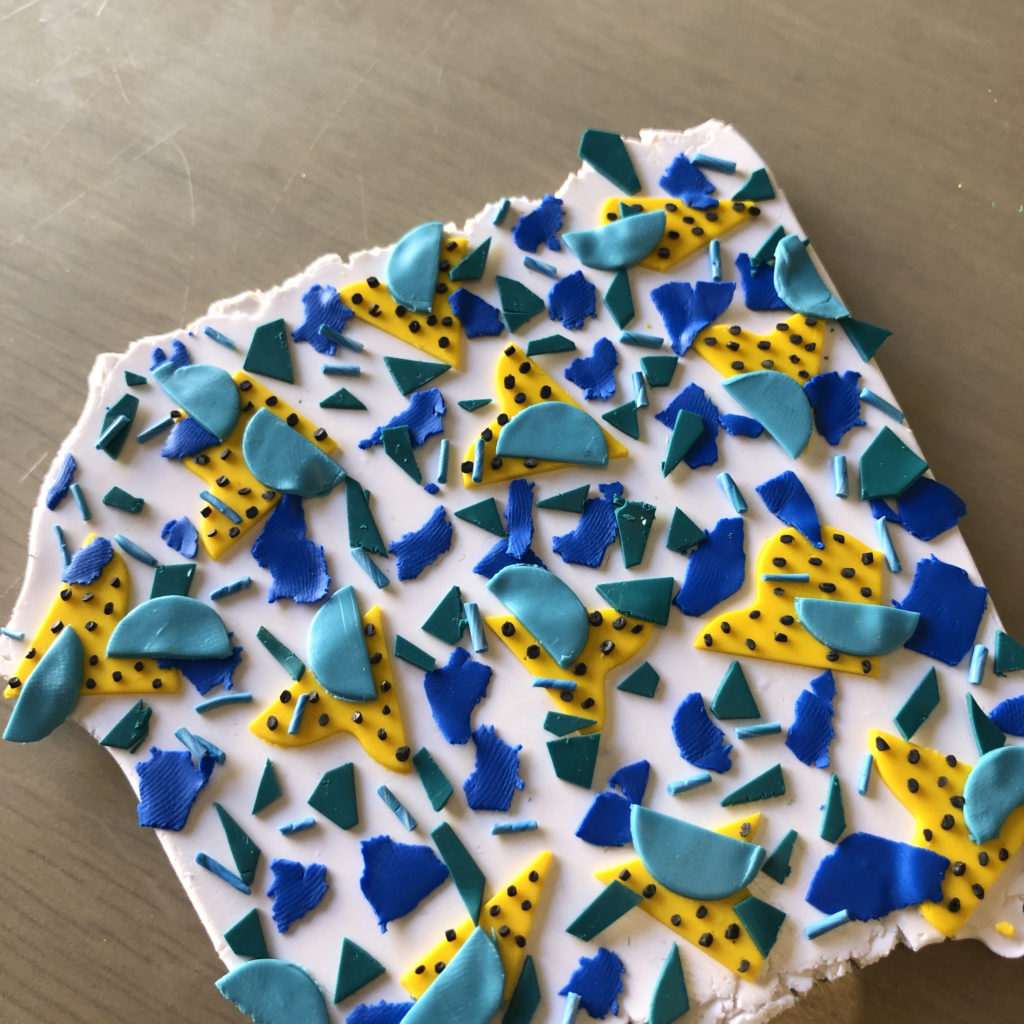
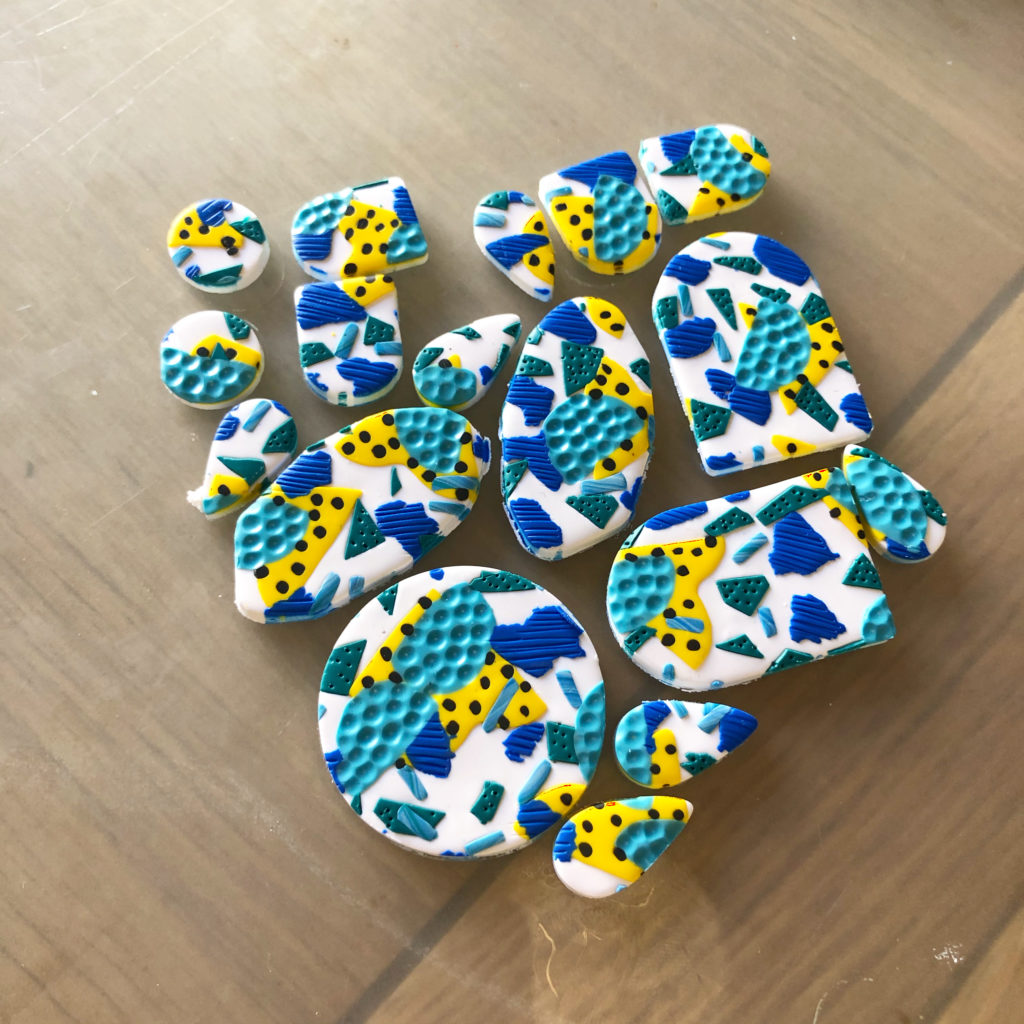
To create some visual interest, you can add small pieces of polymer clay in various colours and shapes to your design. When decorating your slab, there is no right or wrong, and a fun way to experiment with a different colour. For my slab, I used yellow, blue, turquoise and black clay. Using your rolling pin, roll out the polymer clay very thin (roughly 1mm) and form it into the shapes you want. I cut yellow flowers into quarters, and placed it on the white base, followed by blue clay that I ‘tore’ into pieces to create organic shapes, and teal clay that I cut into random small geometric shapes and added to the slab. To finish the pattern off, I added turquoise half circles and small black dots on top of the yellow. A good tip is to ensure that the slab is well-covered so that when the earring components are cut out, they all contain all the colours from your design. Once you are happy with the design, use your rolling pin to flatter the surface into a uniform thickness again.

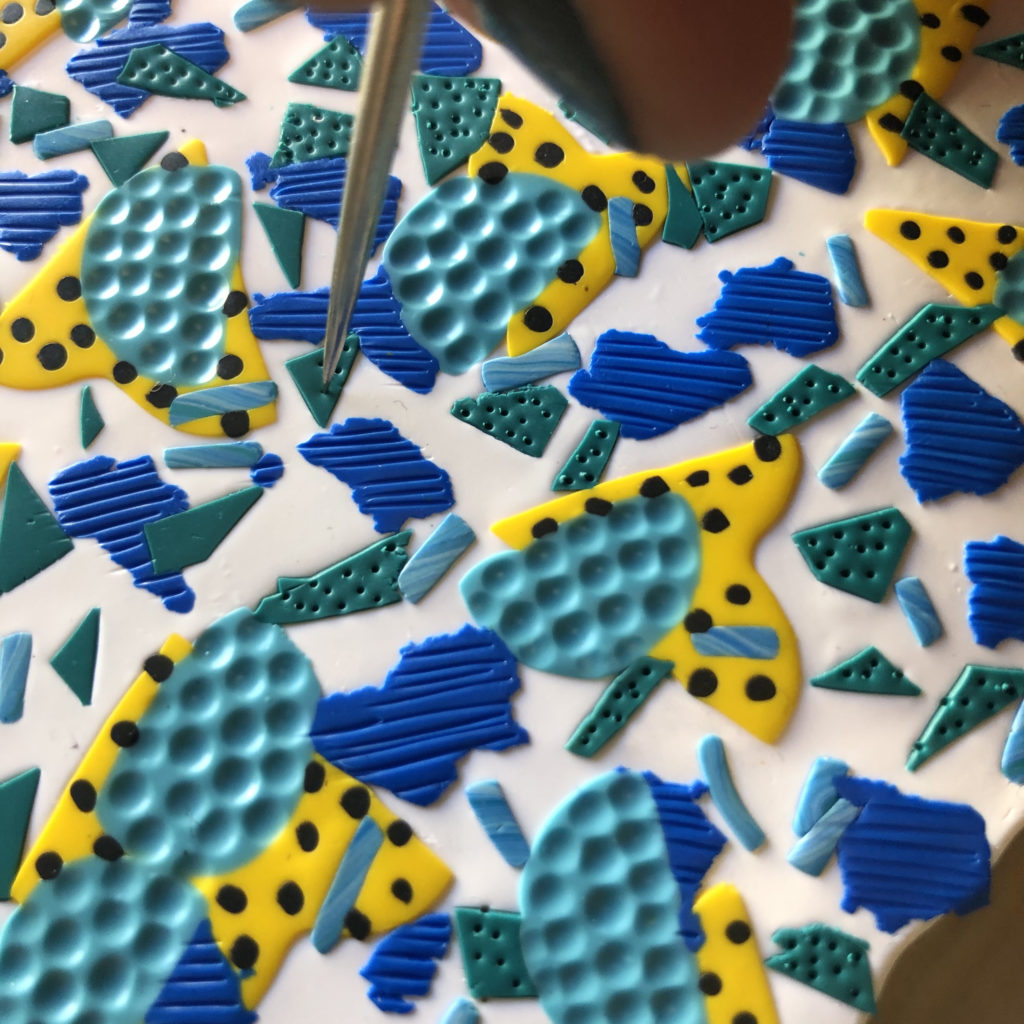
Step 3: Texturing
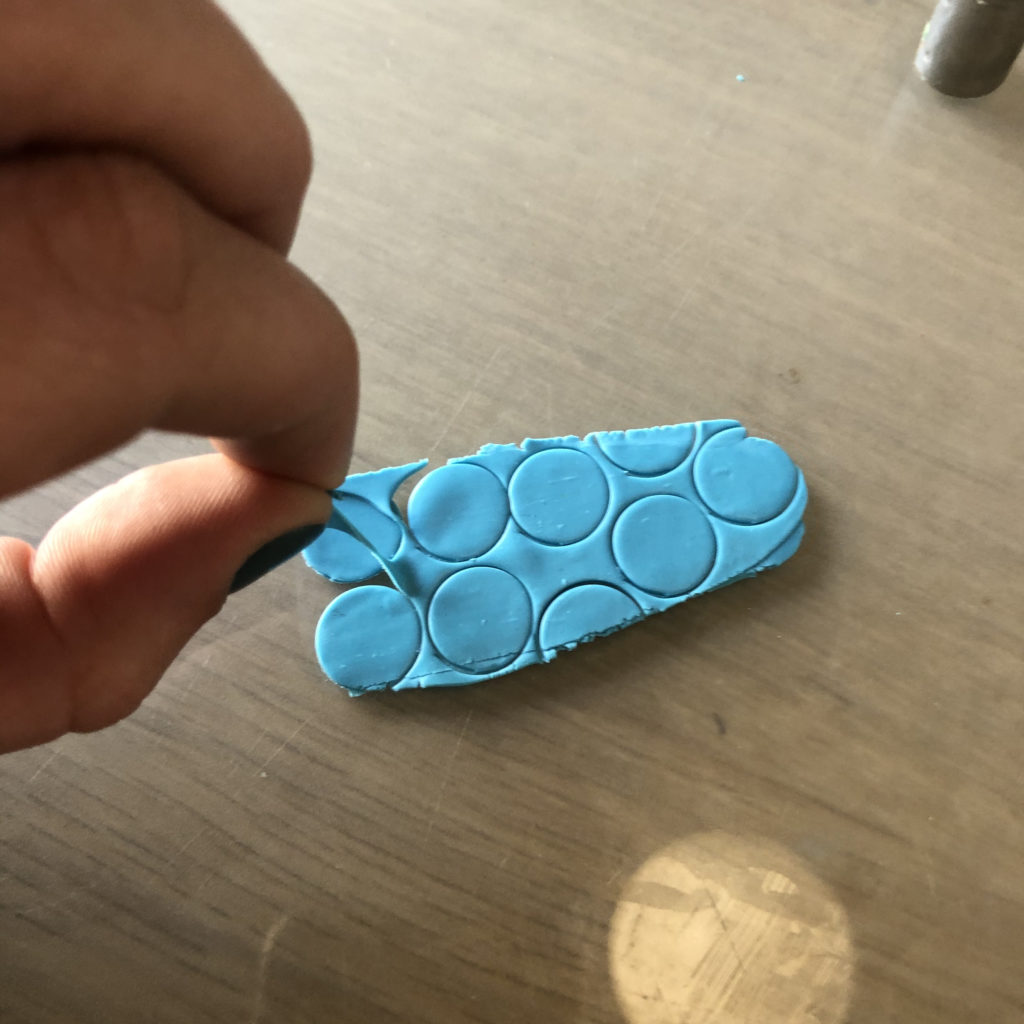
Adding texture to your slab is optional, but definitely adds character to any design. I dotted the half circles using a ball tool, but you can get the same effect by using the head of a pin. Using a thin needle tool (or toothpick), I draw stripes on the blue pieces and added small holes to the teal.


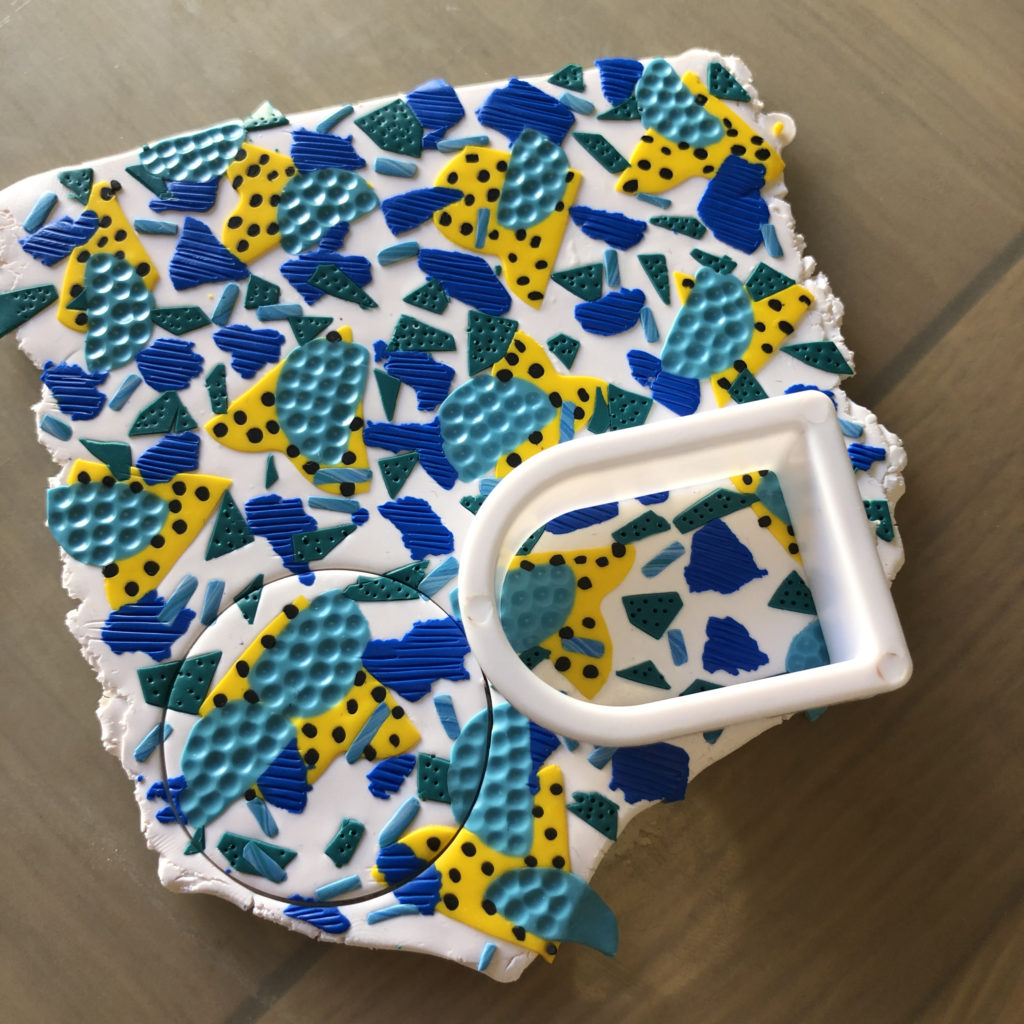
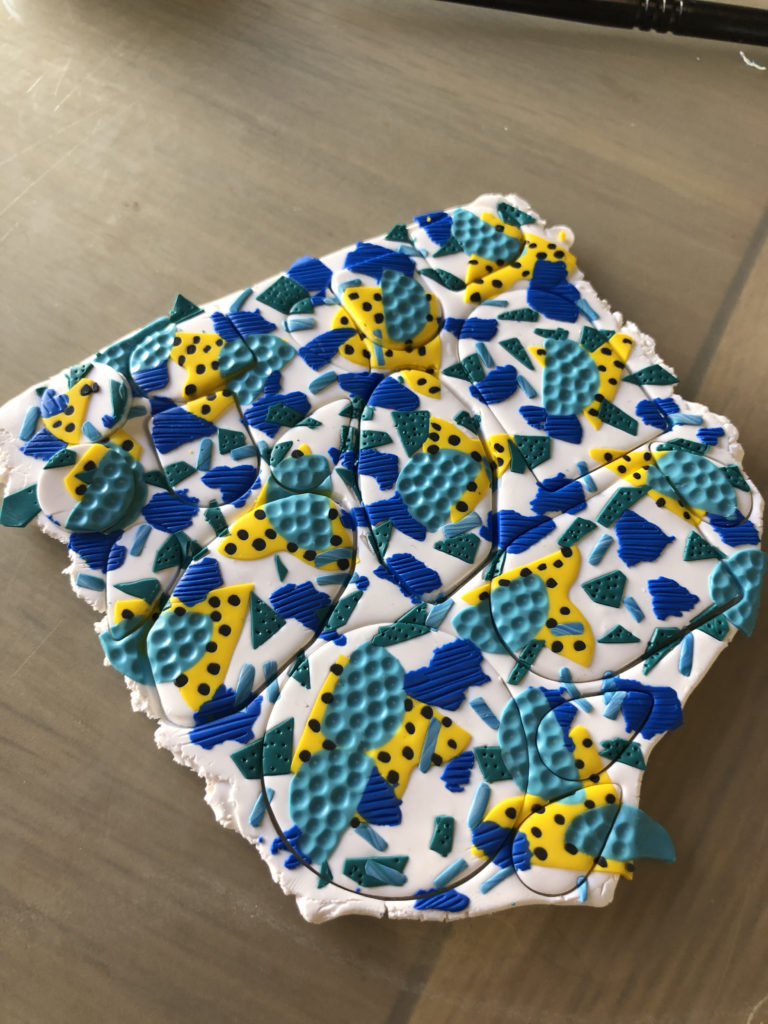
Step 4: Cutting earring components
Once your slab is done, use your shape cutters to cut out all the earring components you need. It is worth taking your time to make sure that shape cutters are strategically placed to make sure maximise the slab and get plenty of earrings out. I added some plain turquoise pieces to my earrings to break up the busy pattern. Once all the pieces are cut, place all earring pieces on a baking tray. At this stage, if you do not have a hand drill, ensure that you poke small holes in the earring components, to connect the pieces with earring hardware later.
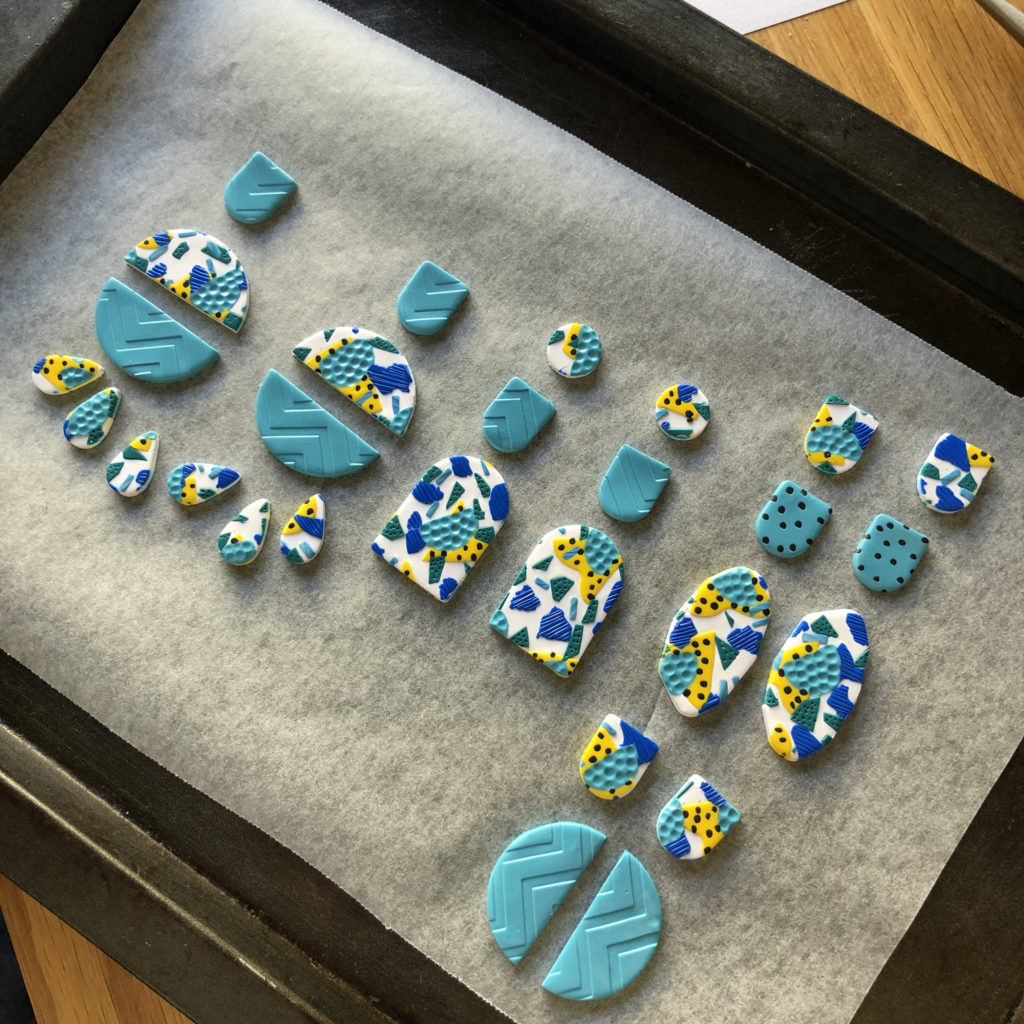
Step 5: Baking
Bake polymer clay in the oven at 130°C for 30 – 35 minutes.
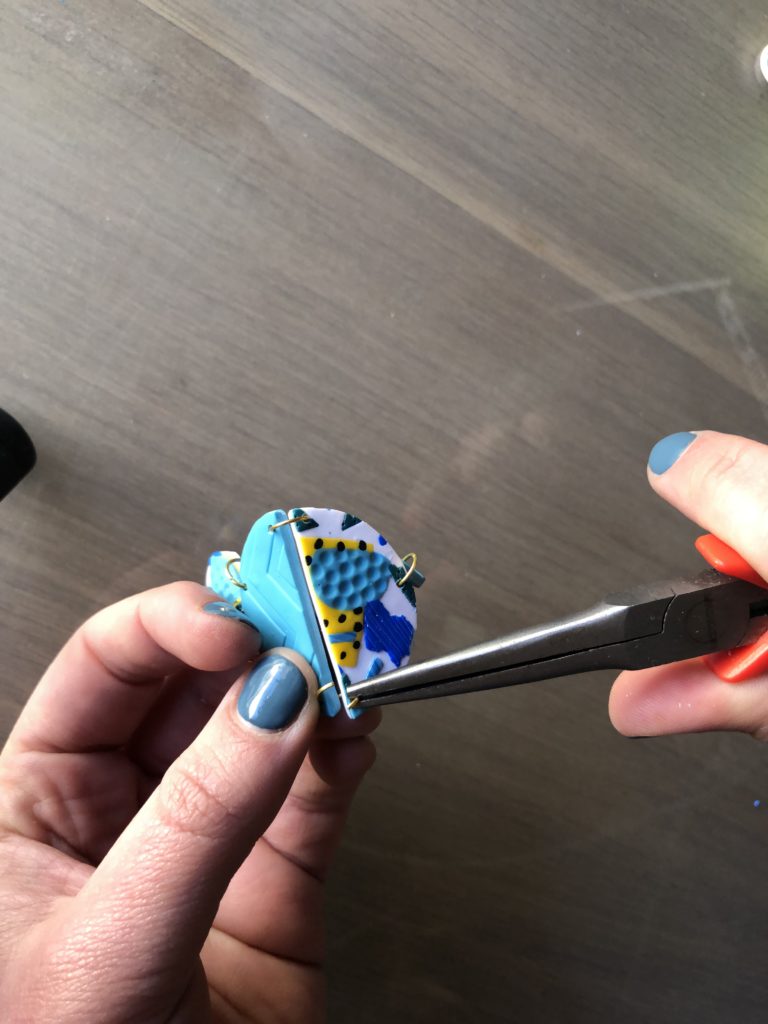
Step 6: Assemble
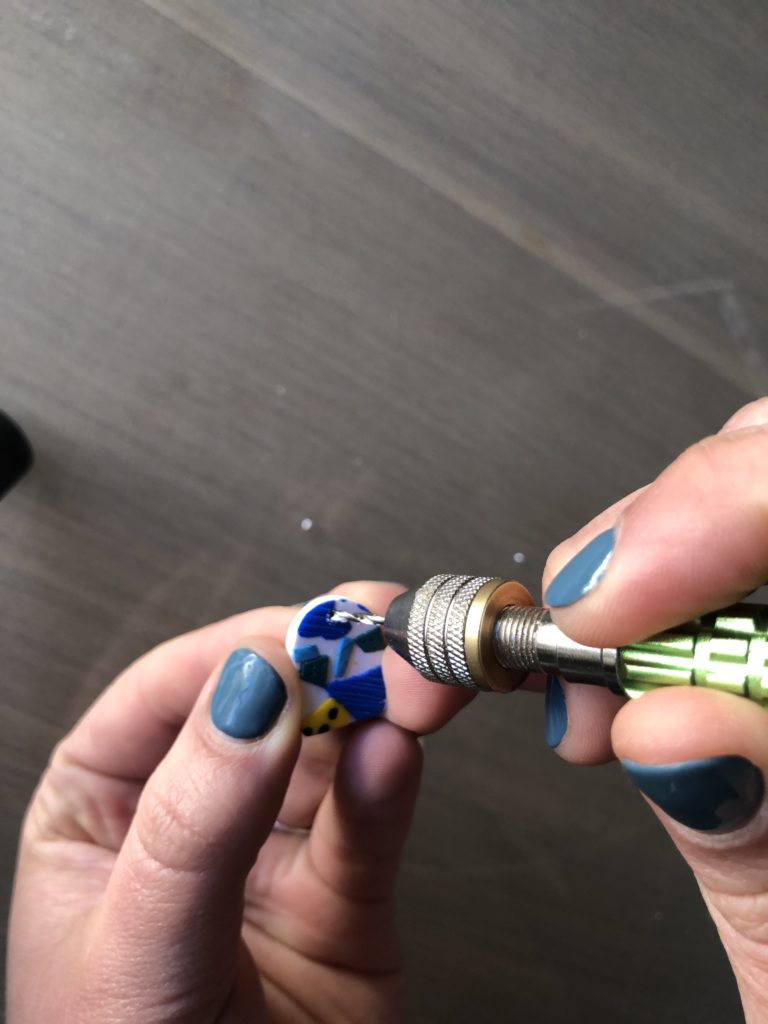
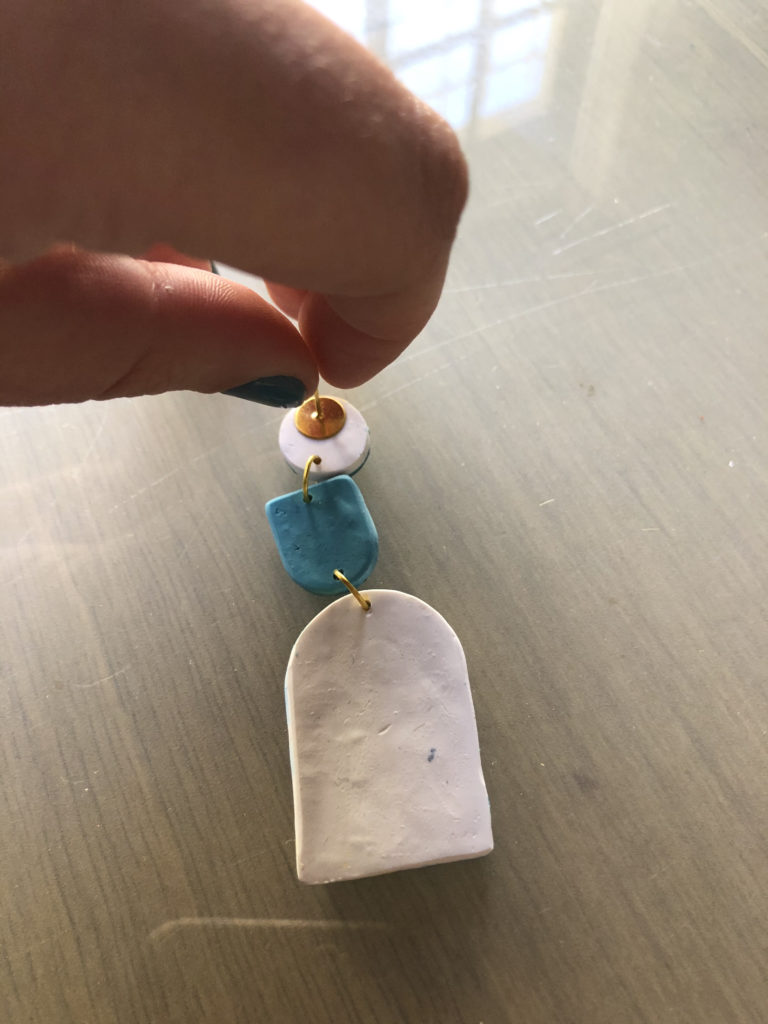
Once your polymer clay pieces have baked and cooled off completely, it is time to assemble them. The clay should be hard but will remain slightly flexible. If you have not yet poked holes through the pieces before baking, drill holes through the pieced to assemble. Connect earring components by gently bending a jump ring open using a flat nose plier. Link the desired earring pieces and gently close the jump ring again. Finally, use a good quality super glue to attach the earring post to the back of the earring and press down firmly for a few seconds to make sure it bonds properly and add a butterfly to your earring.
Your polymer clay earrings can be further enhanced by adding tassels, glitter or charms. These statement earrings are a surefire way to brighten up any outfit (or Zoom call).
Follow Suzanne on:
Facebook: @SuzyHelloStudio
Instagram: @suzyhello_studio