Resin Crafting with Anisha Essop
Resin Crafting is a stimulating, fun and therapeutic form of craft that allows you to ‘embed or
encase ’almost any object in a clear crystal plastic.
The primary materials needed to kick off resin crafting are easy to find and are almost budget-friendly.
The only expensive element/material of doing resin crafting is the Resin itself.
Colour Dyes and/or pigments are used to design an array of dynamic and alluring colours, special
effects and backgrounds. Understanding the fundamentals of how casting resin can be changed from
a liquid to a solid will allow you to successfully create both practical and eccentric projects that will
last indefinitely.
There are two liquids, a casting liquid and a hardener. That, when mixed together produces
a chemical reaction, which generates heat, causing the resin to harden. There is a ratio of
how much resin casting and hardener should be used. Some are one part resin to one
part hardener. Others can be 5 parts to 3 parts ratio. The latter is the one I am using at present. The
process of hardening takes at least 24 hours. Then it can be demoulded if it’s in a mould. Each Resin
pack will come with its own instructions of how it should be used. Make sure, before You start
working with the resin, to wear proper safety materials like gloves and a mask.
Tutorial Step-by-Step
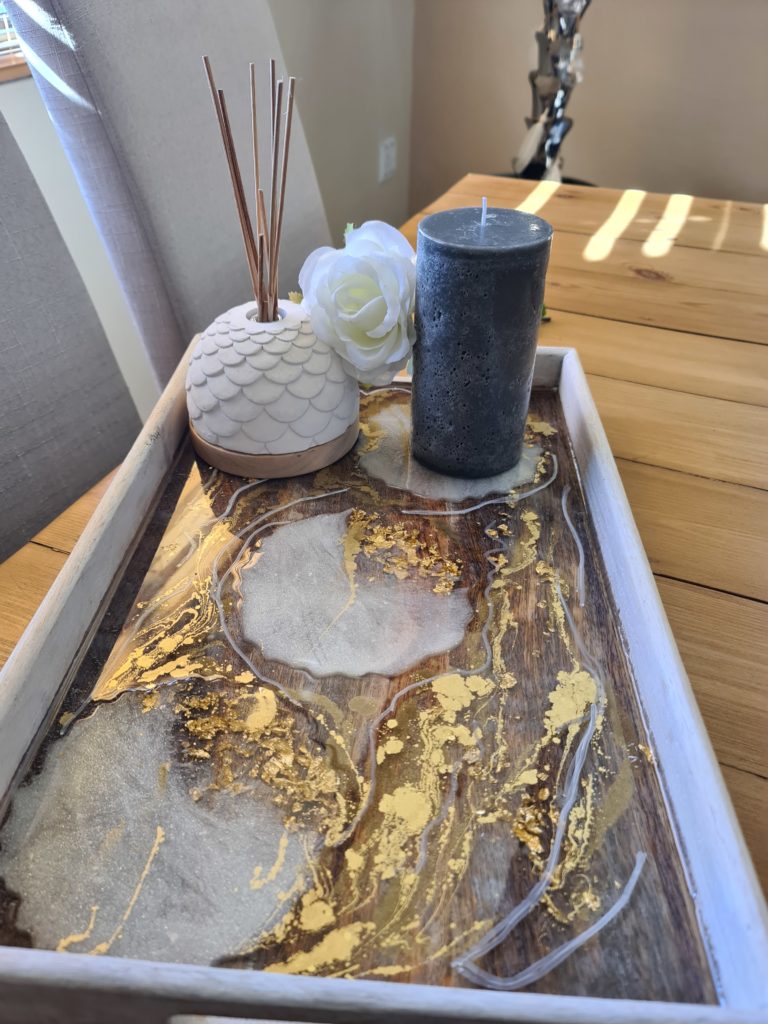
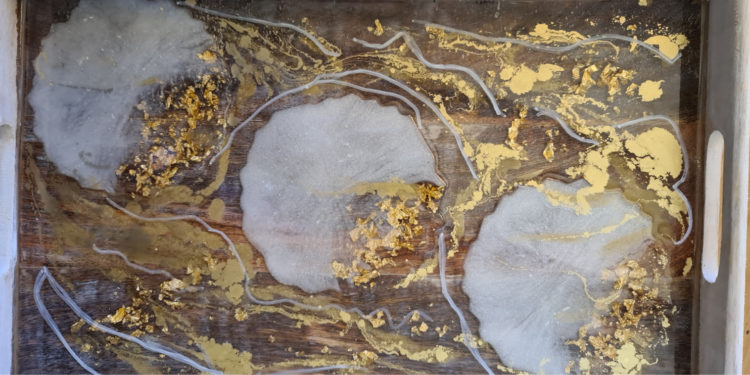
Resin Tray with Coasters embedded in it.
Part 1 Coasters
I decided on making the coasters to put into the tray to give it a different effect.
- First I chose what colours I needed to make my coasters. I decided on a pearl white pigment
mixed with A pure white Pigment and some gold leaf. - I mixed my resin and hardener. Stirred it for 3 minutes until the liquid was clear. Then, I let
it rest for another 5 minutes. This time will allow itself Leveling chemistry to continue
activating which will dissipate all the bubbles. - I poured some clear resin into the Coaster moulds. Then poured some into the white
Pigment and a little in the gold leaf, mixing them thoroughly so as not to have any lumps - I put the gold leaf to one side of the mould and the white on the other side. Swirled the
white pigment around with my craft stick to give it a different effect. - Last I used the heat gun to clear the remaining bubbles in the coasters. A blow torch can also
be used for this purpose. - Once satisfied with the results, I left it to set for 24hrs.
Part 2
Tray with the coasters - I mixed my resin and let it stand for 5 minutes.
- I demoulded my coasters from the silicone moulds. It came out easily as the coasters had
hardened perfectly. - I placed the coasters onto the tray positioning it the way I wanted it.
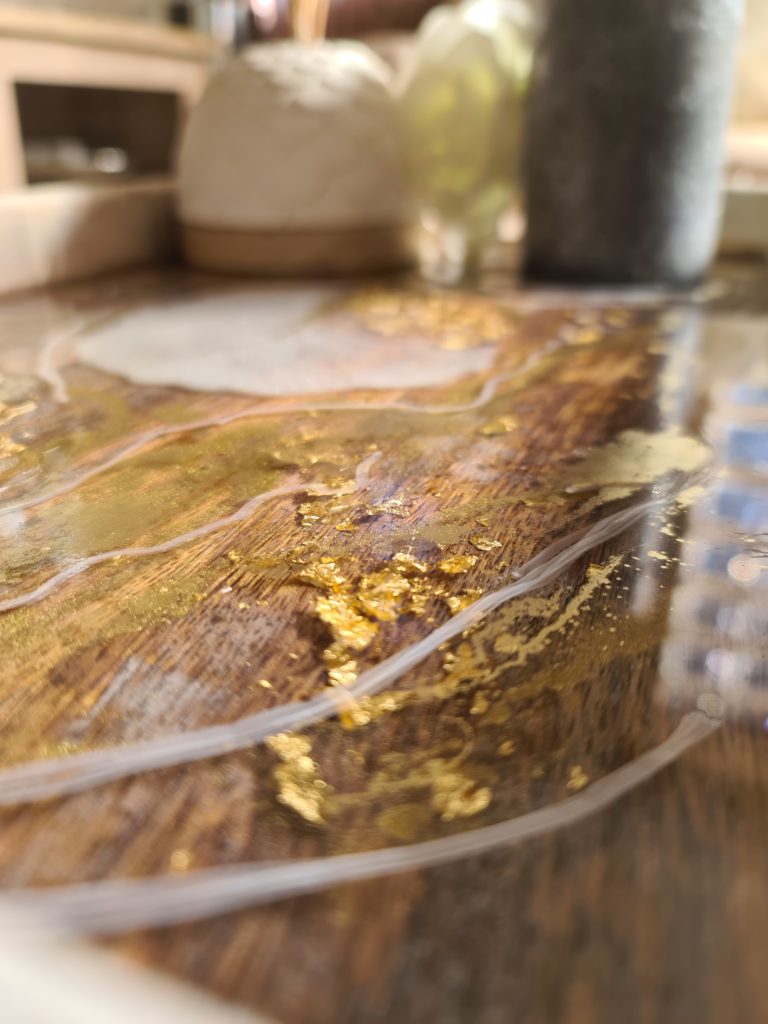
- For this part, I only needed a little gold pigment and a little gold leaf.
- I poured most of my clear resin over the coasters on the tray.
- Using the heat gun, I cleared all the bubbles.
- Lastly, I added the gold leaf and gold pigment. Using my craft stick to make patterns. I used
the heat gun once more just to make sure that there are no remaining bubbles. - Once happy with the final result, I left it to dry for 24 hours.
N.B. Make sure you clean your sticks with wet wipes because the resin is difficult to get off the sticks
once dried. I used silicone cups for the colour/pigment mixing as it is easier for the resin to come off
when hardened.