Making Magic With Mosaic
Mosaic is an art that’s been around for many thousands of years now. There have been mosaics uncovered from antiquity – such as a half-completed piece of Alexander the Great, by the Ancient Romans in Pompeii. Unfortunately, it was never completed due to a technical fault involving a volcano.

Fortunately, we live far from volcanos, so that’s no excuse to not get up to some mosaicking yourself!
What can you create with a mosaic? Positively anything. Essentially, it is various coloured tiles, cut into shapes, that are glued close together, into a grander whole. The cutting is the only really tricky part and requires some patience initially – but you’ll soon be a pro!
Beginning your craft.
Getting started is easy. You can buy outlines of designs on boards done for you or you can draw your own outline in pencil.

The subjects you can do are endless: a gorgeous sunset? Easy. A spiralling design? Simple. A portrait of a person? Not a problem.

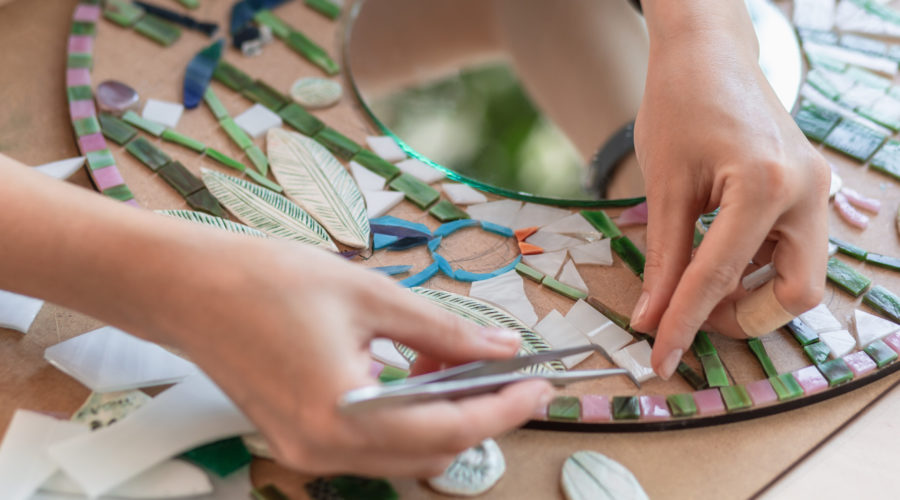
All cut up.
What you want to do is carefully cut all your shapes with a pair of mosaic cutters – but careful! They’re sharp! Once you get the hang of it, you’ll soon be cutting the tiles into shapes that best suit your chosen or self-drawn design.

Next, once you feel you have enough pieces, simply apply craft glue and stick the mosaic pieces down.

Tweezers will help a lot with more intricate works, so consider using them when placing your mosaic pieces. It’s also important to leave a little bit of space between the pieces because that’s where the magic happens…
The ties that bind.
…that’s the grout we’re talking about.
Grout is a powder that you mix with water into a wet cement-like substance. You normally do this in a jar specifically for the purpose (a half 2-litre coke bottle will work just as well). But before you create your grout-cement, you should leave your mosaic a full day for the glue to bond properly to the board.

(Above is the grouting effect seen more clearly – it is what literally adds substance to your mosaic!)
Once that’s done, all that’s left is to make the grout, then apply it between the spaces of the mosaic pieces. Some of it will inevitably mar the pieces, but that’s okay. You’ll be scraping that all off with a scraper, leaving just the grout between the mosaic pieces.
Viola!
Provided the spaces aren’t too big, you’ll have a lovely effect from the grout binding the pieces of mosaic together. This takes another day or so to dry, so leave it be till then.
If there’s dried grout on the mosaic tiles now, you can continue to just scrape it off. Finally, using a damp cloth, give your mosaic a rub and let those pieces sparkle!
Hang it with pride.
Your mosaic is now finished. If you’re particularly proud of it, you should get it framed and hung on a wall. It will make a lovely addition to any household’s art collection.

And don’t forget, you can get all your mosaic tiles, grout, and tools at PNA!