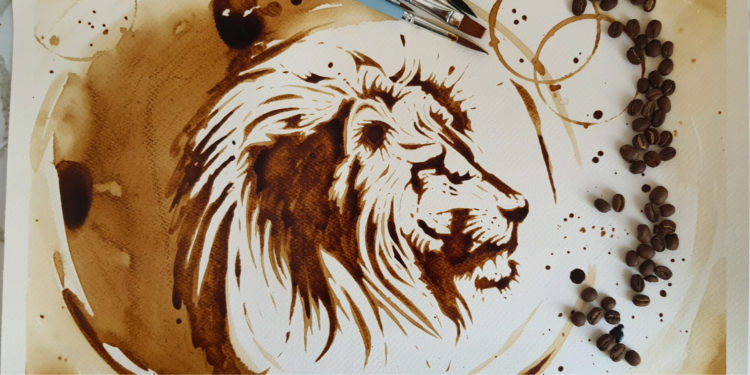
Lion Coffee Art by Elaine Solms
What you need:
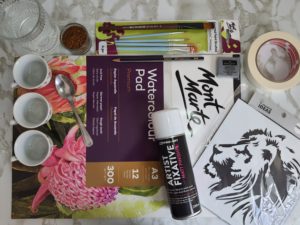
- 300gsm cold-pressed watercolour paper (Mont Marte)
- Lion stencil (unlimited ideas)
- Watercolour brushes (round & flat of various sizes) (Mont Marte)
- Container of clean water (for rinsing)
- Masking tape, washi tape or artist tape
- Teaspoon
- Instant coffee (any)
- Warm water
- Kneadable eraser (Faber Castell)
- HB pencil (Faber Castell goldfaber)
- Artist fixative (Pro-Art artist fixative – Matt Finish)
- Tissues
- Paint pallet, or containers to mix the coffee in
Process:
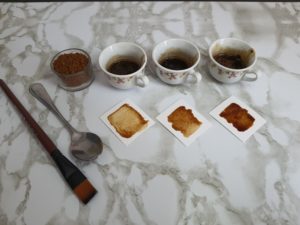
Mix 3 different strength of coffee “paint” colours. You can use any containers or a paint palette. The ratio of coffee to water will be different depending on the brand of instant coffee you are using and the amount of paint you are mixing. There is no “recipe” as you will need to dilute the strength and test as you go.
For the lightest shade, add a small amount of coffee granules with some warm water, and mix to dilute. Test the strength of the colour on a piece of paper. If the colour is too dark, add some warm water. If the colour is too light, add some coffee granules and test the colour strength again, until you are happy with the colour consistency. Repeat this process until you have 3 strength variations of coffee “paint”. The darker shade should feel slightly sticky. You will also notice that the coffee “paint” will feel sticky as it dries.
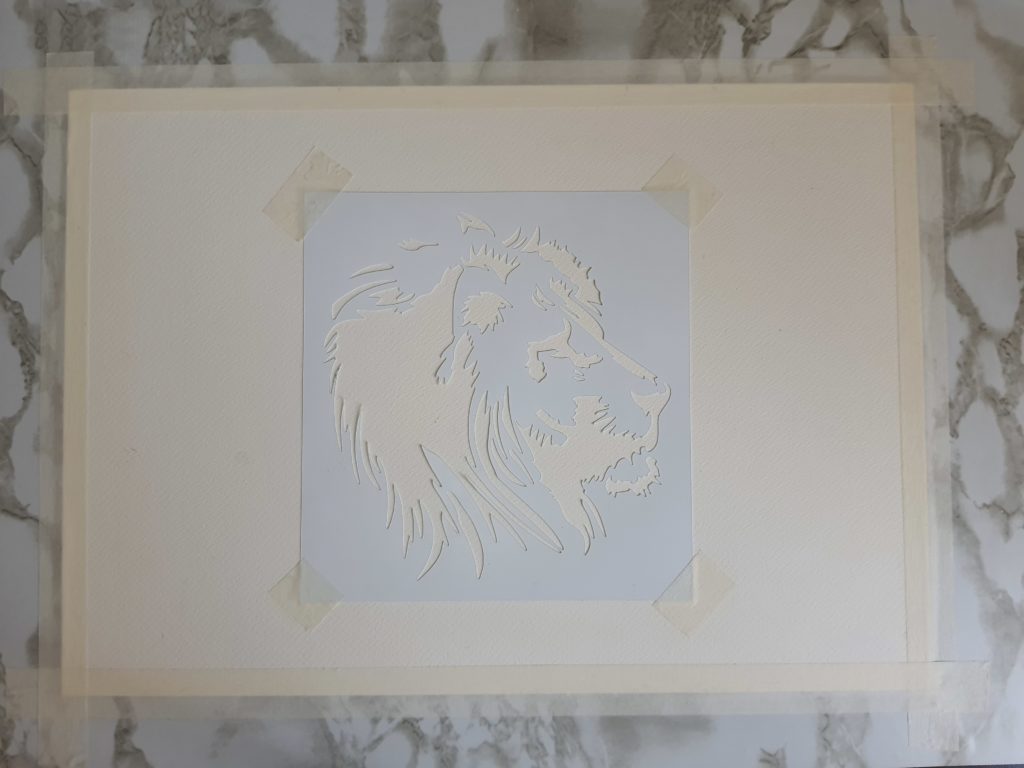
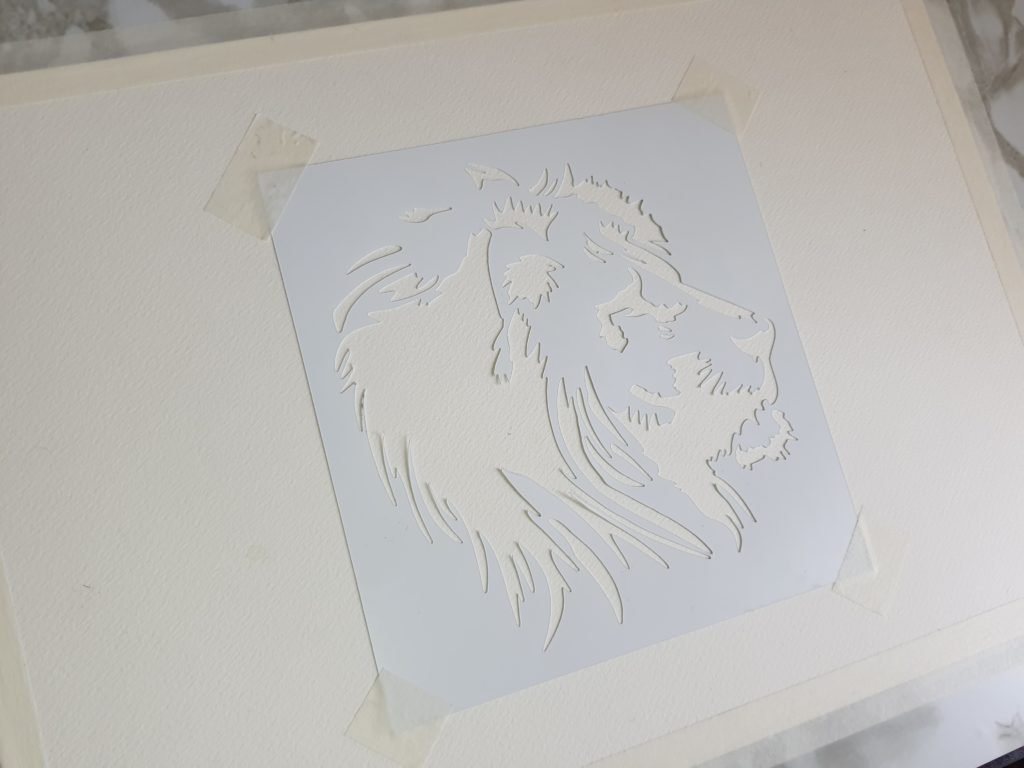
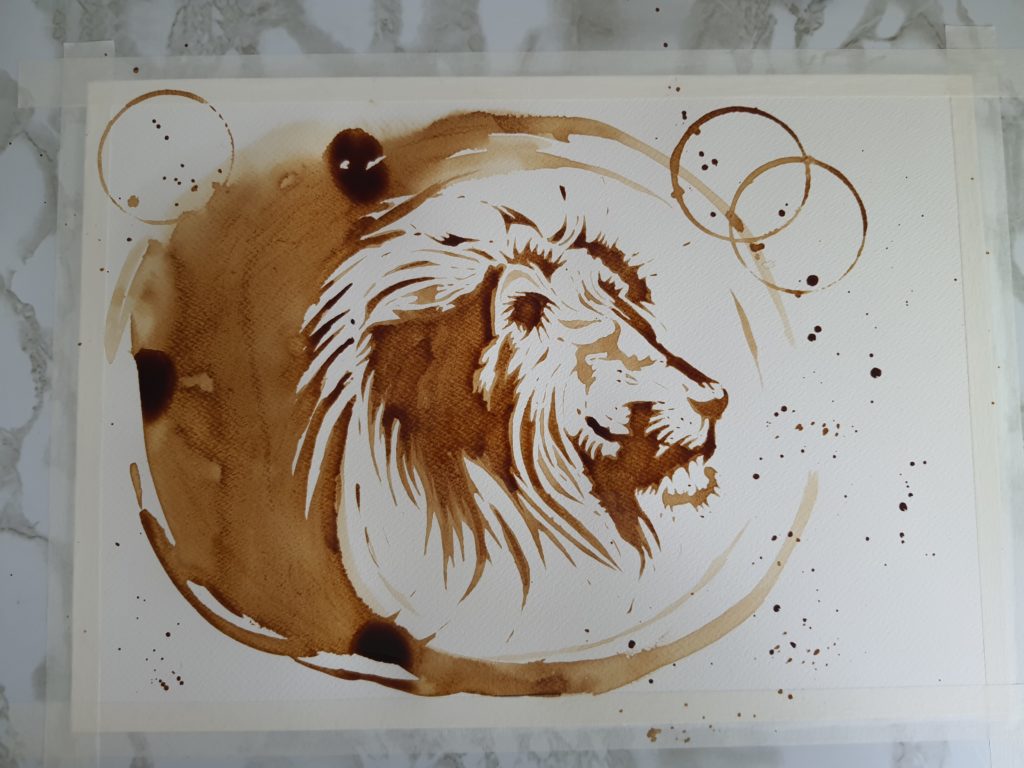
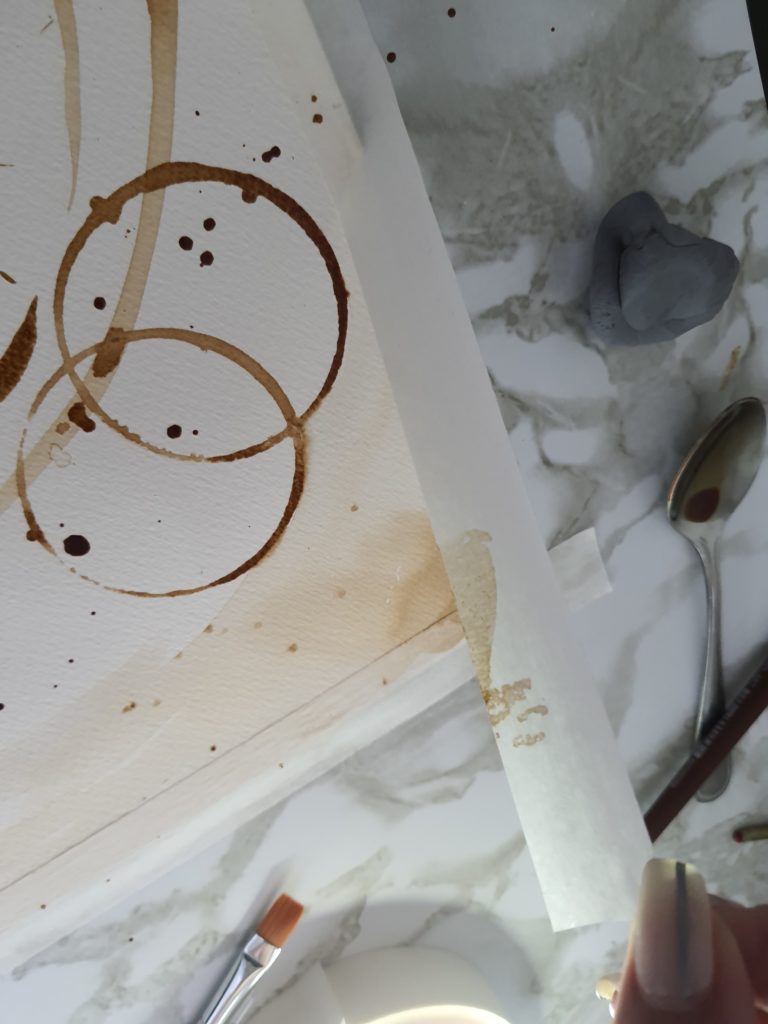
Use the masking tape to tape down the paper, onto the surface you are working on. It will also create a “frame” around your picture. Make sure the tape is not too tacky as it can tear your watercolour paper in that case, when you remove it. Also, position your lion stencil in the centre of the page and gently tape that into place by adding some masking tape on each corner.
To remove some of the tape’s tackiness, I normally stick it down on any other surface and then remove it before placing it onto my paper.
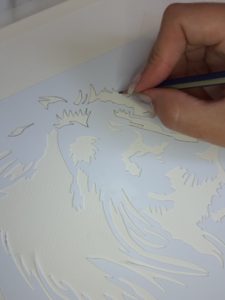
Use your HB pencil to “trace” the outline of the lion stencil. Then remove the stencil from the page.
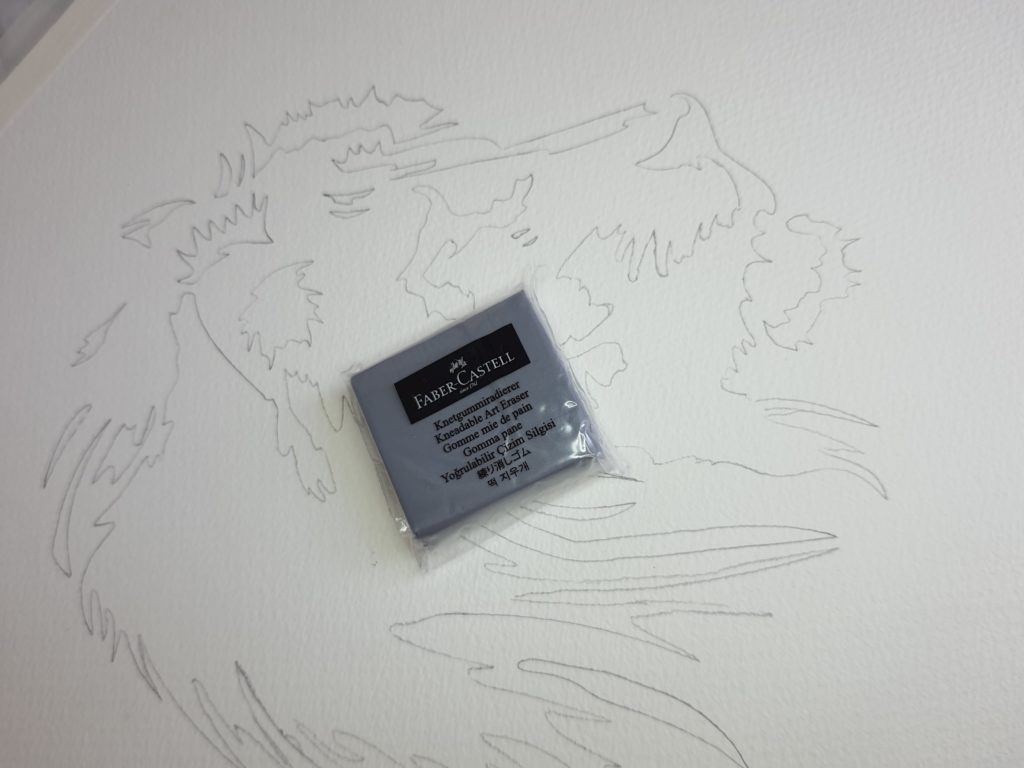
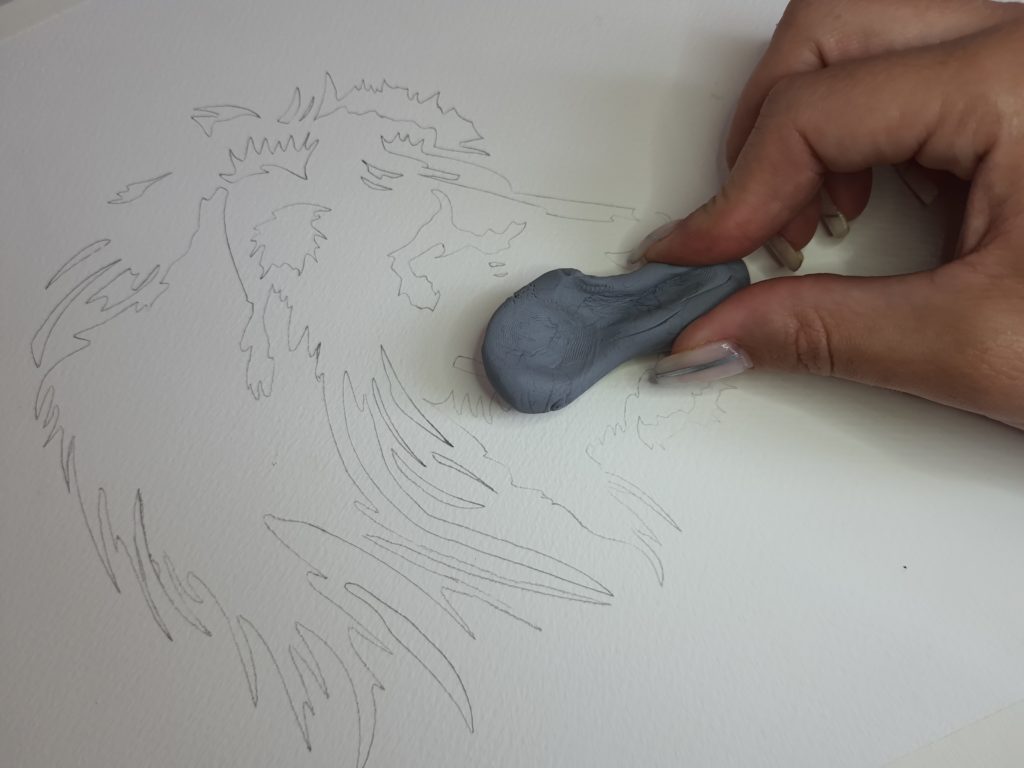
Using the kneadable eraser, remove most of the colour from the pencil lines by lightly rolling it over the pencil lines. You will not be able to remove the pencil lines once you have painted over them. This process will lighten the pencil lines slightly.
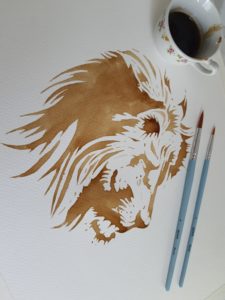
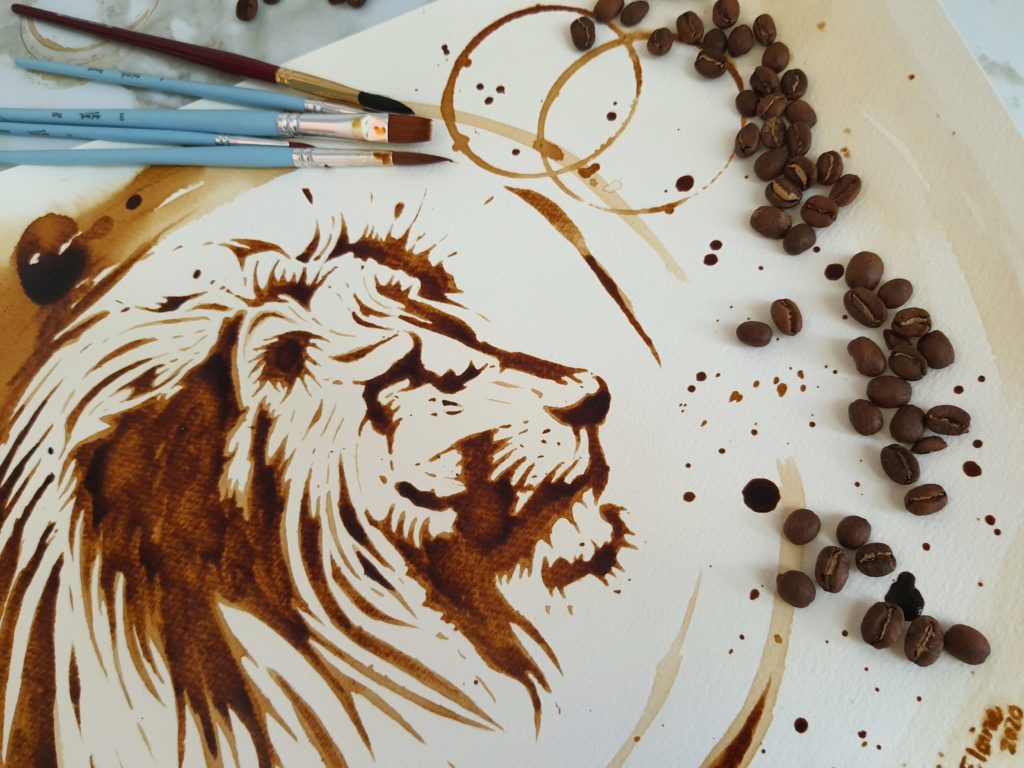
Use the light colour of coffee “paint” and a small, thin brush. I used a size 8 and paint inside the pencil lines that you have drawn. You should end up with your entire lion face painted with the lightest coffee shade. I have added extra lines to mine that were not part of the stencil, and I also extended some of the existing lines. Be careful not to create “puddles” on the page.
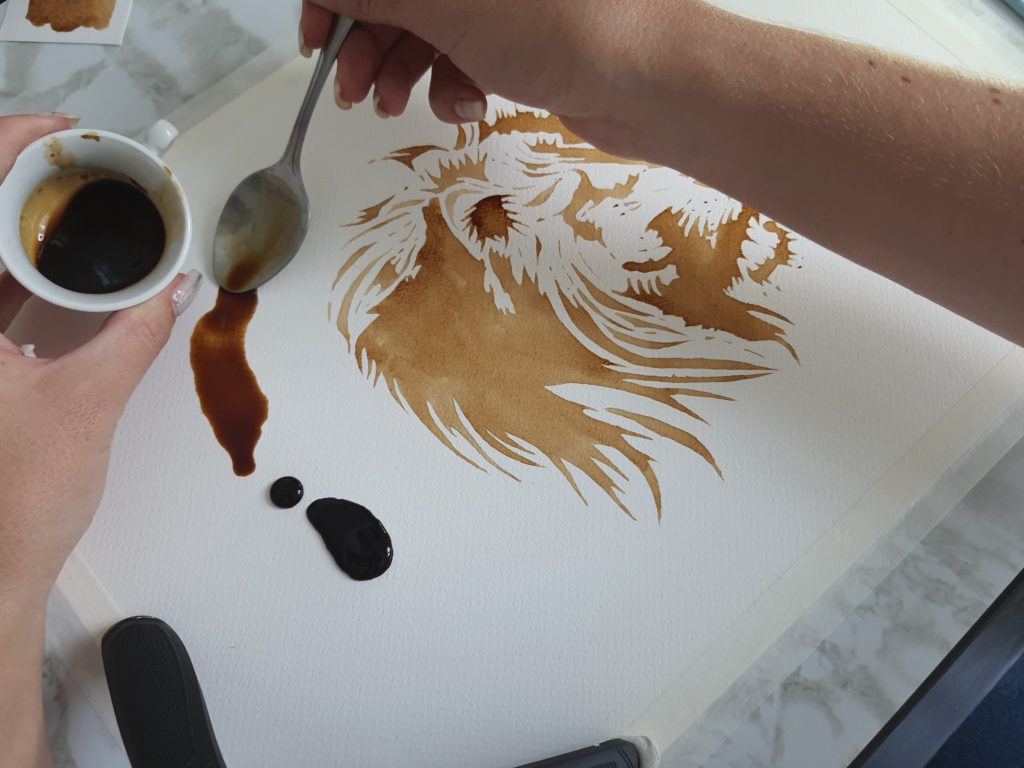
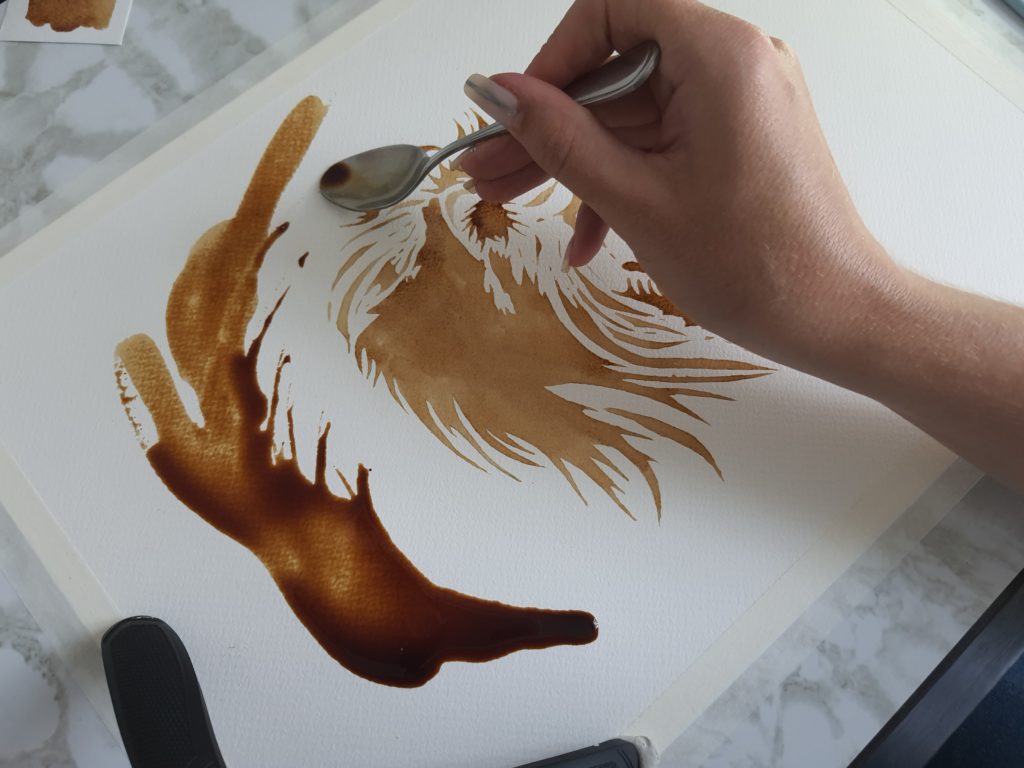
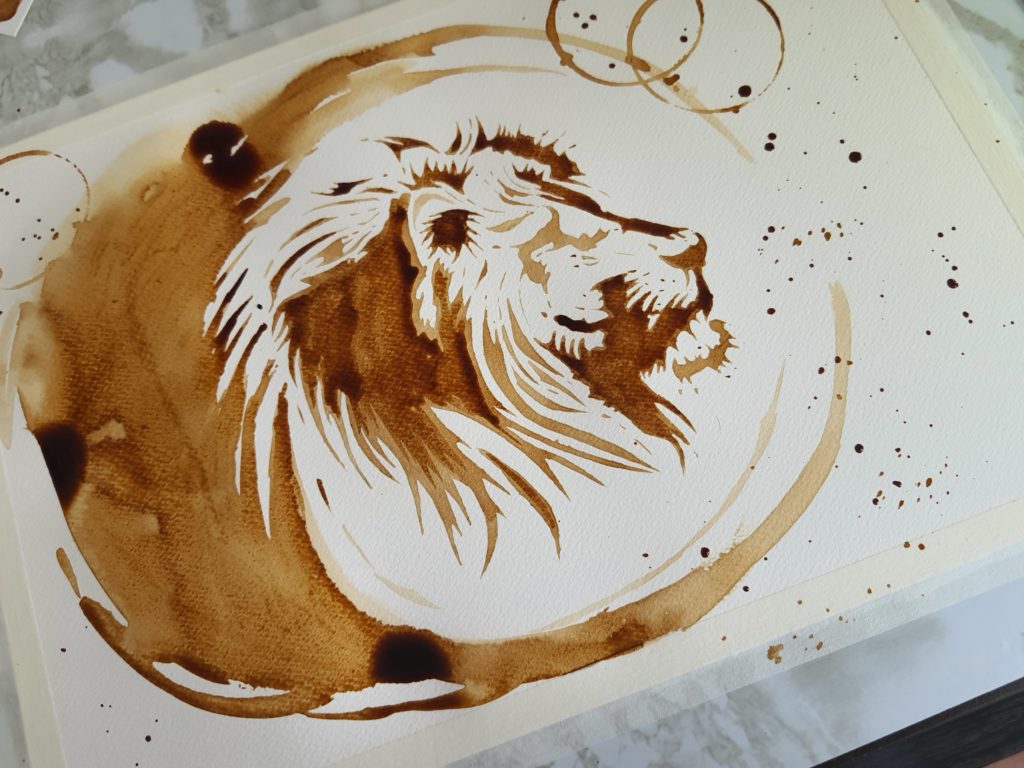
Use your second or medium strength coffee “paint” mix, and a spoon, to create a ring around your lion, use the spoon to smooth out the coffee onto the paper. I also used the back of the spoon to add some lion’s mane. I then used the flat brush number 10 to add details and smooth out the ring around the lion’s head.
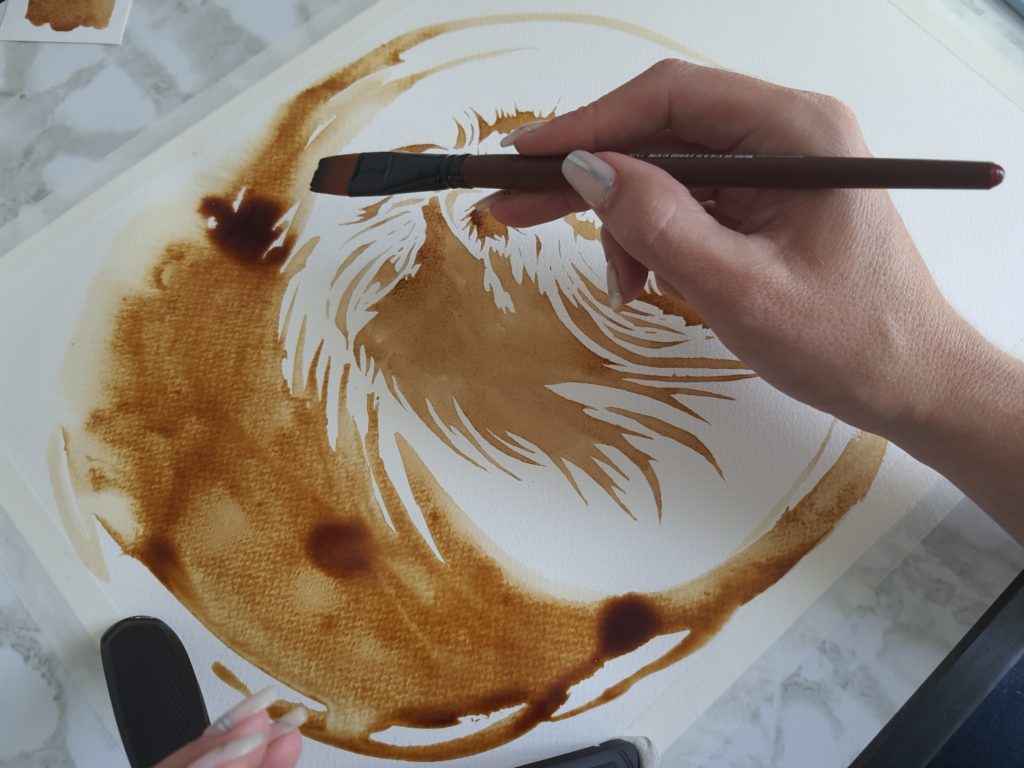
Use the flat brush, coated with coffee. Lightly tap onto the brush to add some splatter onto your picture, focusing on the outside of the picture.
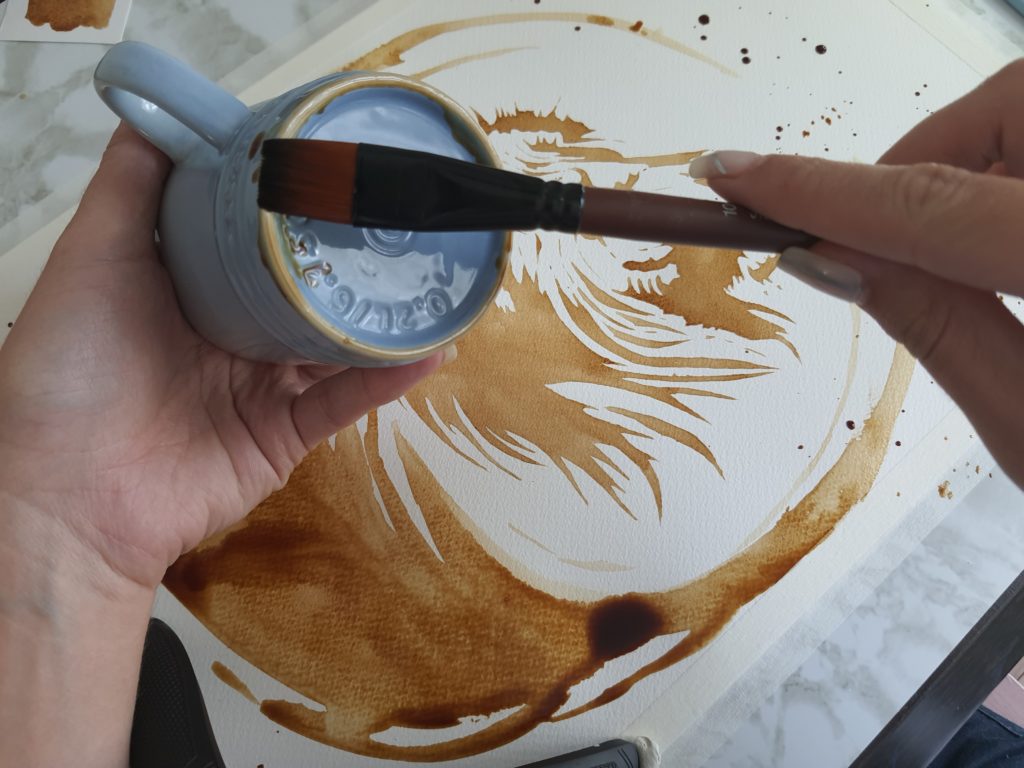
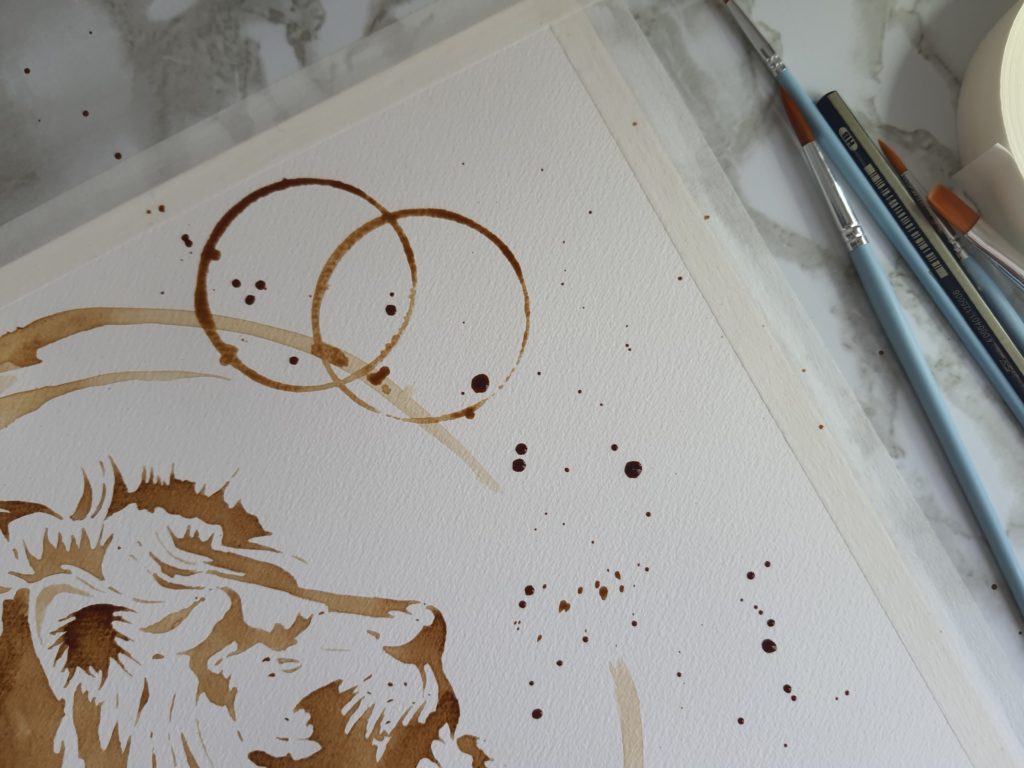
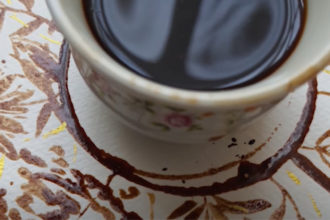
Use any coffee mug, coat the bottom with coffee and add some “ring marks” to your painting. You can place these at random.
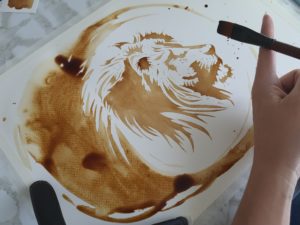
Make sure that your painting dries completely before continuing with the next steps.
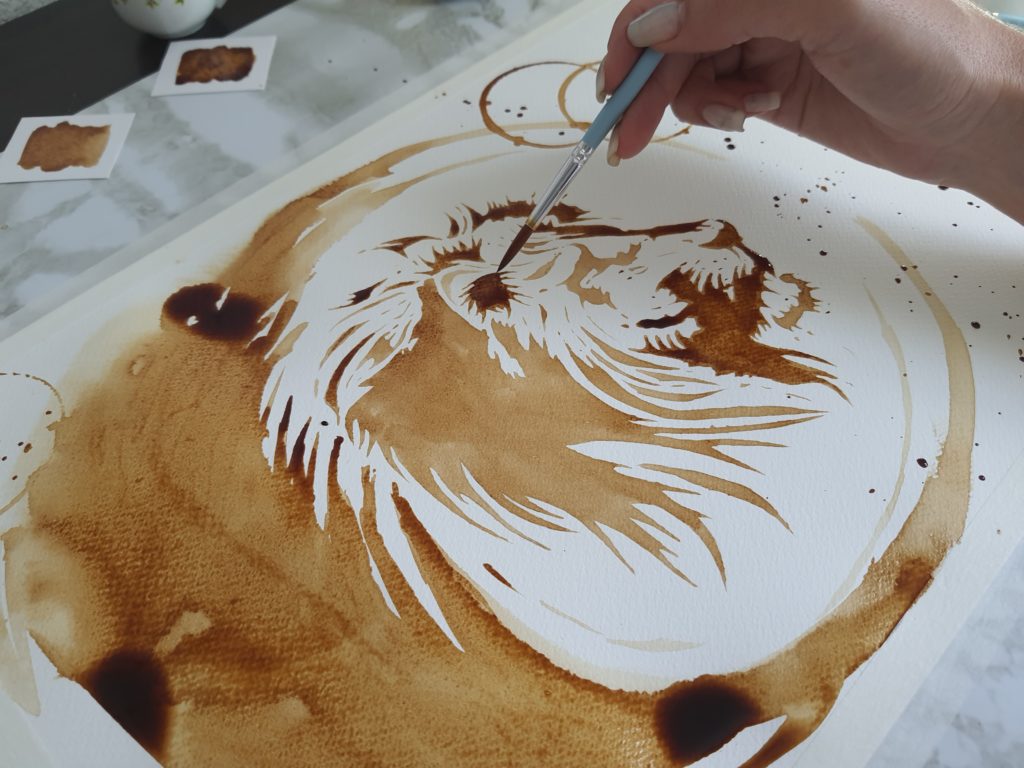
Use your medium-strength coffee “paint” to add some darker definition to your lion’s face. Ensure you leave some lighter areas to create interest. By layering the darker paint onto the lighter paint, we will create definition and a bit of interest.
Leave to dry completely.
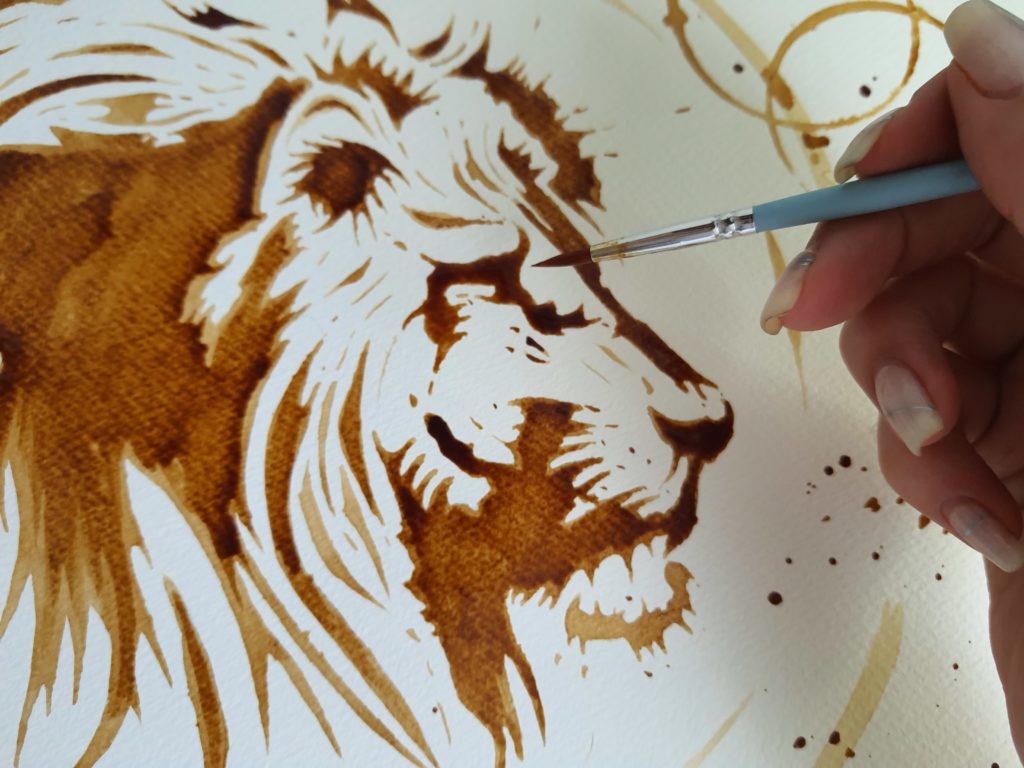
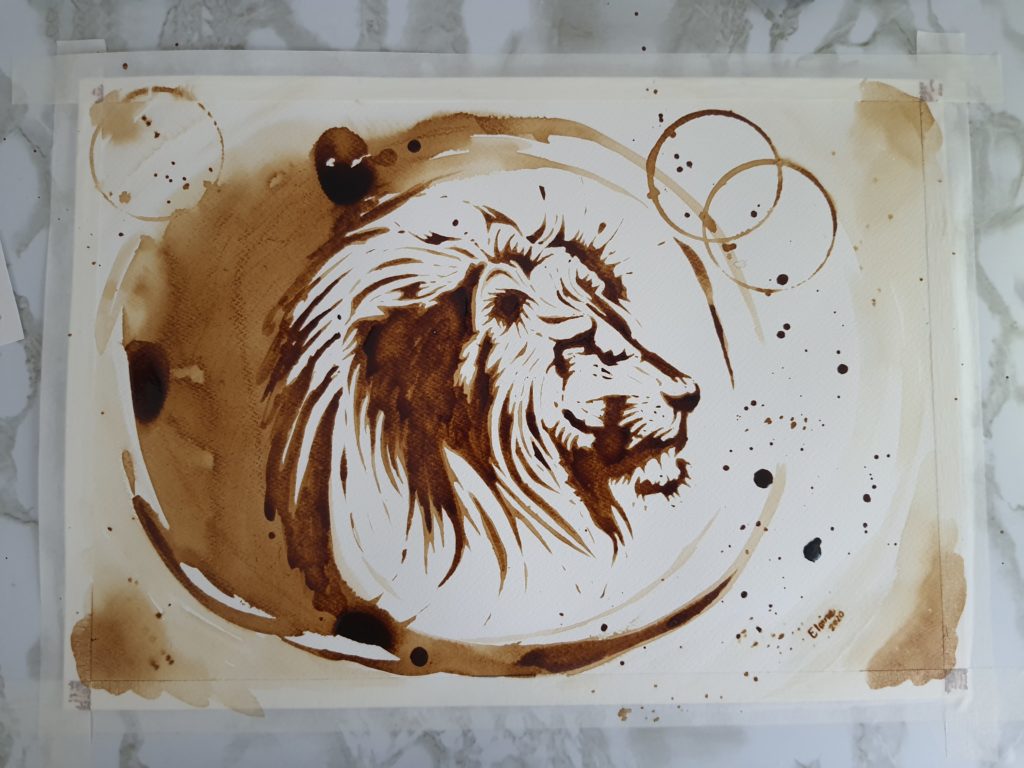
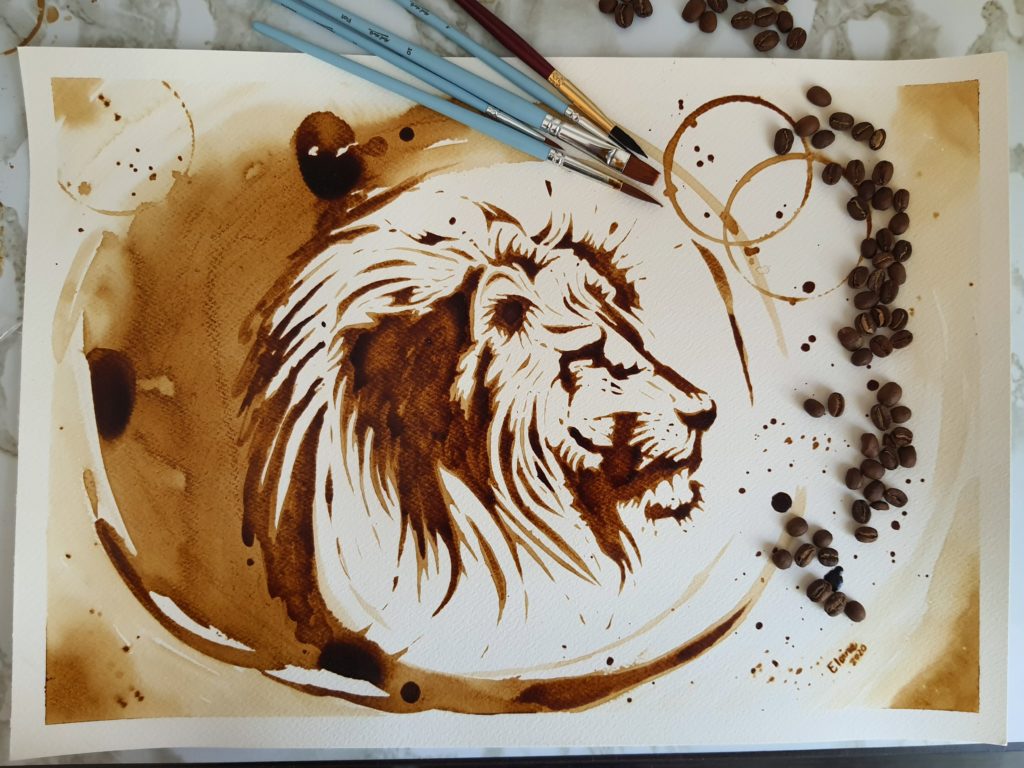
Finally, finish off your painting by adding some darker details to your lion’s face and mane with the darkest mix of coffee “paint”. I also added some shading into the corners of the painting with the lighter coffee mix.
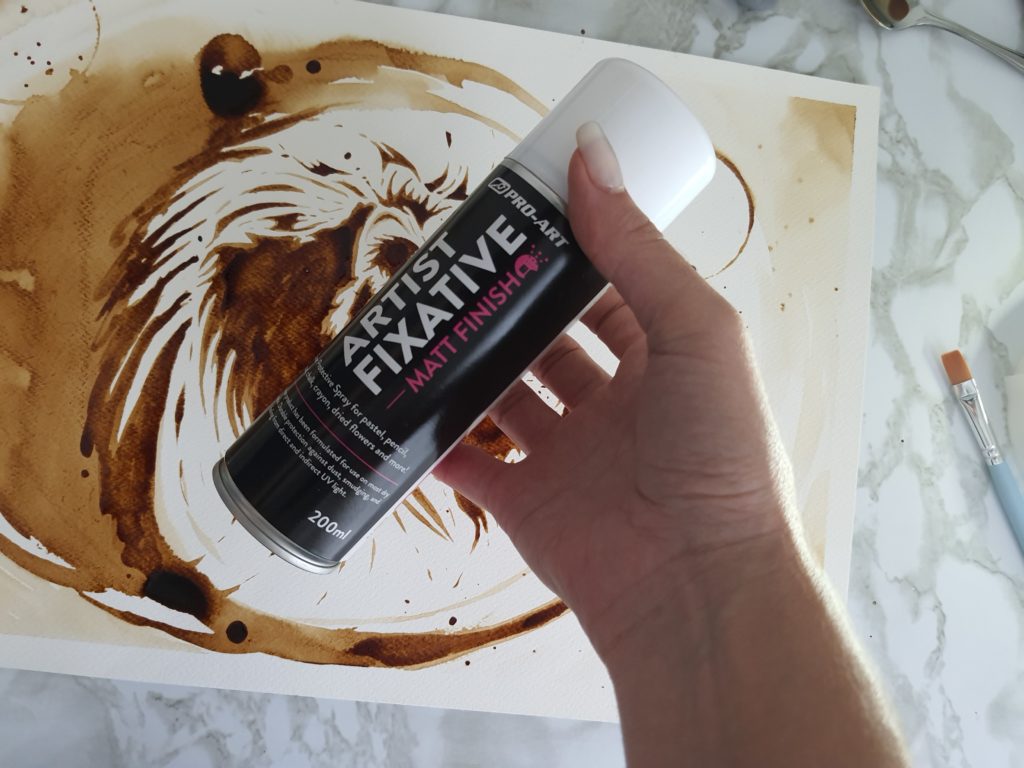
Once your painting has dried for a few hours, you can remove the tape and spray with a fixative spray to set your painting.

Follow Elaine on:
Facebook: Elaine Solms Art
Instagram: @elaine_solms_art
Email: [email protected]