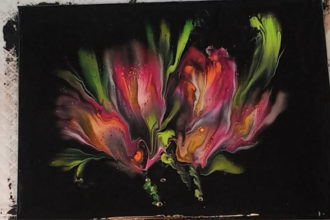
Dutch Pour by Bernadette Liedeman
Dutch Pours give a splash of colour to your canvas using a blowing tool to get its unique effects. A blowdryer/mini blower/straw or tubing can be used to get the feathered petal look that is loved by so many in the fluid art space.
You will need to mix your acrylic paints to a very thin consistency using a pouring medium to prepare. A cost-effective pouring medium is white craft glue mixed with water. This pouring medium is then mixed with your paints plus a squirt or two of additional water to get each colour to the same consistency (this is important). Every colour, including the base colour, must all be the same consistency (flow)
You will need a base colour. Any complimentary colour of your choice will be fine. In this video, we have used white acrylic paint for the base colour.
Ensure that the canvas is LEVEL. Another important factor. If you don’t – your paint will slide right off the canvas! It is fluid art, after all!
Now to start the process, you will need to spread your base colour onto your canvas, ensuring that the sides are also covered
Using a butane torch – pop the air bubbles that appear on the surface. Please keep the butane torch moving at all times so that you don’t risk burning your paint.
Now it is time to layer your colours. 4- 7 complementary and contrasting colours are sufficient. Use light and dark shades. You can use metallics in the mix as well.
Layer the colours dark, light, dark, light. Once the colours are layered, you need to give it a torch. This aids in popping air bubbles in the paint as well as to promote the formation of cells and lacing – an effect that assists with the overall look of your final product
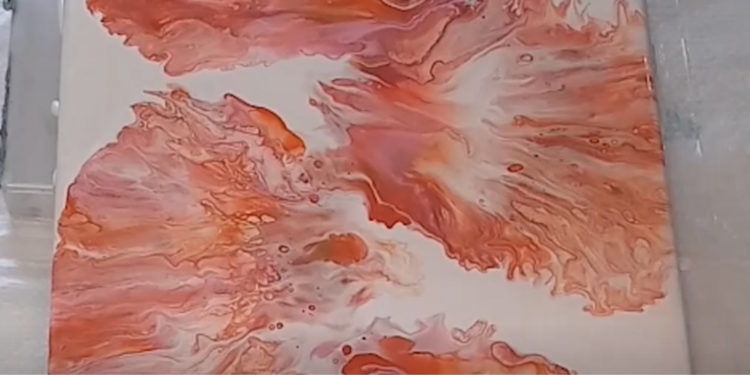
Now – its time to use the blow dryer. 😊 You will need a blow dryer of 1800W or higher to move the paint.
Keeping it on a low speed at first and on a warm or cold setting, start from up high, moving the blow dryer closer to the paint. Once the paint starts to move, that will be your perfect level to hold the dryer. Don’t go too close, or you will end up blowing all your paint off the canvas.
Keep moving the blow dryer steadily across the canvas – move your paint in the direction you want to create your petals. Do this slowly – there is no need to rush.
Once you have completed this step – take a moment to assess your design
You can now use a straw or tubing (used in aquariums/fish tank filter pipe) blow gently along the edges of your petals to improve the composition if needed
Give a final torch – then run your fingers along the canvas’s underside edges to remove all the drips. Do this another 2-3 times every 5-10 minutes.
The painting will start to dry from the outer edges to the centre.
Now sit back and watch your painting dry. 😊 This is the fun part. 😊
WARNING – DO NOT TOUCH THE PAINT WHILE IT IS DRYING.