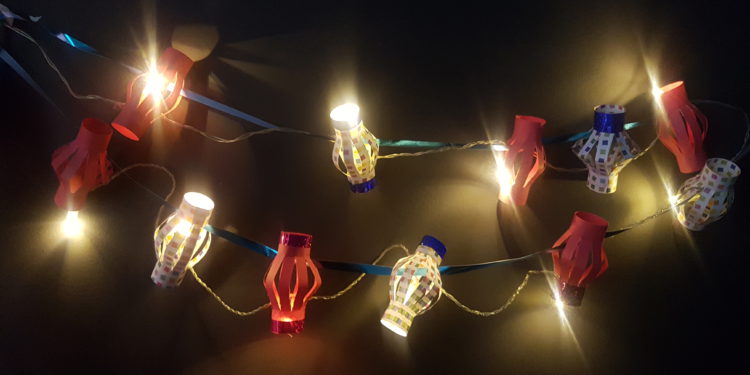
With the holidays around the corner, the race is on to throw the best party of the season! Decorate your outdoor area without delving too deep into your pocket and make your own DIY paper lantern garland using only PNA goodies. It’s easy, cheap and looks just darling wherever you decide to hang it. Let’s get started!
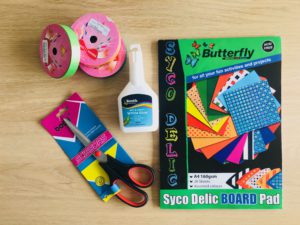
You’ll need:
- Coloured board
- Scissors
- Ruler
- Pencil
- Glue
- Ribbon
- Optional washy tape for decorating
Steps to follow:
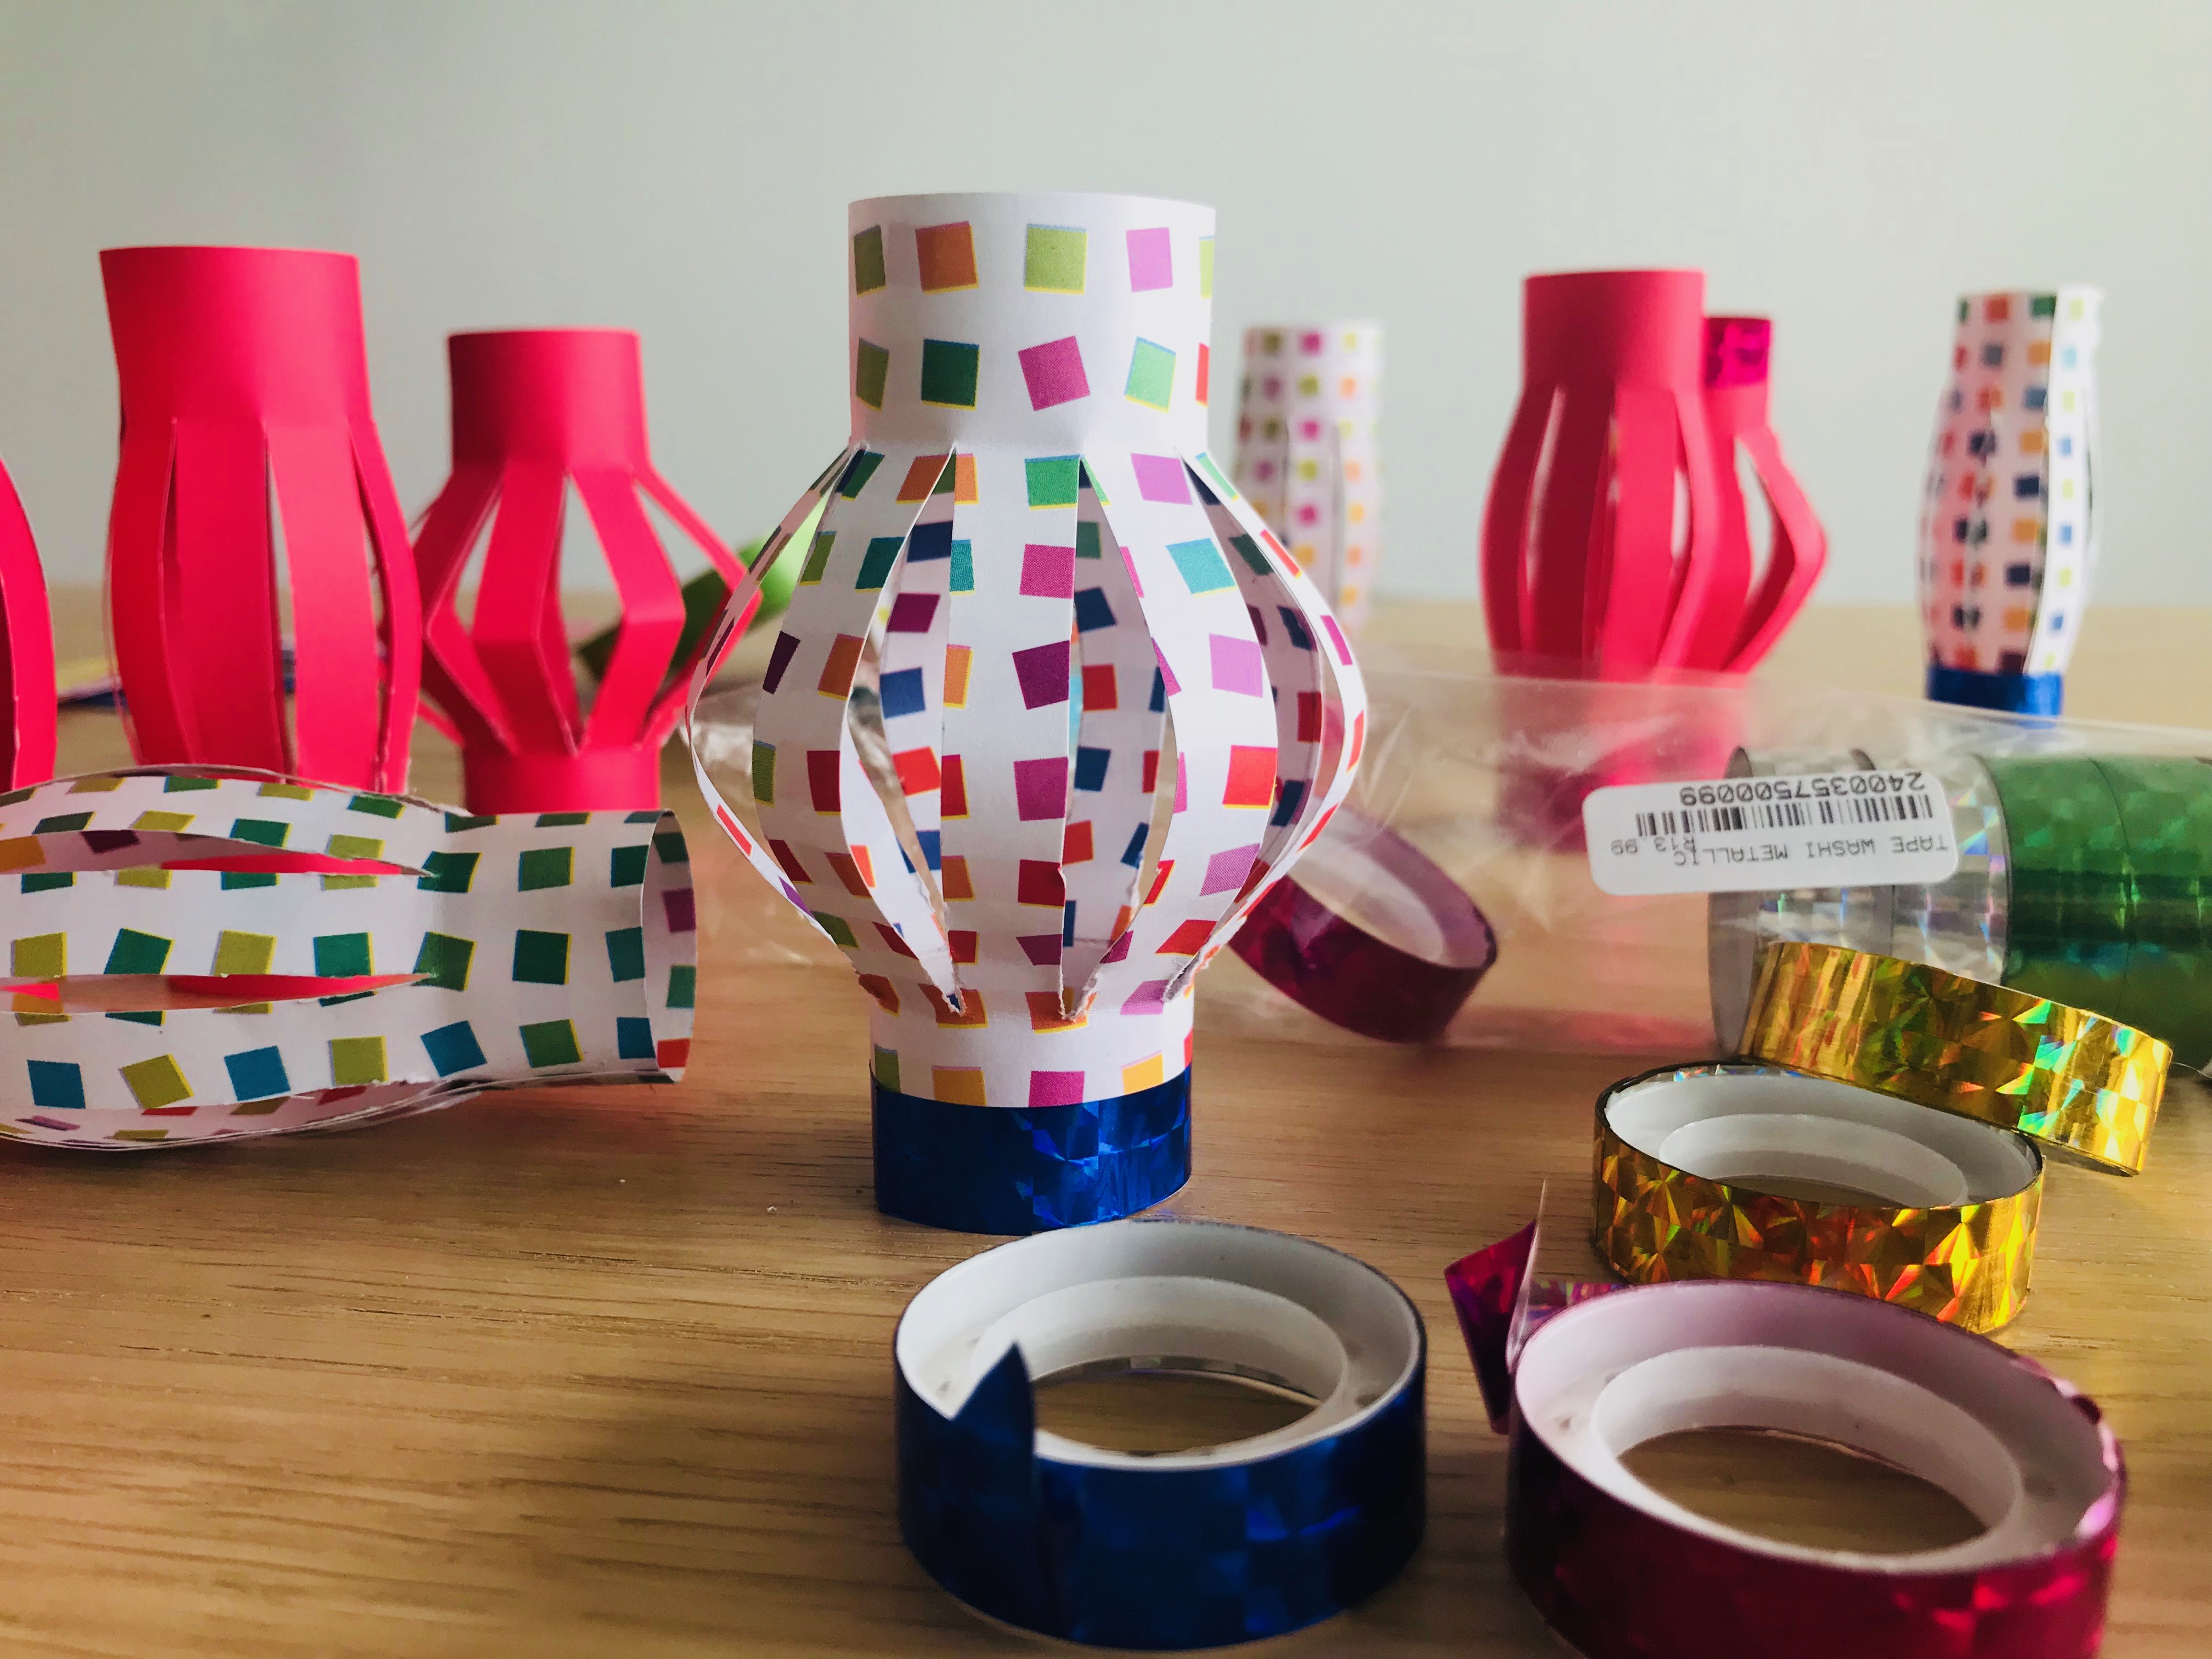
- Cut the board 10cm x 10cm squares.
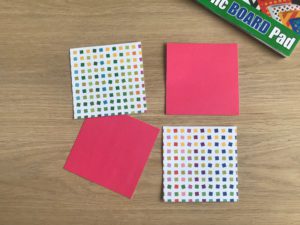
- Measure and mark a line 2cm on one side and repeat on the other.
- Measure and mark every 1cm along the lines.
- Draw a line down the board to connect with the mark on the opposite line.
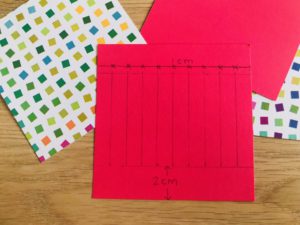
- Cut on these lines. It doesn’t need to be perfect. 😊
- Fold the board on the 2cm line.
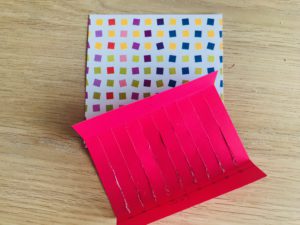
- Wrap the board around and secure with glue.
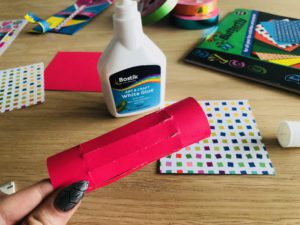
- To shape the lantern, slowly press down on the top and shape the petals.
- String all the lanterns together and hang outside or inside to give your space a touch of whimsy.

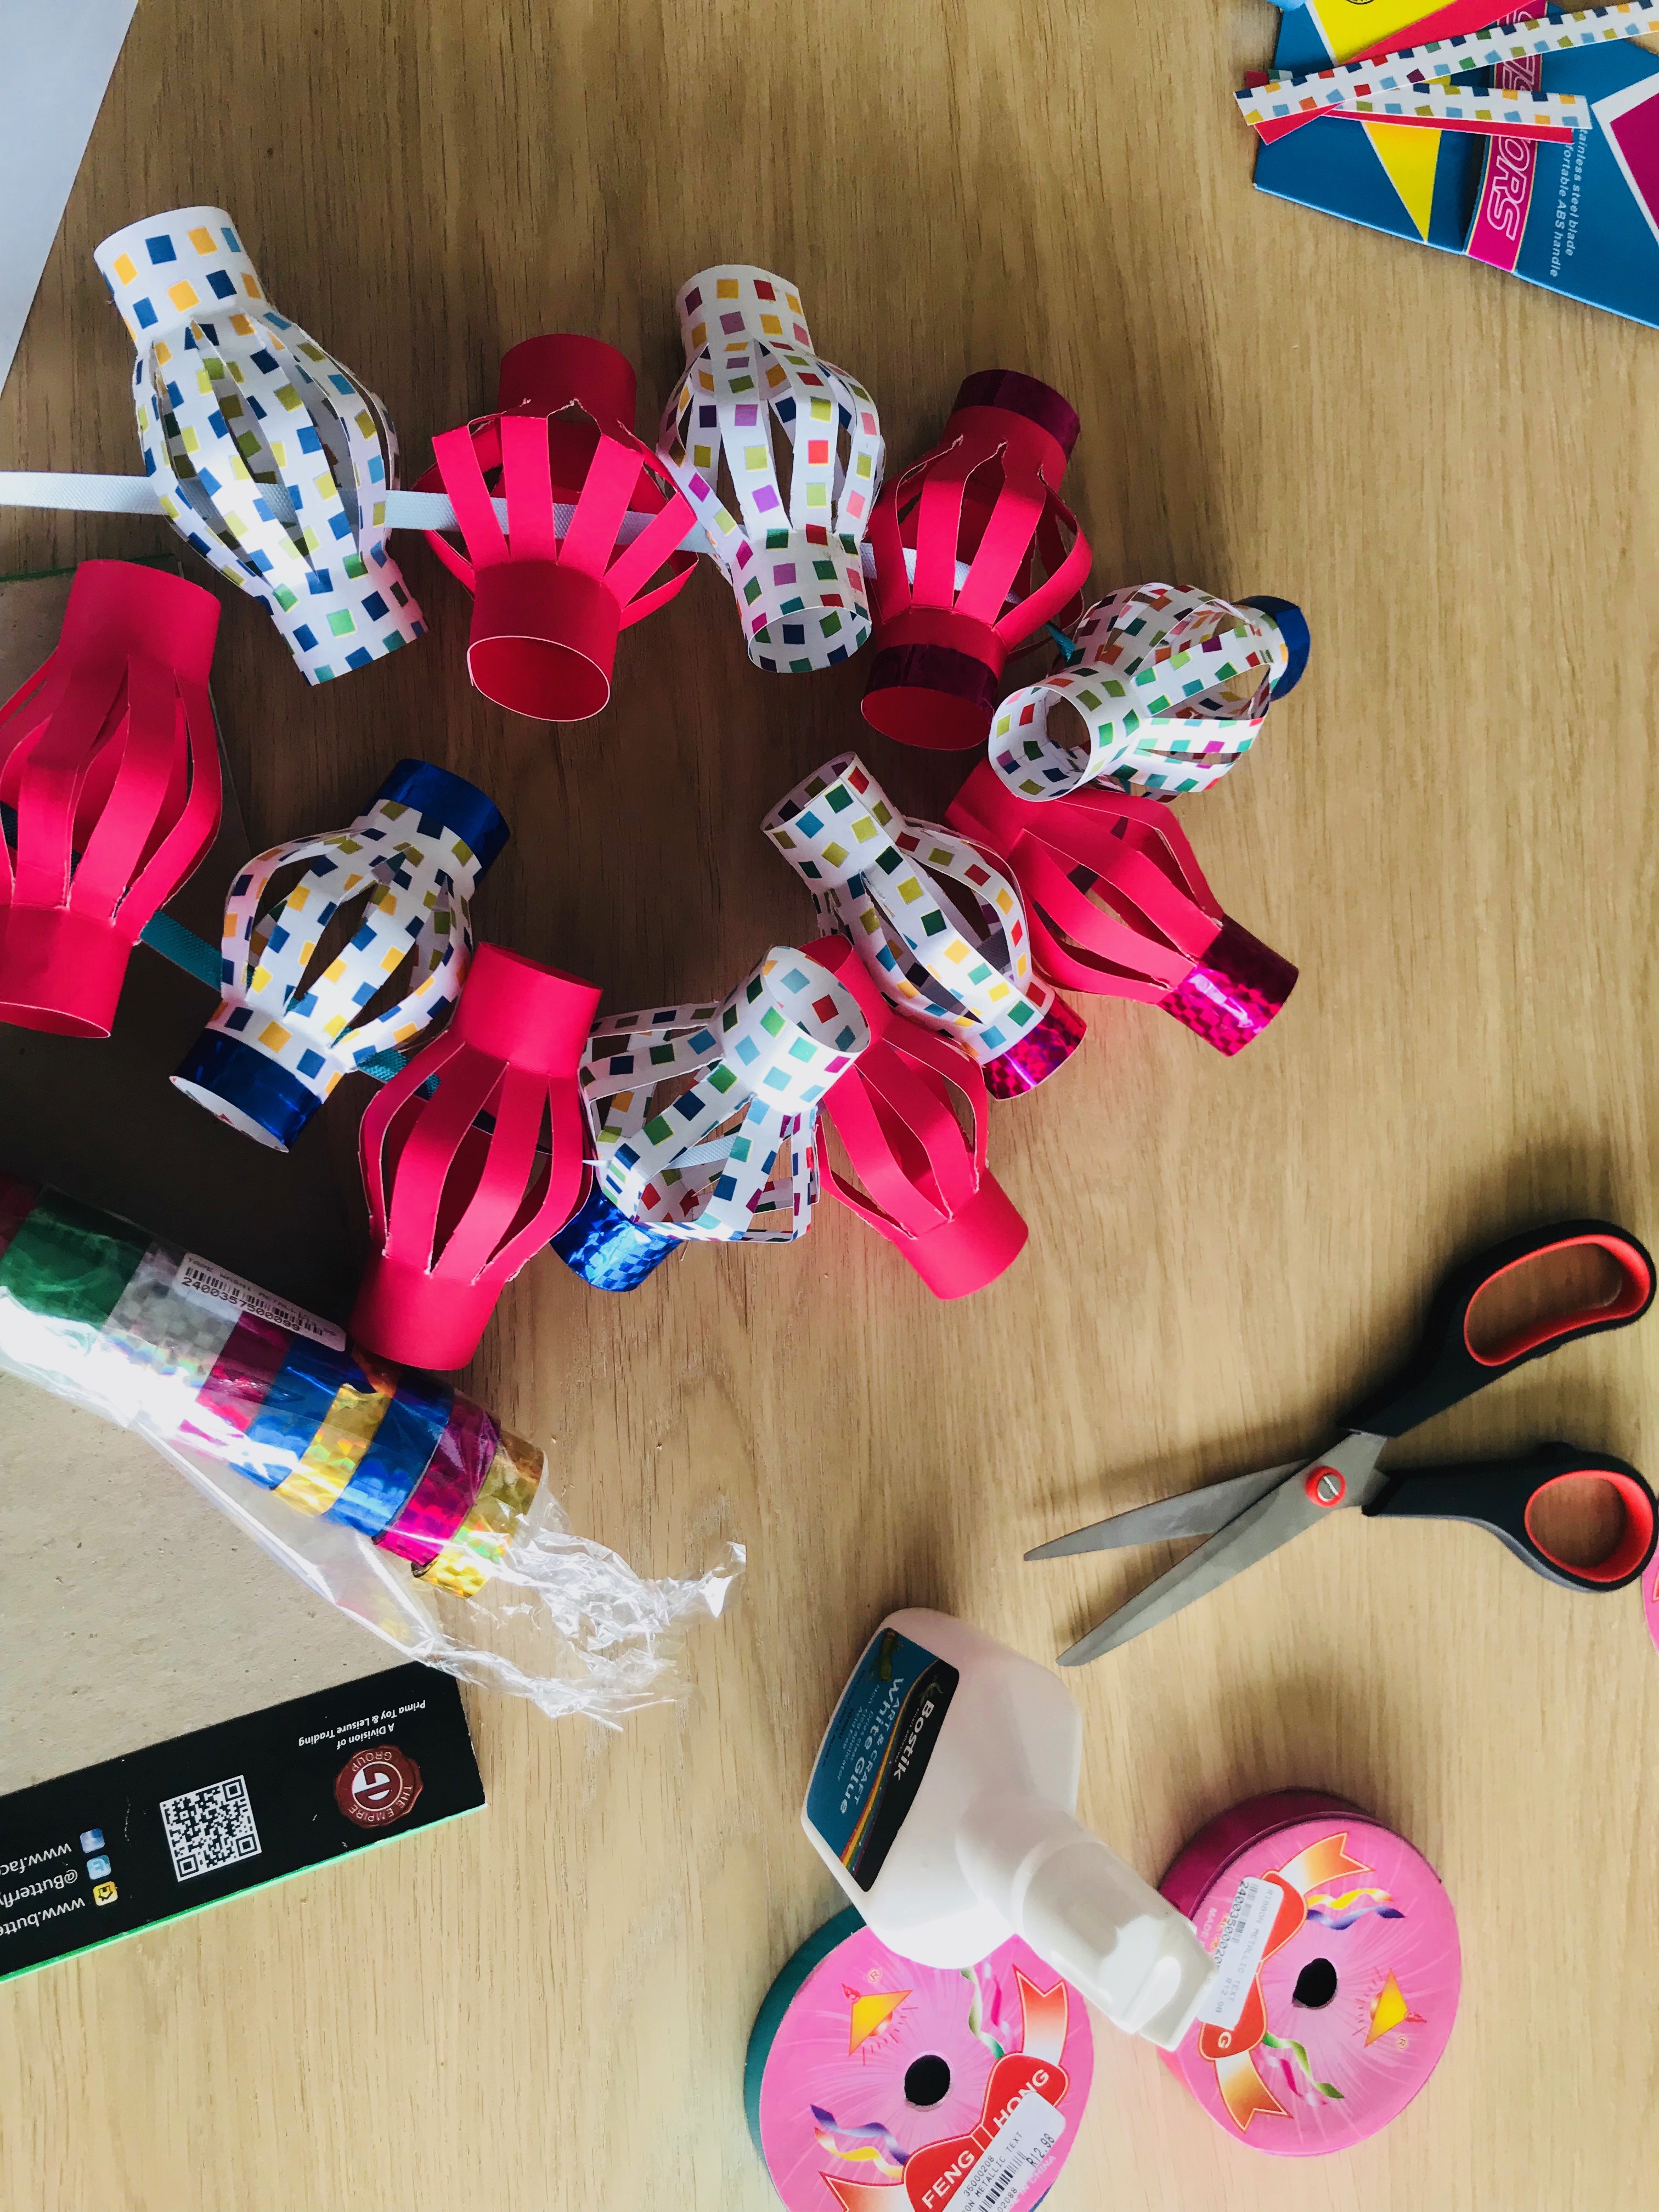
Decorate your lanterns any way you want to! We used some metallic washy tape around the bottom to give the garland some extra whimsy. What do you think?
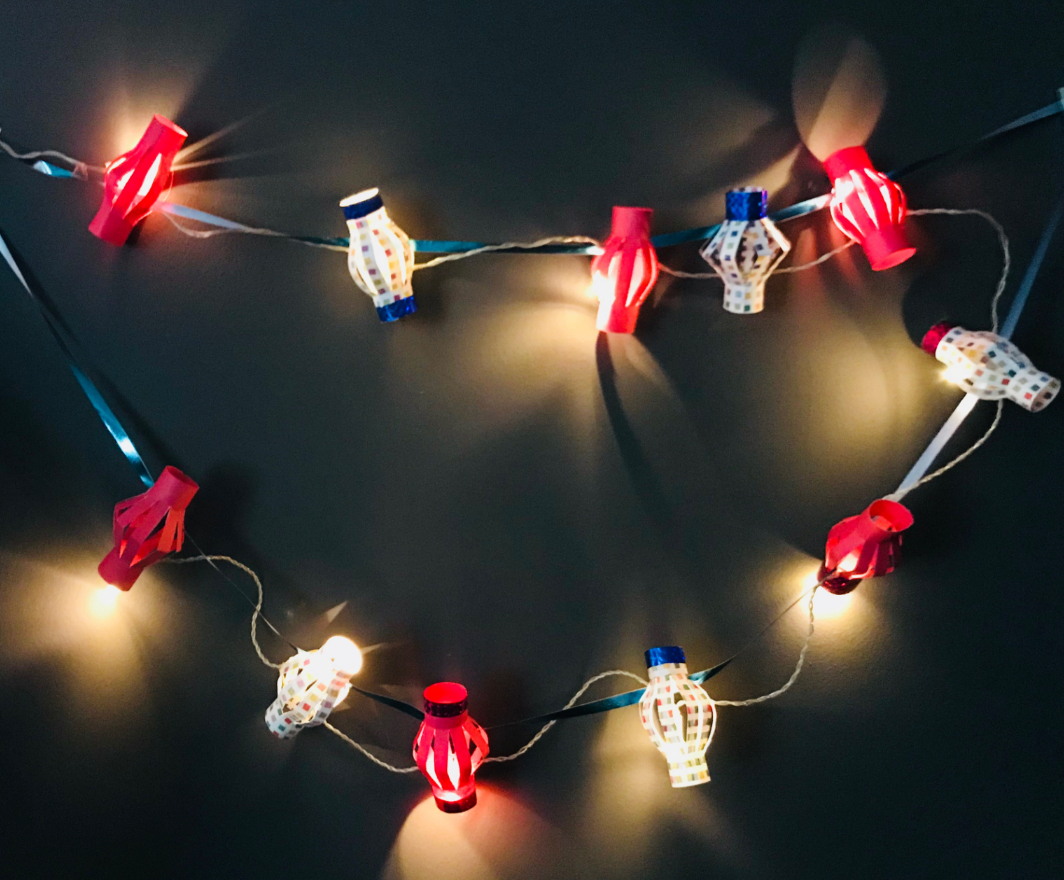
So, grab your ruler and some coloured paper and get crafting! These garlands are perfect for brightening up any outdoor area, be it for a casual family gathering or a spooky affair. Change up the colours to fit any theme or add fairy lights for a magical feel.
Be sure to head over to your nearest PNA store and stock up on all the goodies you need to make your own garland. Click here for more.
Follow us for more DIY projects, product releases, promotions and competition giveaways on our social platforms.
Facebook: www.facebook.com/pnacolouryourworld
Twitter: @PNASouthAfrica