Clay Sculpture with Charlene Potgieter
You will need:
- Glass bottle
- Air-dry clay
- Polystyrene ball (I have also used Christmas baubles)
- Paper (newspaper or paper packet etc.)
- Black craft/acrylic paint
- Red craft/acrylic paint
- White craft/acrylic paint
- Glue gun
- Paintbrush
- Rolling pin
- Sculpting tools: (You can use spatula, spoon etc.)
- Baby Powder or Cornstarch to sprinkle on work surface (Not a necessity)
Method:
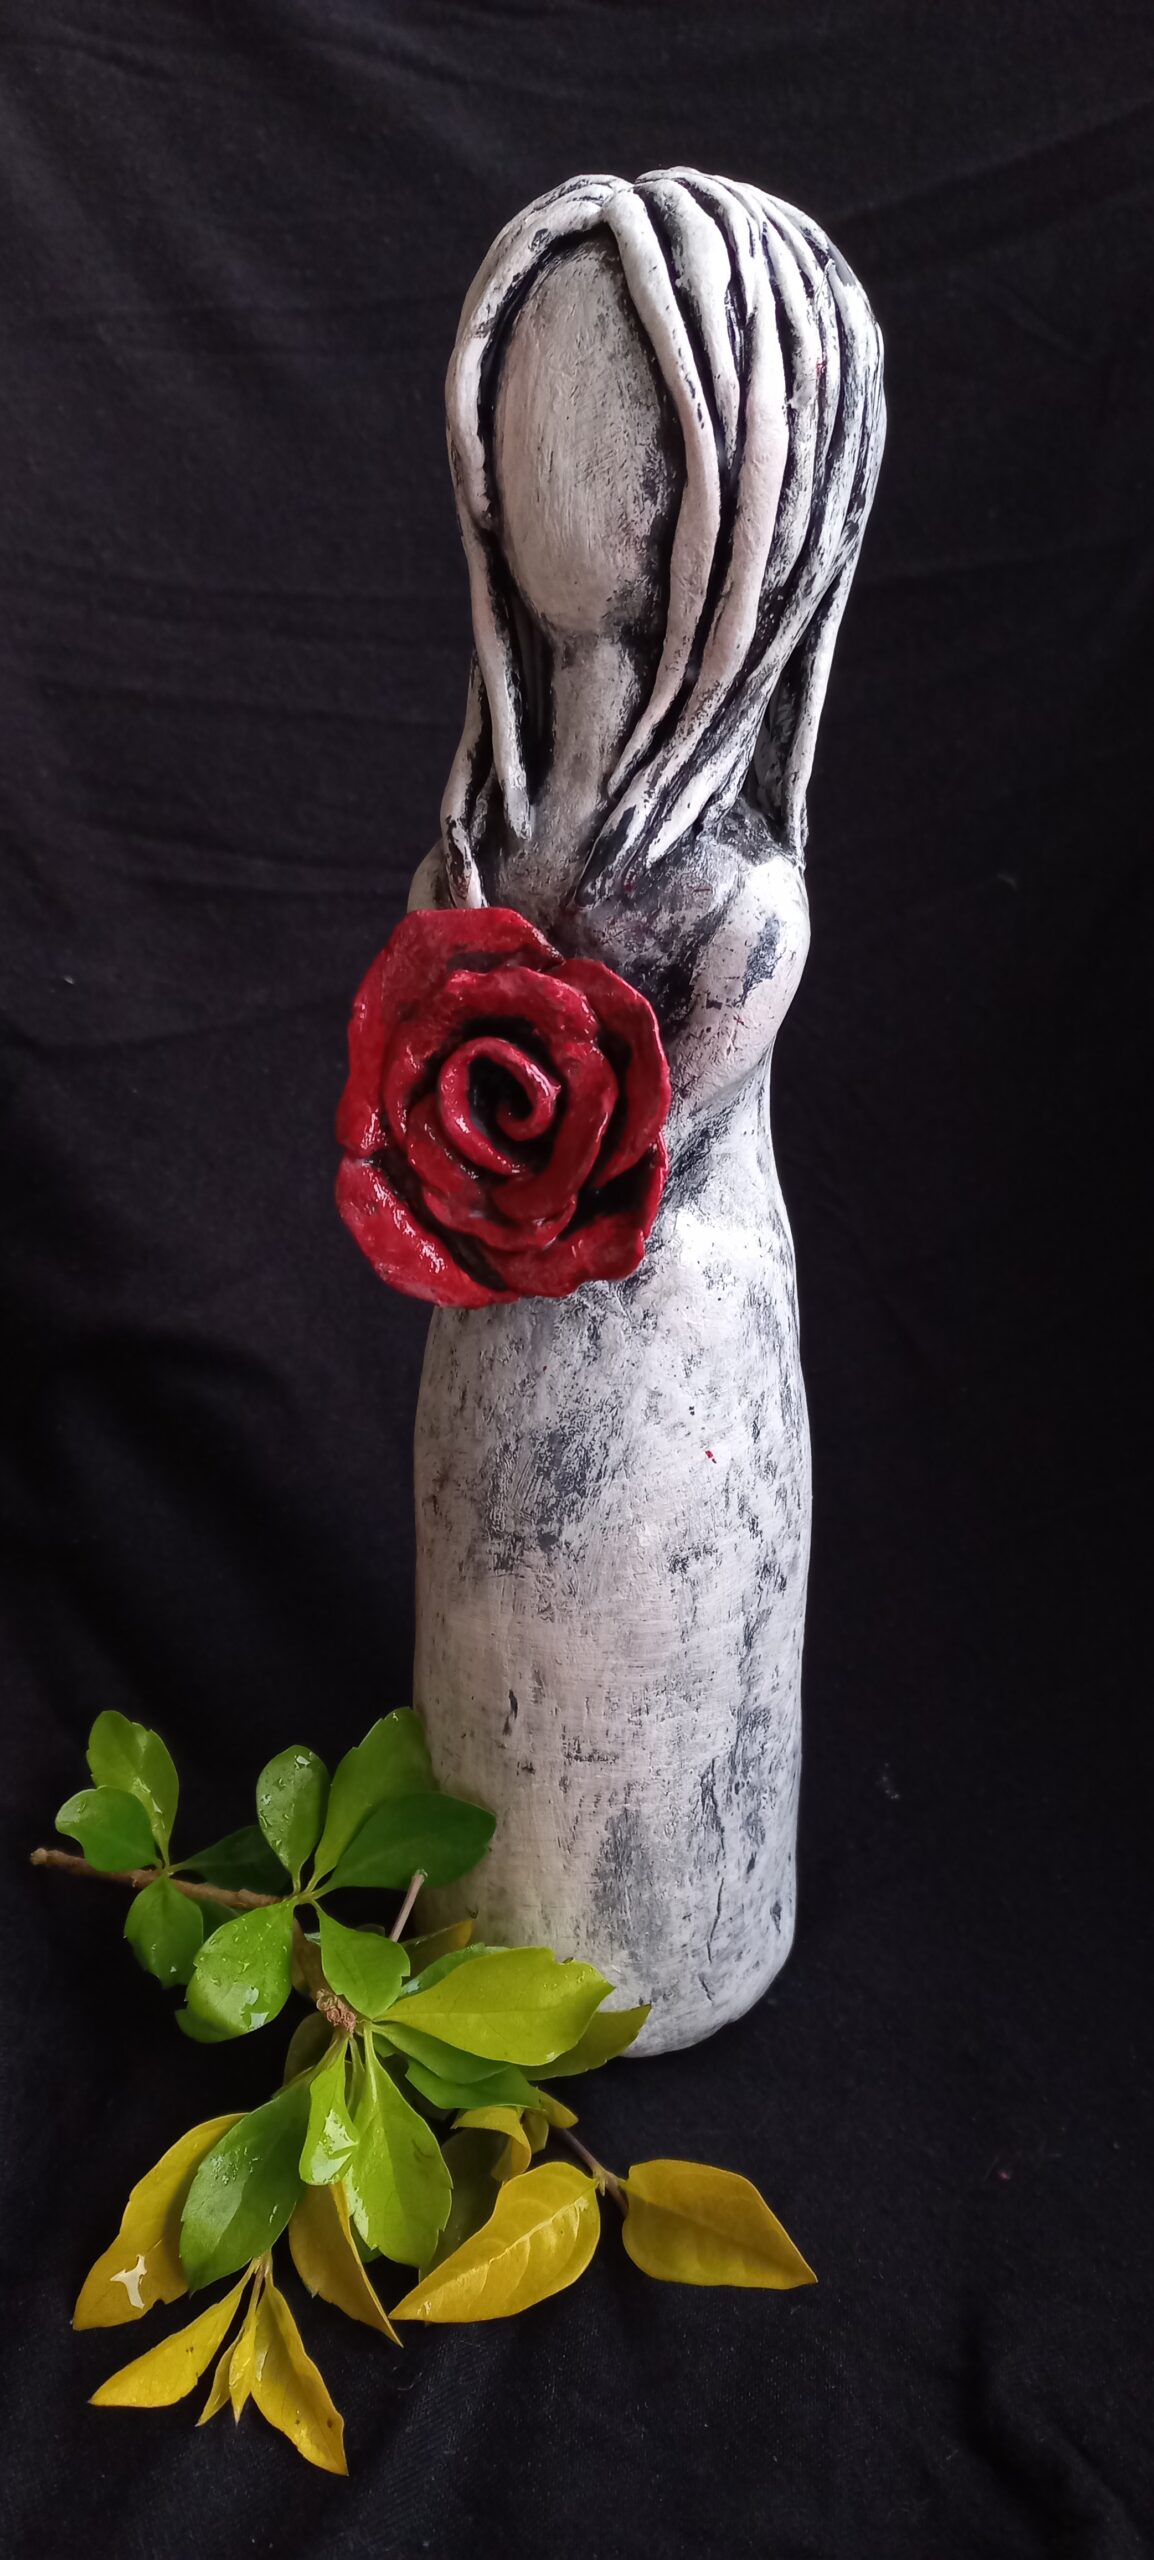
- Wrap the poly ball using paper to form the head and neck.
- Stick inside bottle opening using a glue gun.
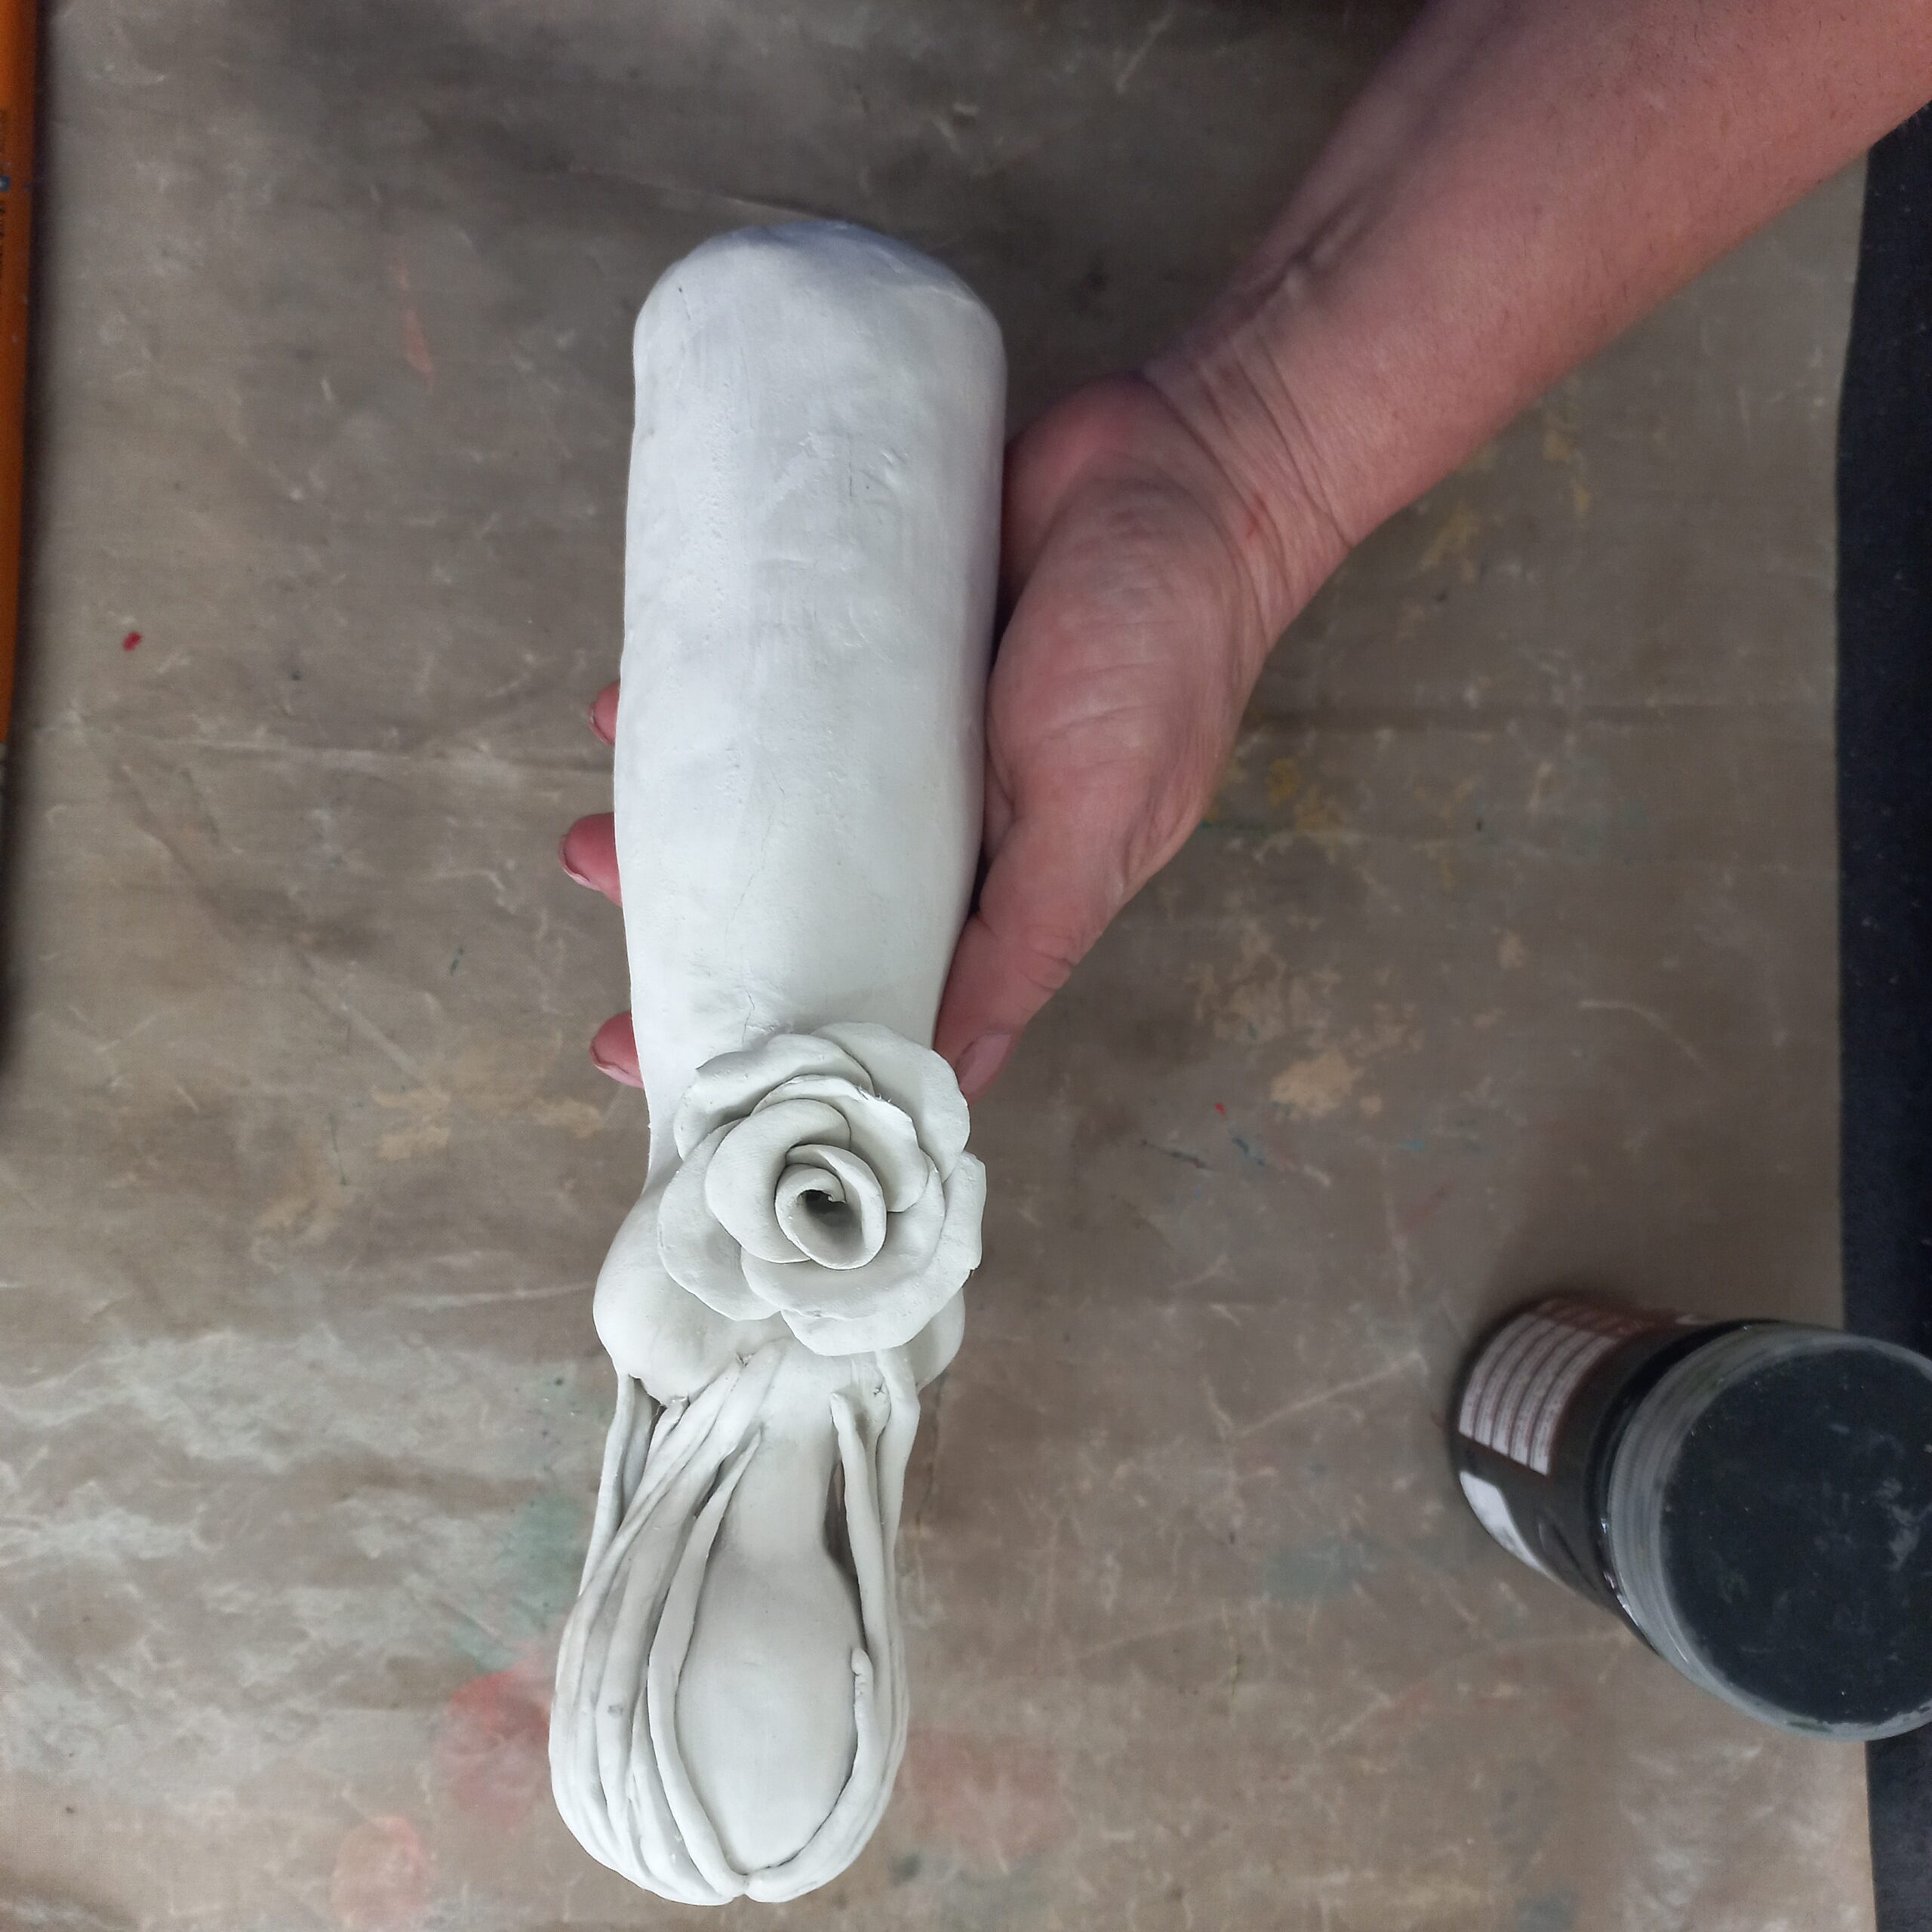
- Roll out enough clay to cover the head and neck. Shaping the clay with your fingers or tools. Whatever works best for you. Dip your fingers/tools in a bit of water to help smooth out the clay.
- Roll out clay for the shoulders and body and sculpt around the bottle.
- Add hair by rolling thin pieces of clay.
- Add arms in the same way.
- If you need to stop working at any stage, simply cover your piece with a damp cloth until you are able to work again. This will prevent the clay from drying out.
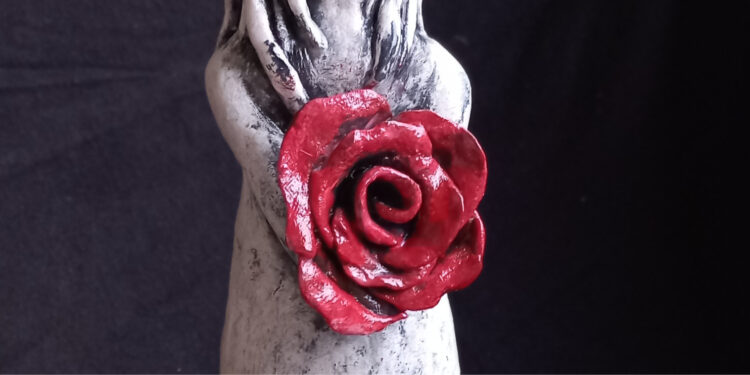
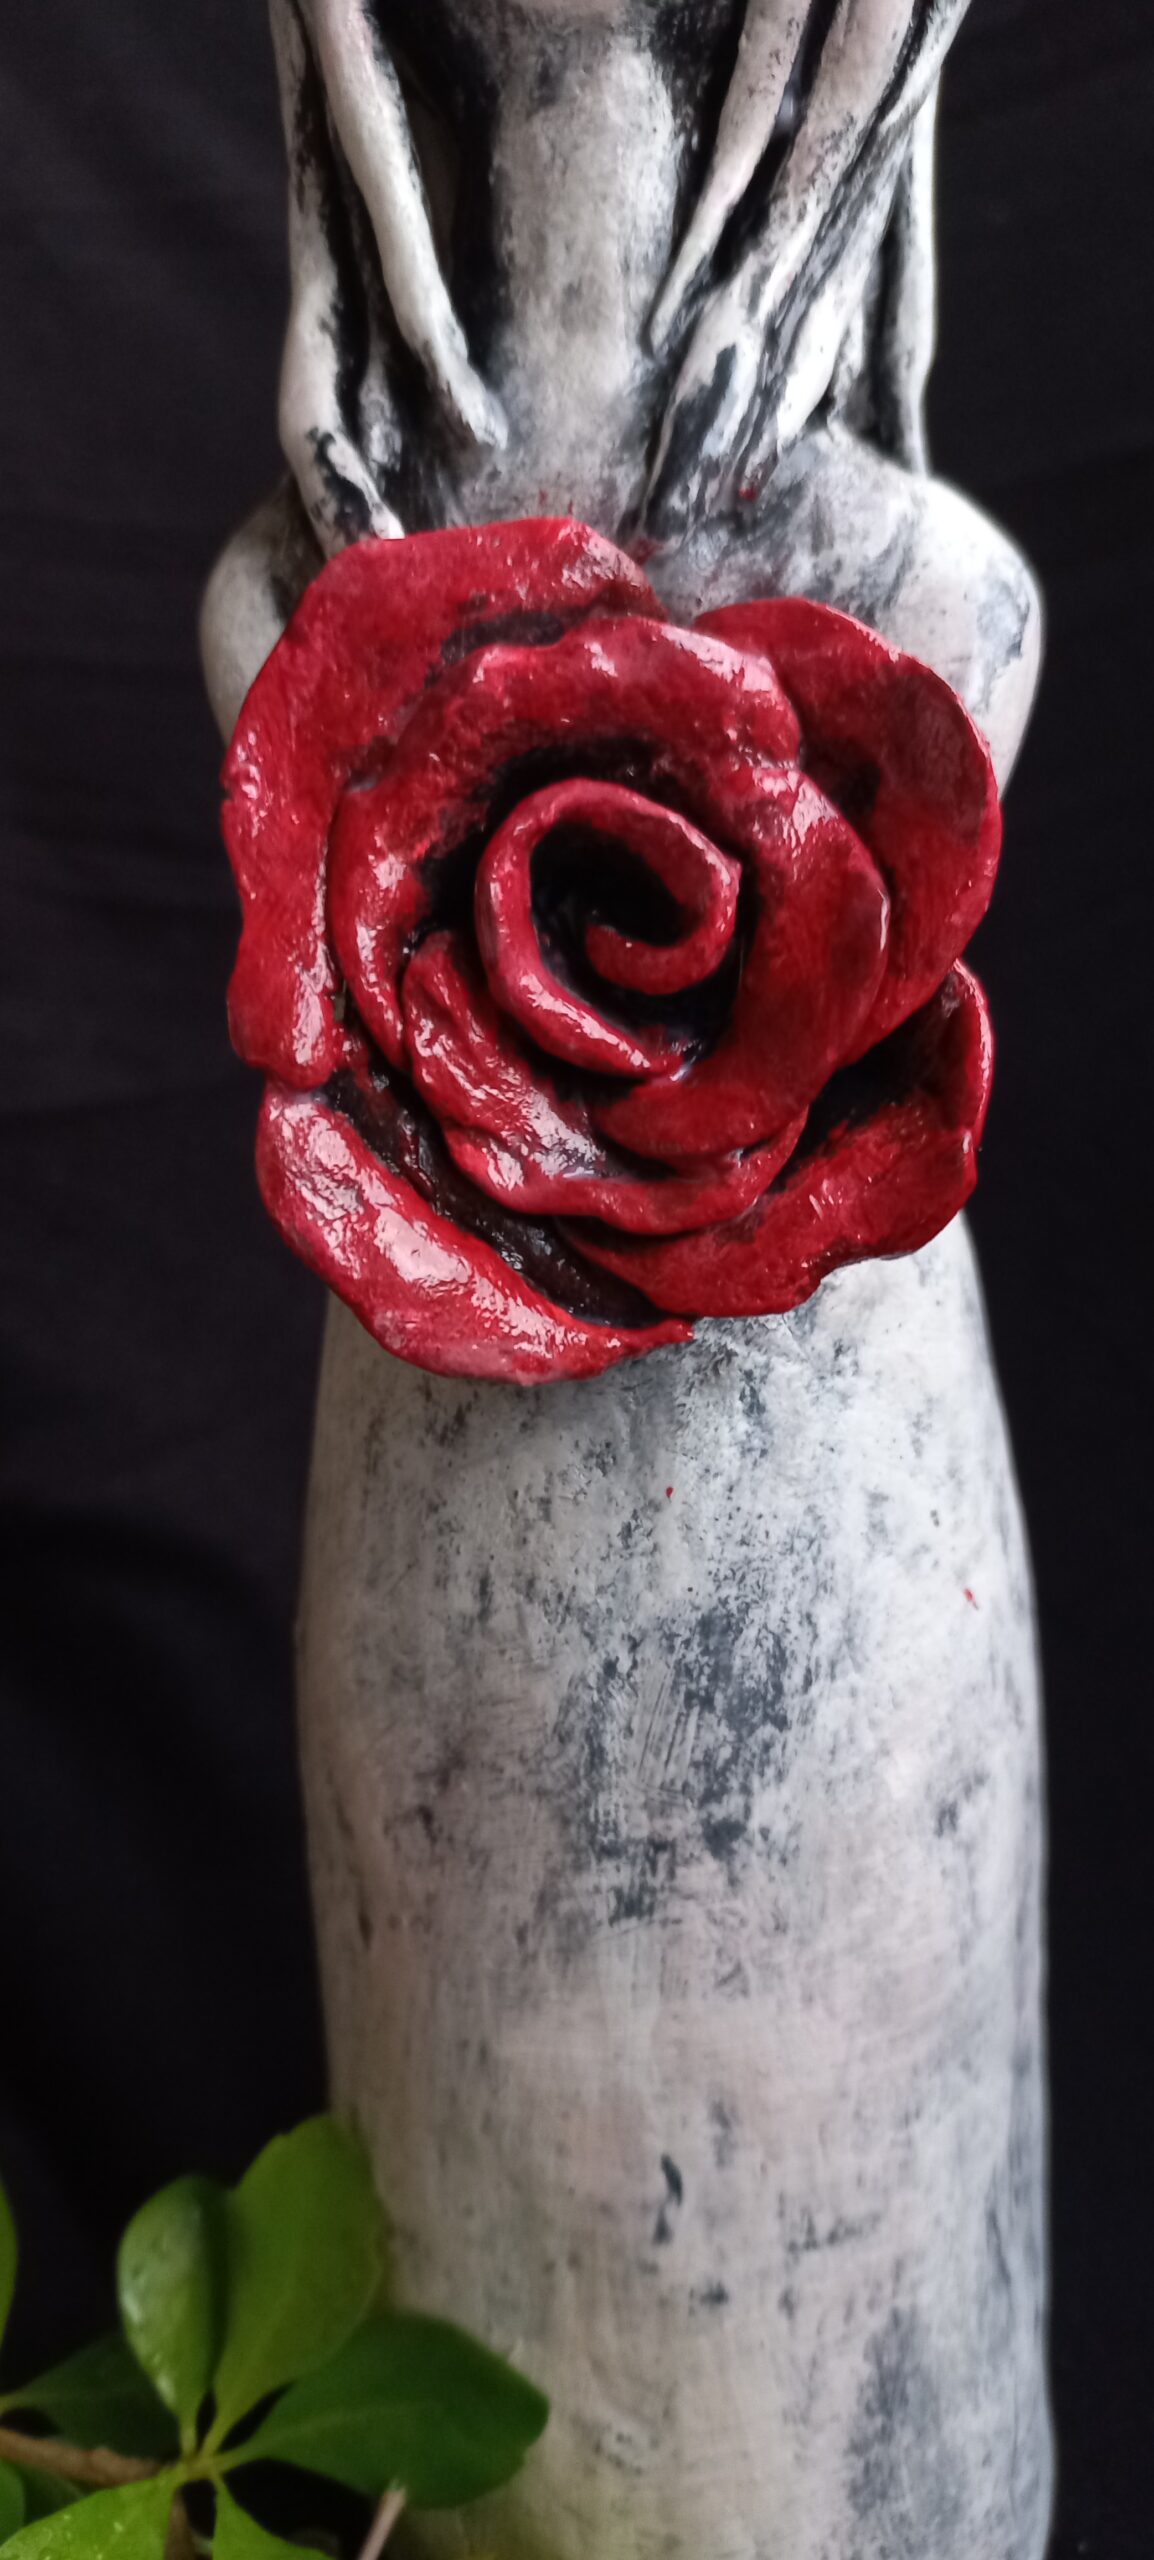
- Sculpt the rose as per the video and add it to your sculpture, (Use a toothpick/sculpting to roughen the area before placing the rose there. You can also add a bit of white glue to make it more secure if you wish.
- Leave to dry.
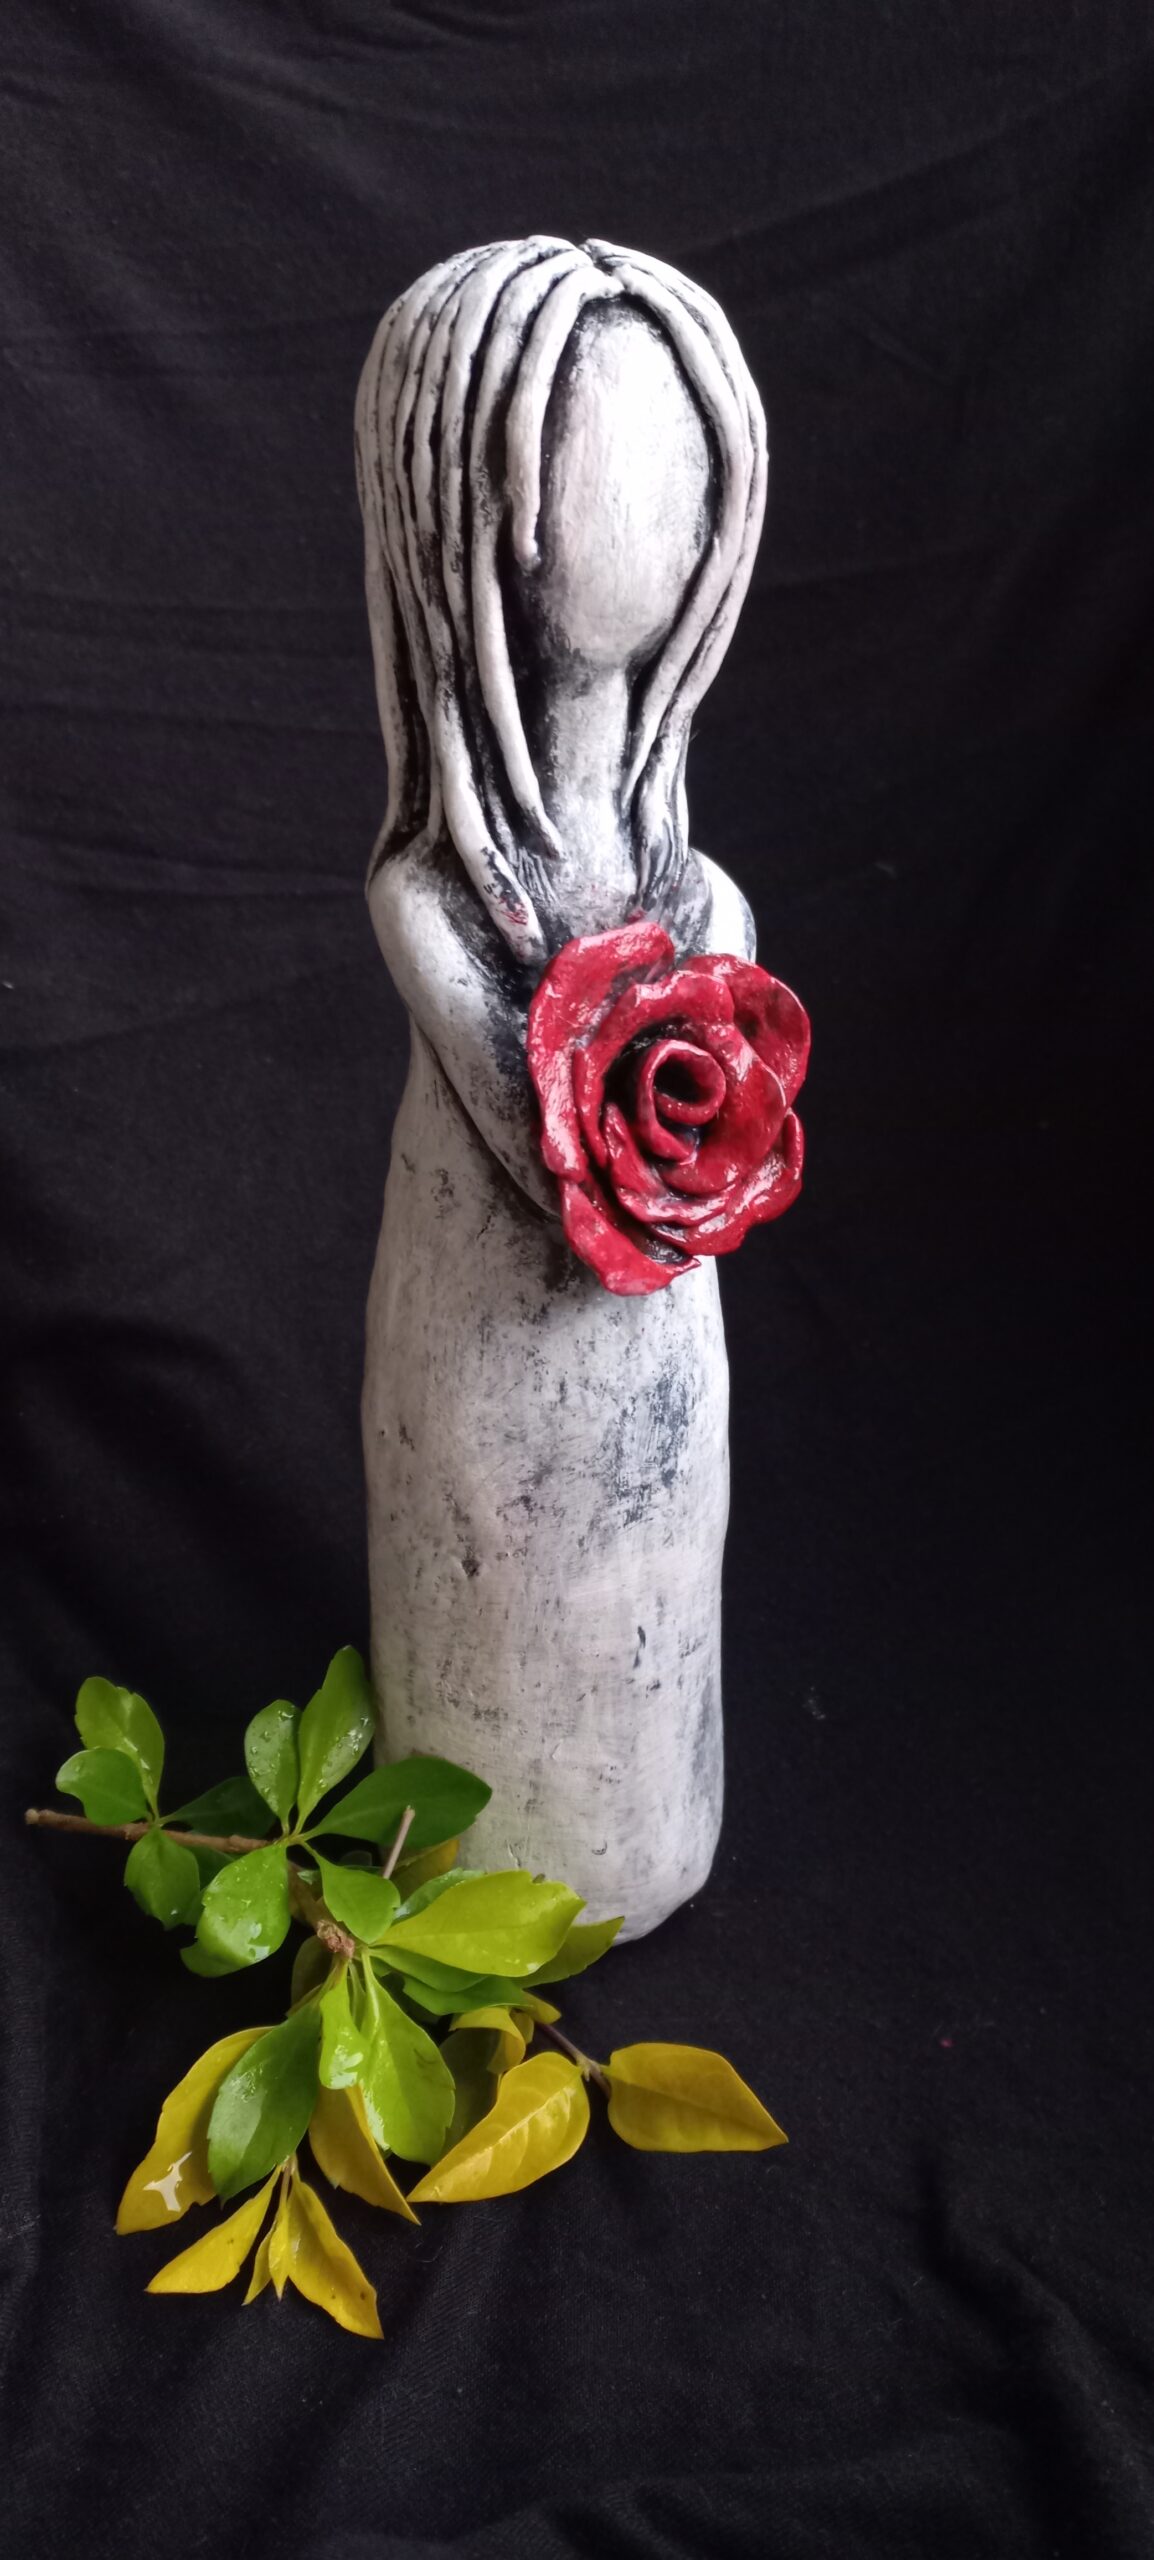
- Paint the entire sculpture black.
- When black is COMPLETELY DRY,* Dry brush entire sculpture white. You can add layers of white until you are happy with the look. Dry completely between each layer.
- Dry brush the rose in red. You can also add a lighter red/orange for some highlights. (Remember to wait for each layer to DRY COMPLETELY before doing the next.
- (*Dry brush: Use a dry brush and dip into a small amount of paint. Remove access paint on a paper towel or cloth. Then lightly brush over your piece. “painting” only the risen areas)
- You can varnish your sculpture if you wish. I would recommend a water-based varnish. This is just easier to clean brushes etc. However, you can use a polyurethane varnish as well.
- Please remember to have fun! When I teach any creative workshop, I ensure that my students know “there are no mistakes”. We simply call it a “new technique”, Lol. Stop and walk away for a bit if things don’t work as you would like it to. Remove the clay and start again. Paint over anything you are not happy with….you see what I’m getting at here? You are welcome to reach out to me if you need any help. Im on Facebook and Instagram as Kreatief My Lief. Or email me at [email protected].
I hope that this inspires you to make more lovely clay sculptures. Please share your creations with me!
Much love
Charlene
#KREATIEFMYLIEF